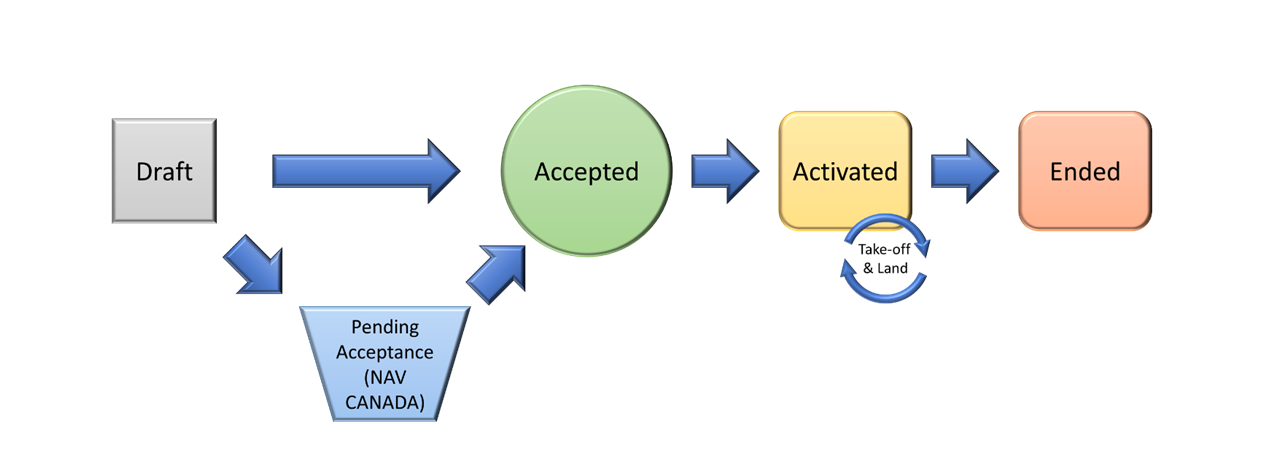
The different Operation Planning states are as follows:
The process of how operations are planned is shown in the workflow diagram below.
The following steps demonstrate how to plan an operation:
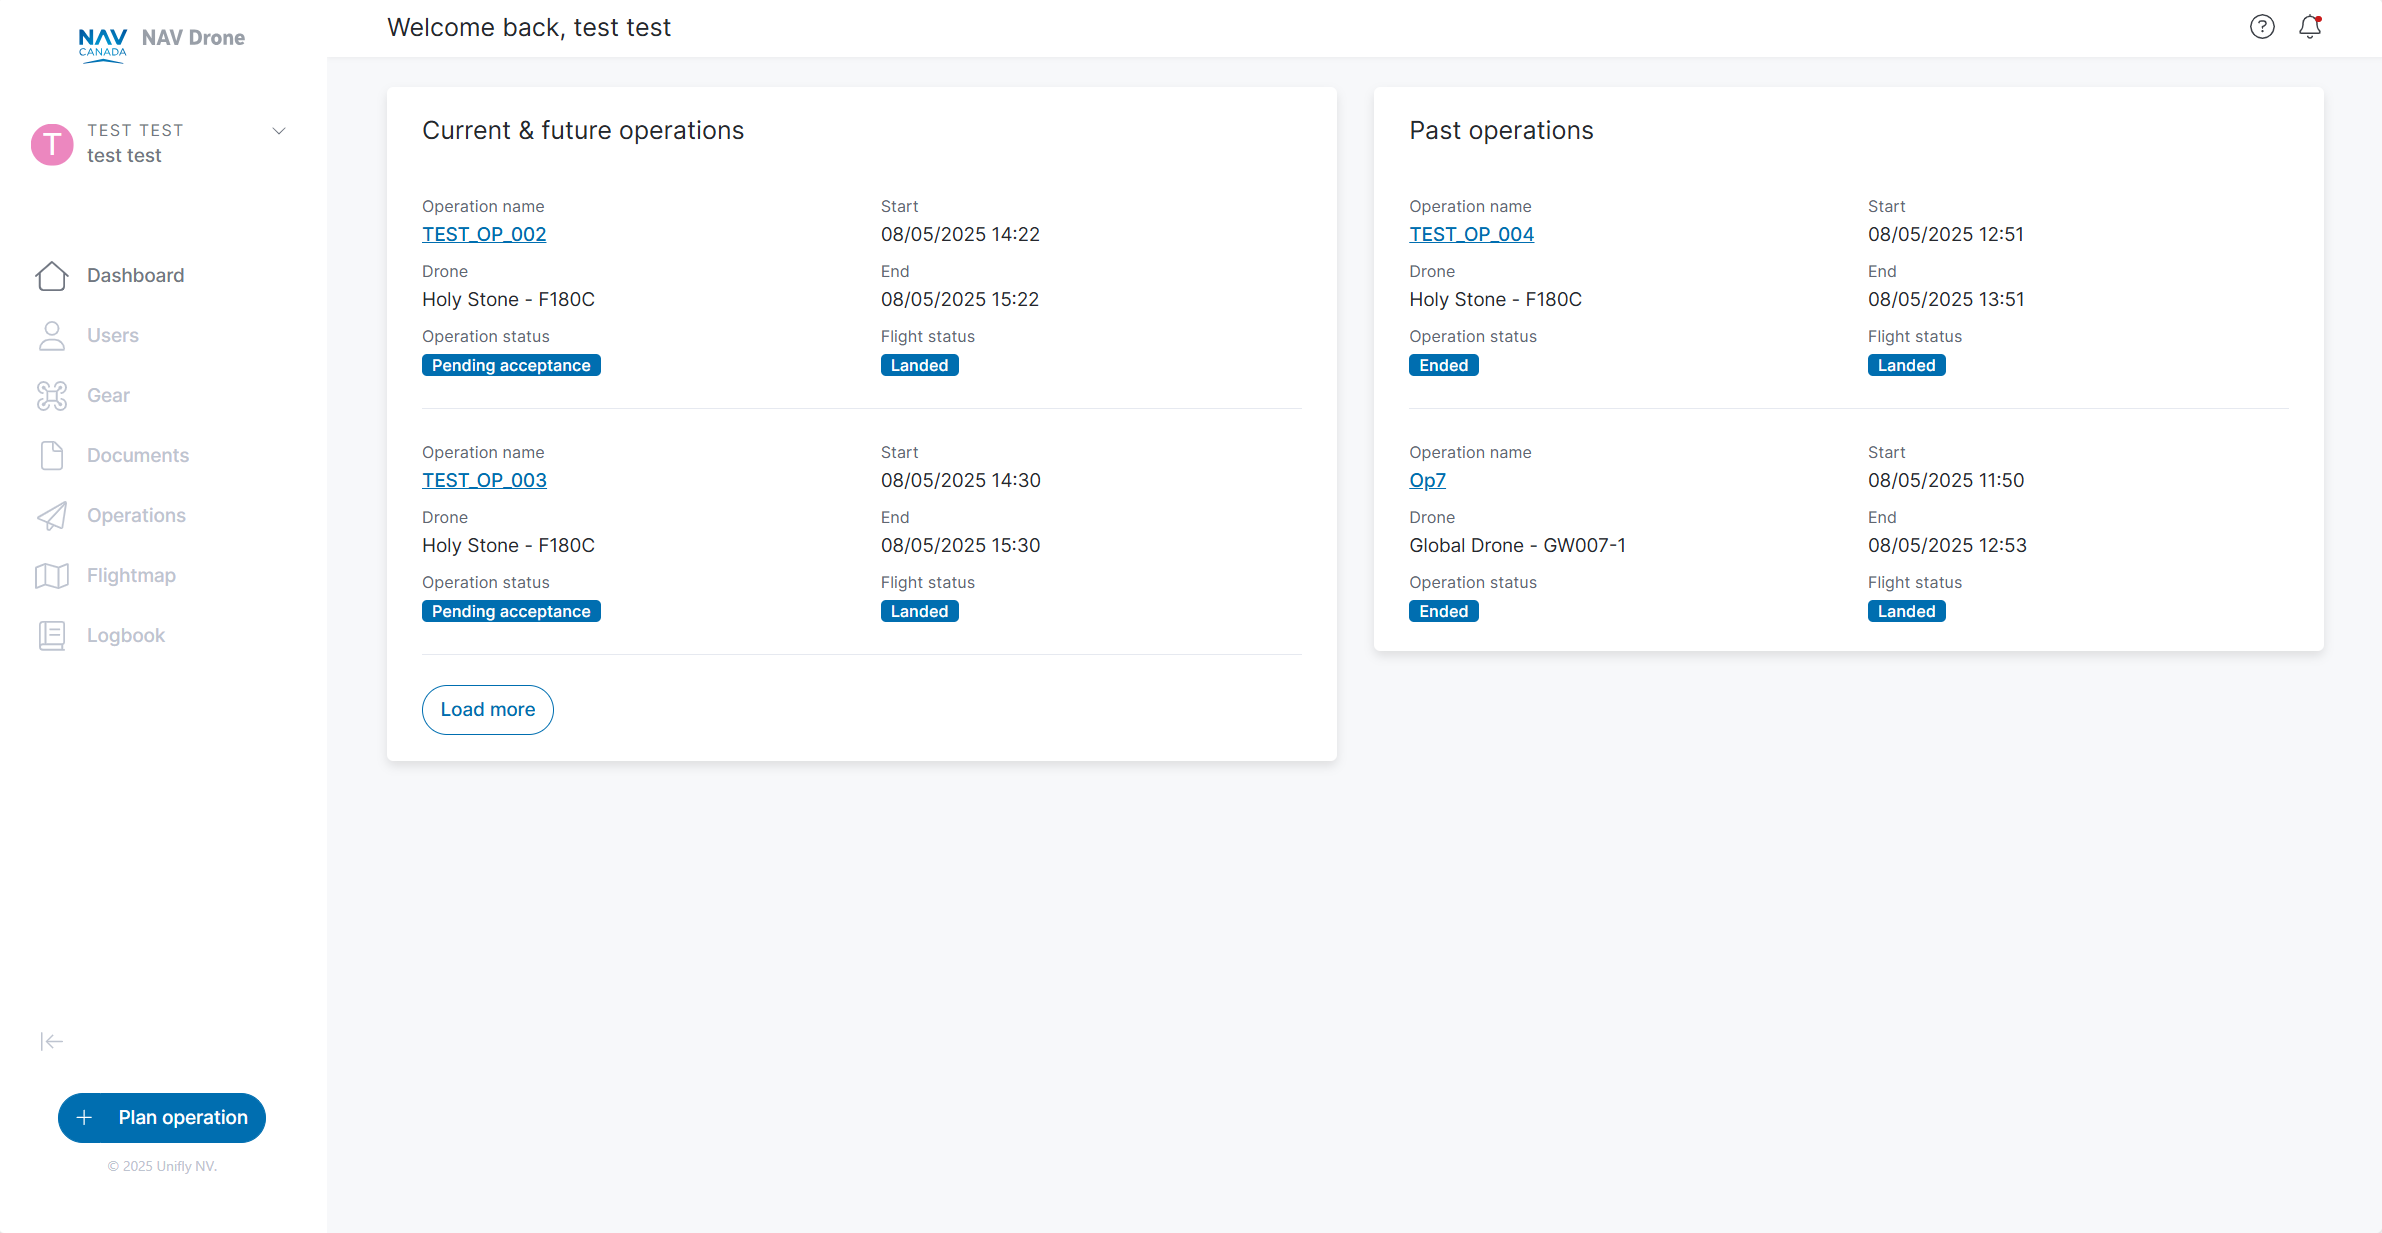
1 - From the Dashboard screen, select the Plan operation button at the bottom left of the NAV Drone Web application.
To copy an exiting operation, click the + button attached to the Plan operation button.
2 - In the New operation screen, enter the location of your operation in the location search bar or navigate to an area of interest using the map features.
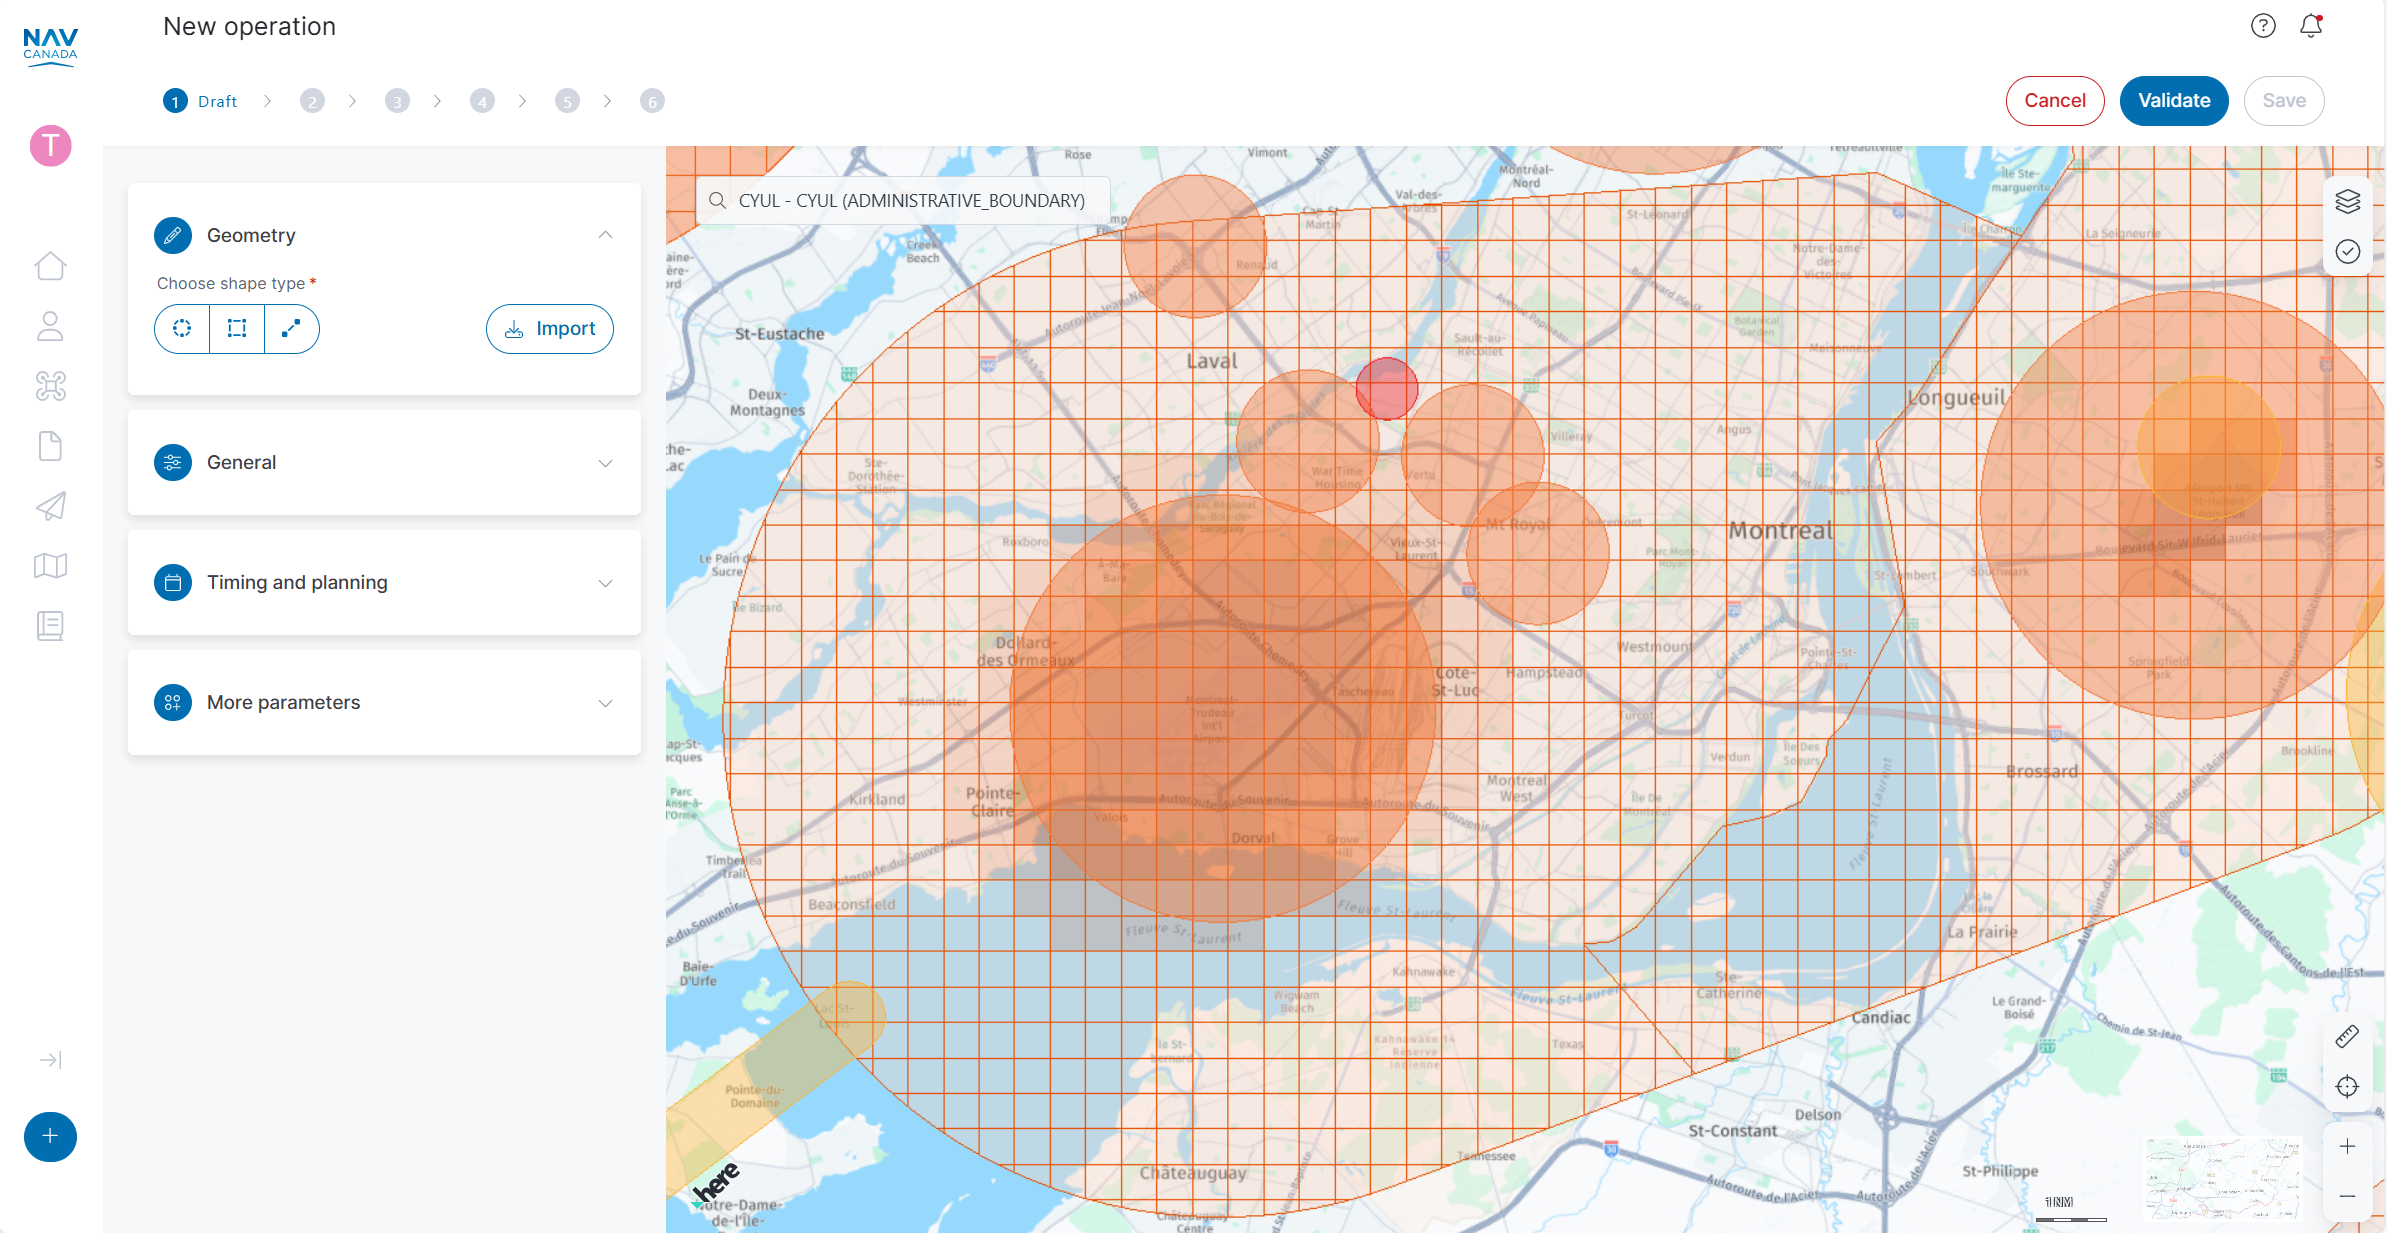
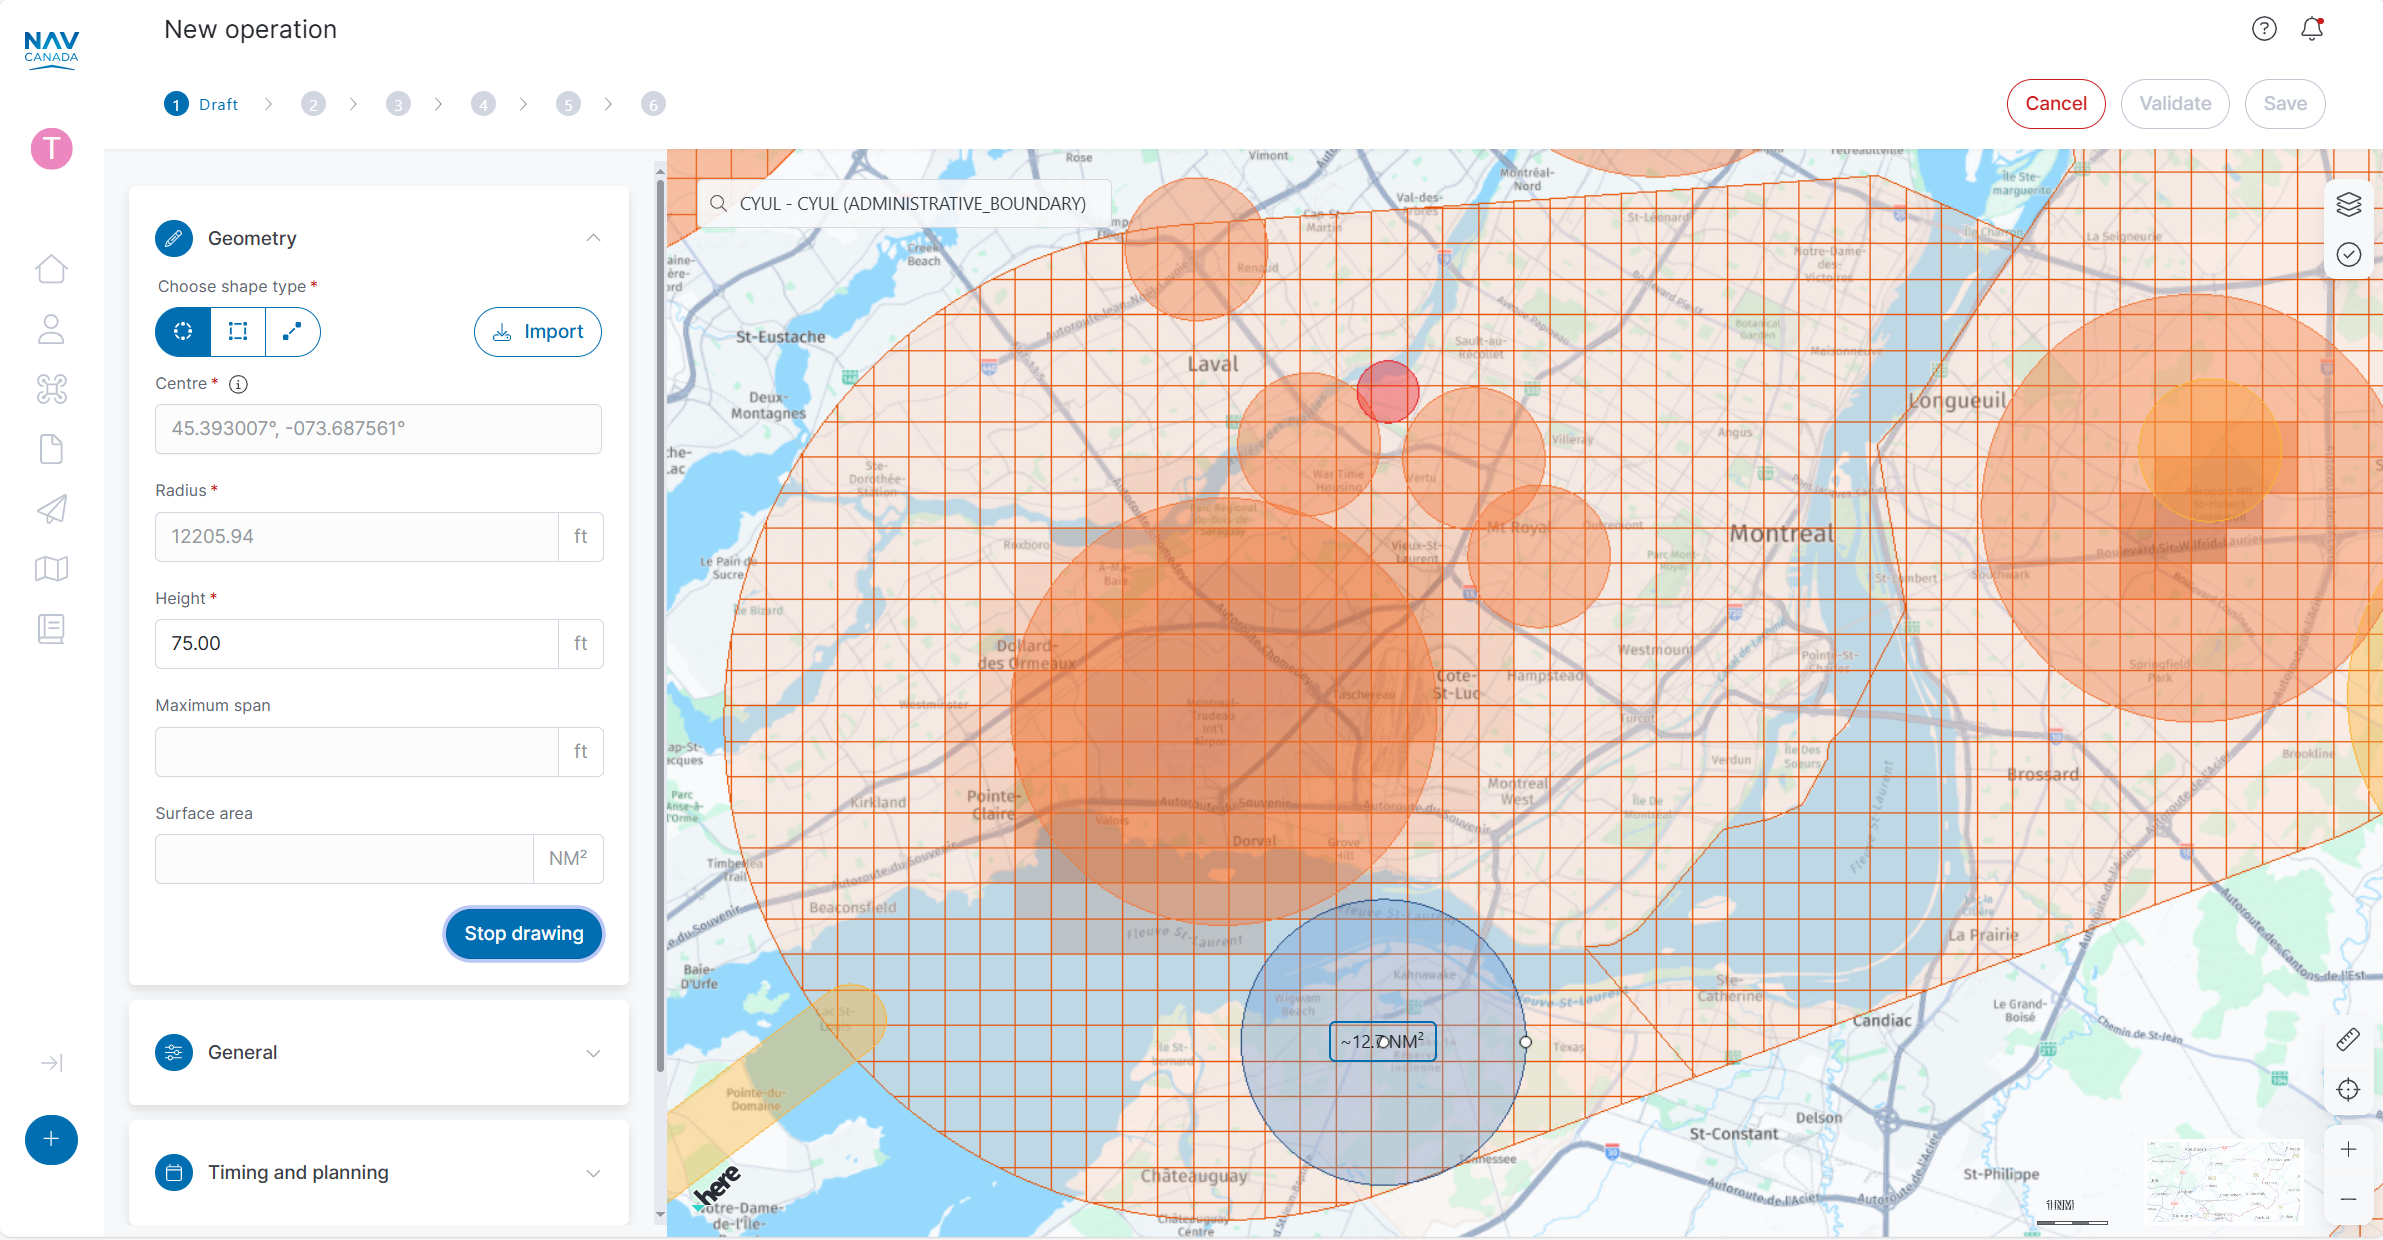
3 - Under the Geometry menu, choose a shape type (Circle, Polygon, Path) or select Import to upload a predefined geometry in GeoJSON, JSON or KML format. Draw the geometry that best defines your planned operation zone. You can adjust the location and size of the geometry by clicking/dragging the shape to a new location and/or clicking on the white dot(s) on the perimeter of the geometry to resize it.
4 - Set the maximum Height of the operation zone and click the Stop Drawing button to complete the geometrical definition of the operating zone.
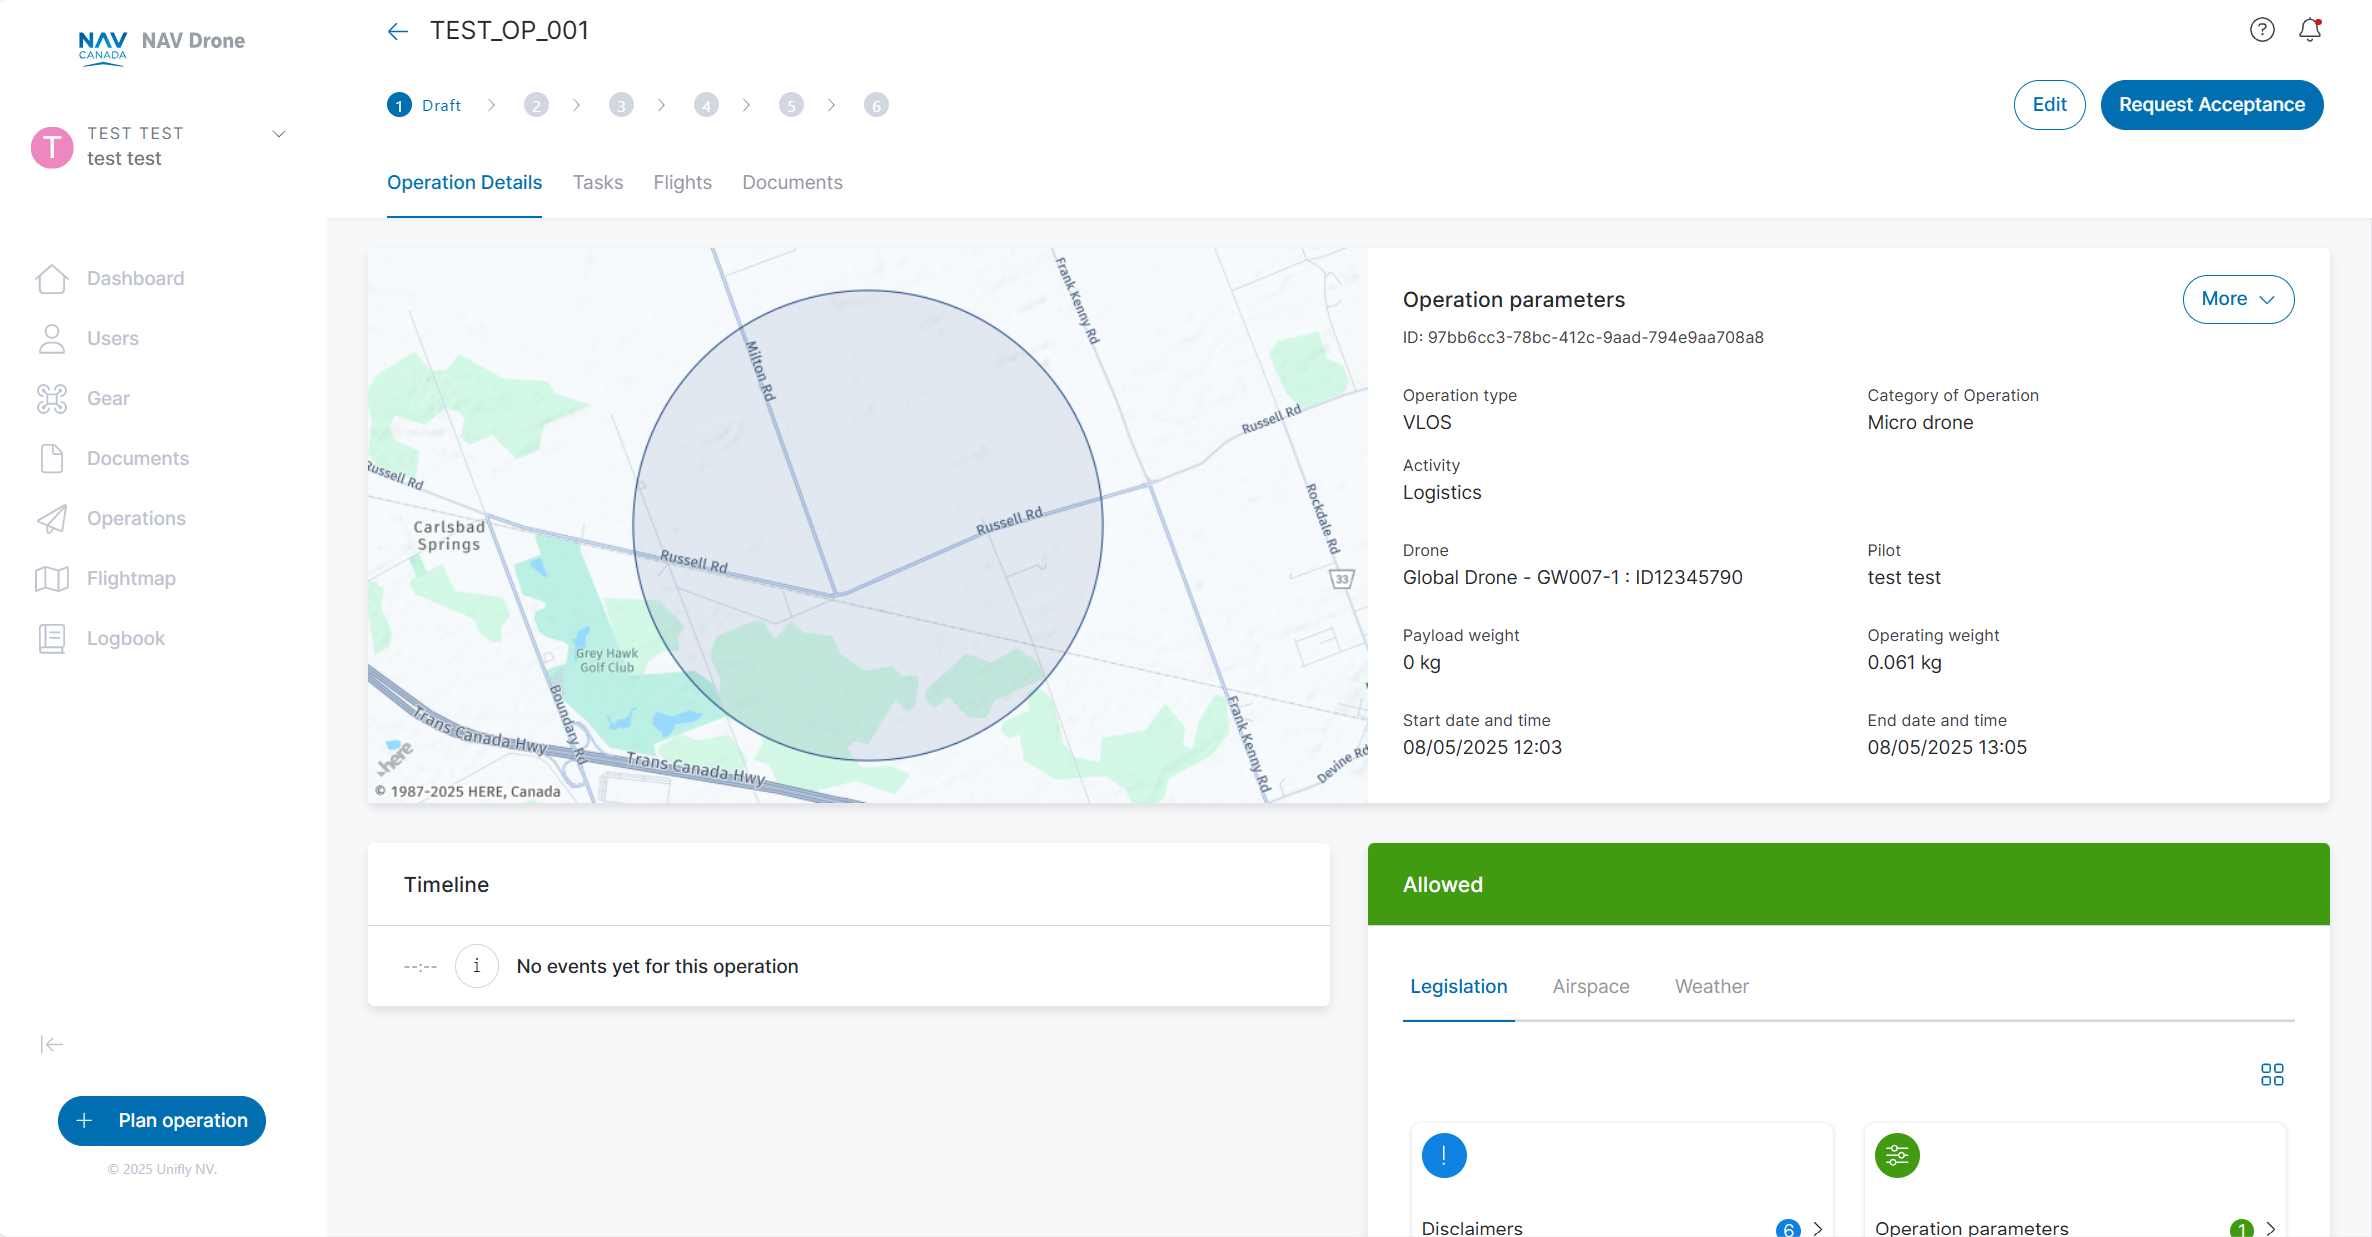
5 - Under the General menu, enter an Operation Name and select the desired Pilot and Drone for this operation.
6 - Enter the Payload weight. The system will automatically calculate Operating Weight for the operation.
Operating Weight is the sum of the weight of the drone (including batteries/fuel, systems required for its operation, etc.) and the weight of any payload attached to it. Operators must ensure that the Weight parameter for a drone is entered in their drone profile via the Gear tab, otherwise the validation result will return a negative message when planning an operation. Operating Weight and Payload Weight are parameters of the operation.
Based on the operating weight, the drone is categorized as either a micro drone, small, medium or a large drone.
7 - Select a Category of Operation: Micro Drone, Basic, Advanced or Special Flight Operation Certificate (SFOC). For a Basic, Advanced or SFOC operations, the selected pilot requires the appropriate Pilot Certificate.
8 - Select the purpose of the operation under the Activity dropdown.
9 - Select the Operation Type.
10 - Under the Timing and Planning menu, select Start and End time of your operation. You can also select the Check airspace availability controls to determine if your operation overlaps other operations or geozones in the area.
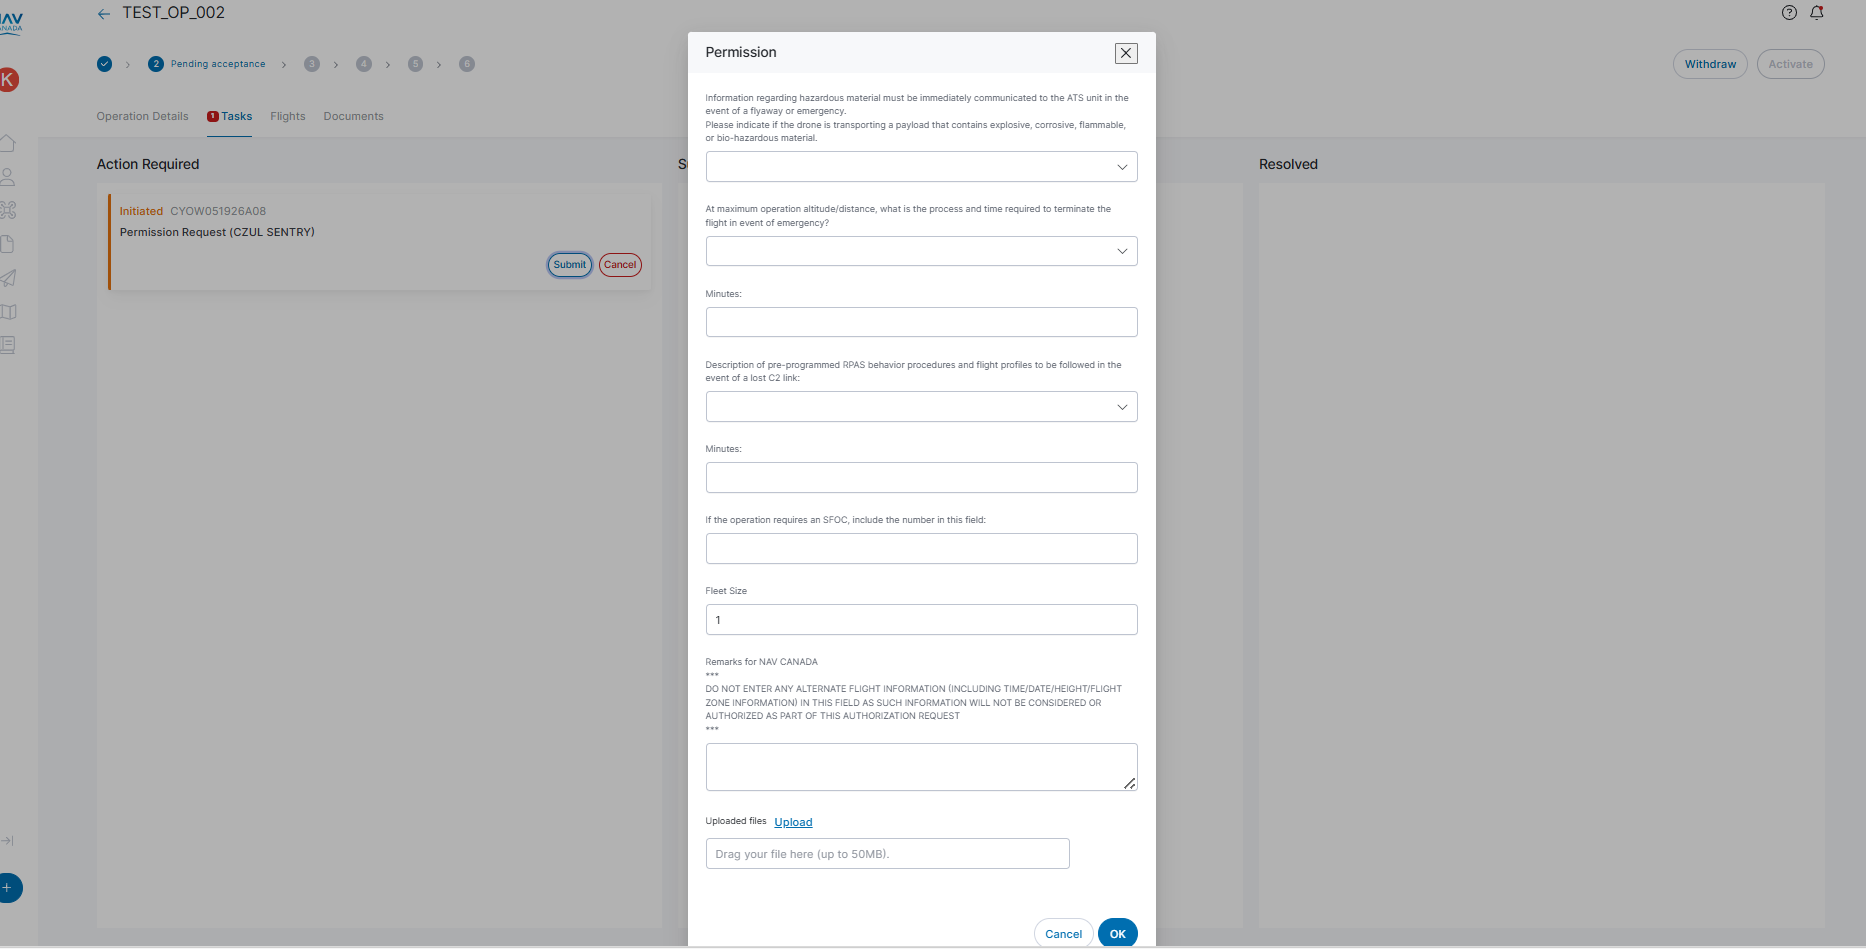
11 - The More parameters menu provides a data field to include optional supplementary information about your operation. As indicated on the warning label, do not include alternate flight information as it will not be considered in the authorization process.
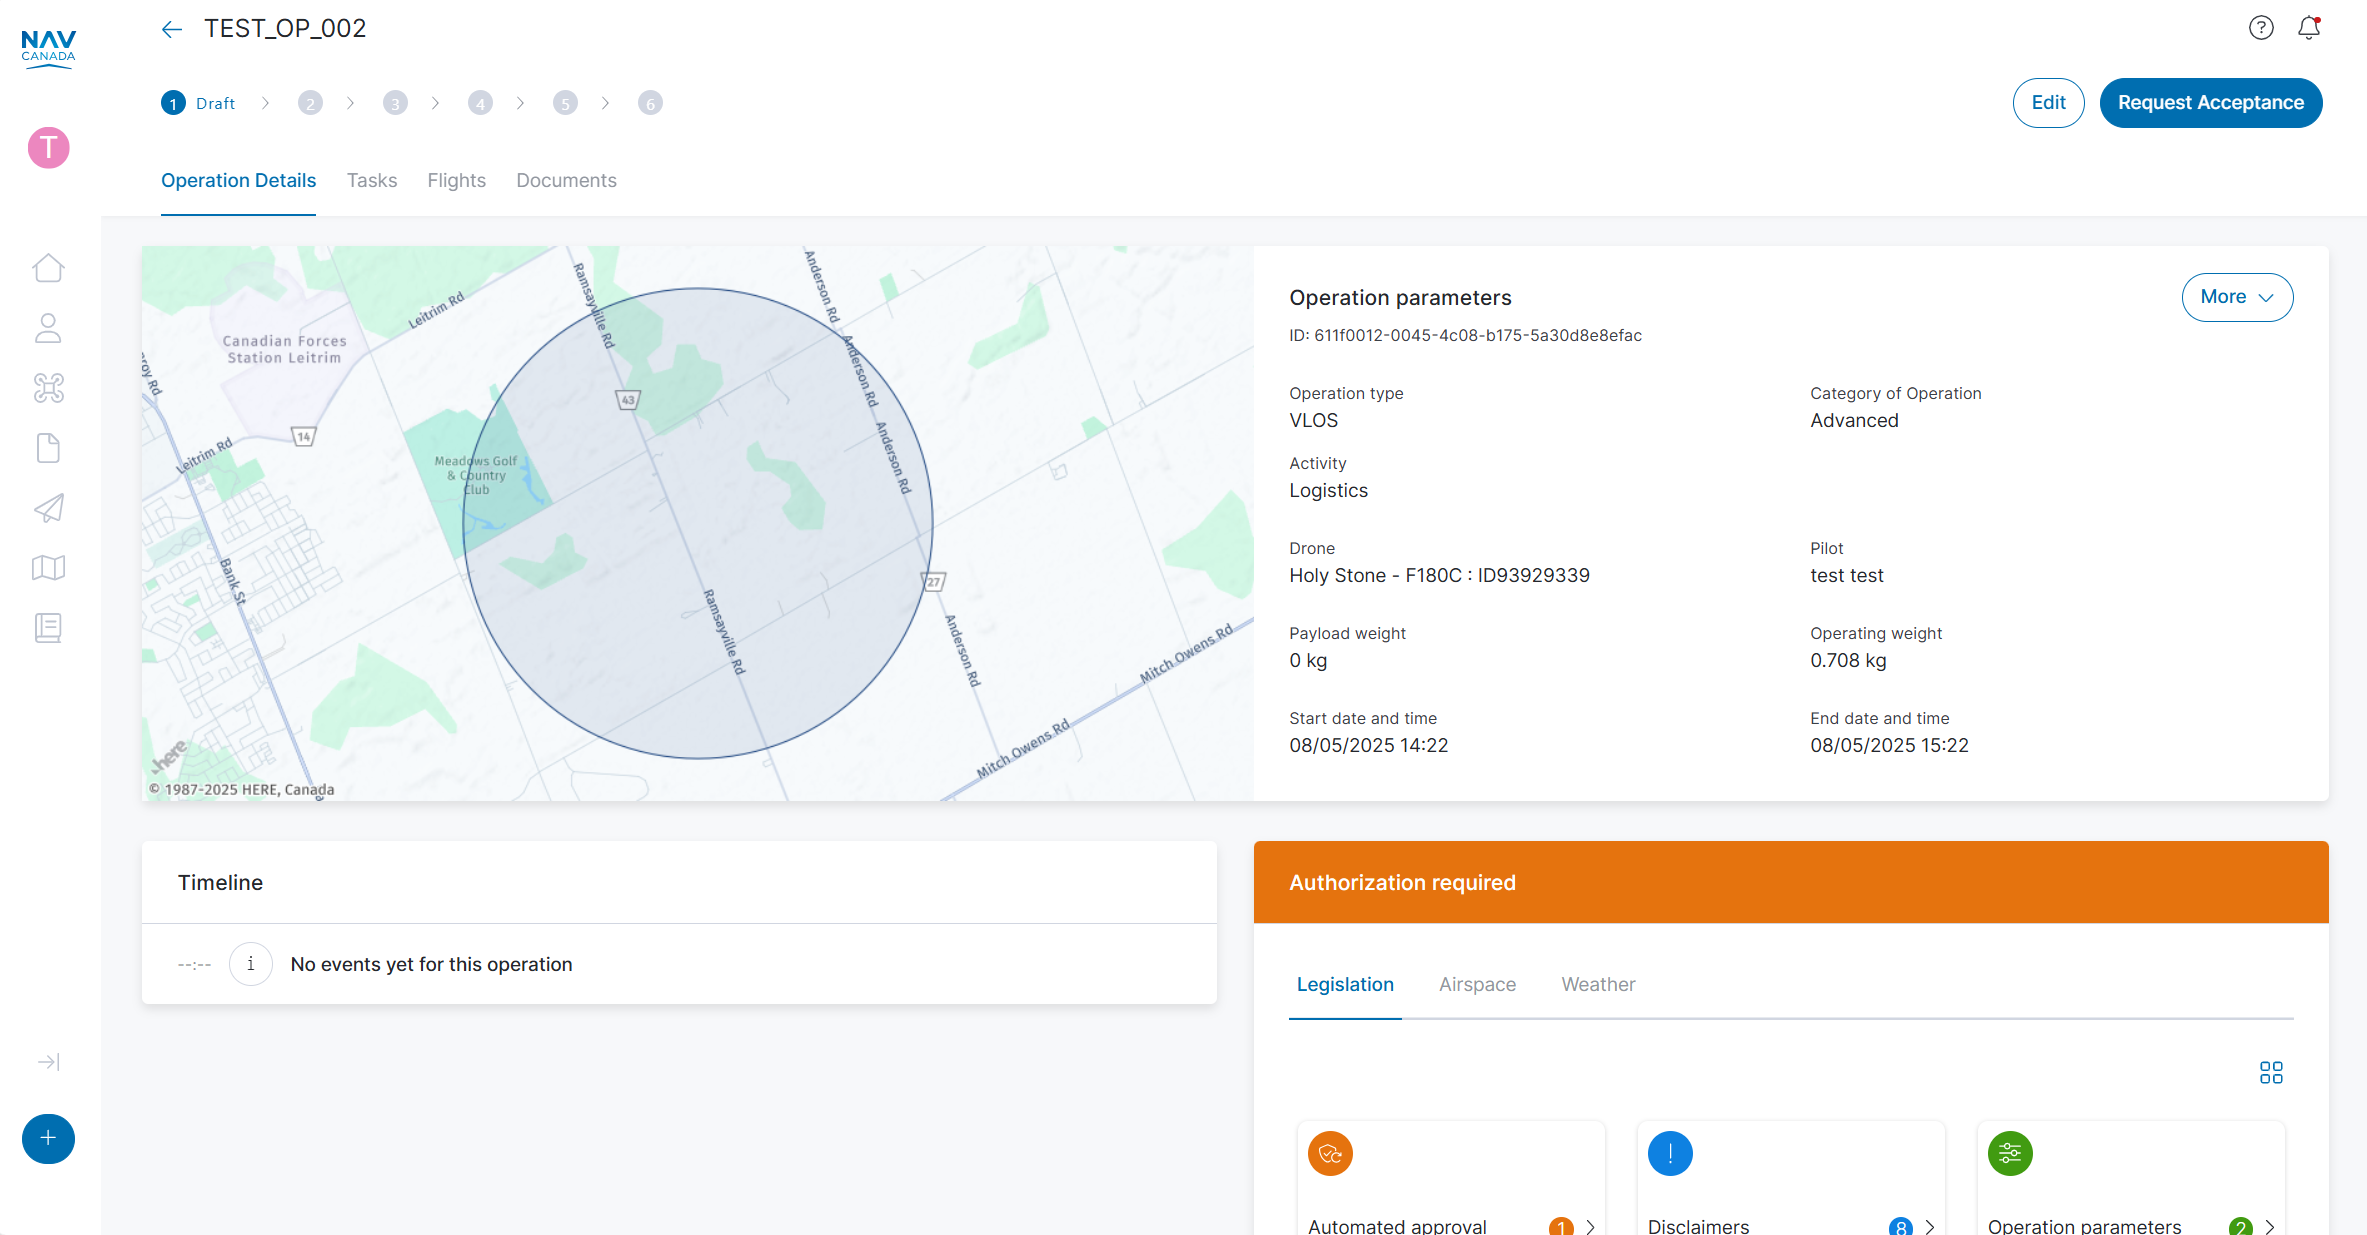
12 - Click the Validate button to perform a preliminary assessment of your operation. If any required fields are missing, the validation process will highlight the missing field. The validation result is located on the right side of the screen.

While planning an operation the following Validation results are possible:
The number next to each validation category shows the number of relevant validation messages for that category. Click the icon to the right and below the validation result to switch between tile and list views for the the validation messages.
13 - After the validation messages have been reviewed, click on the Save button at the top right to save your operation.
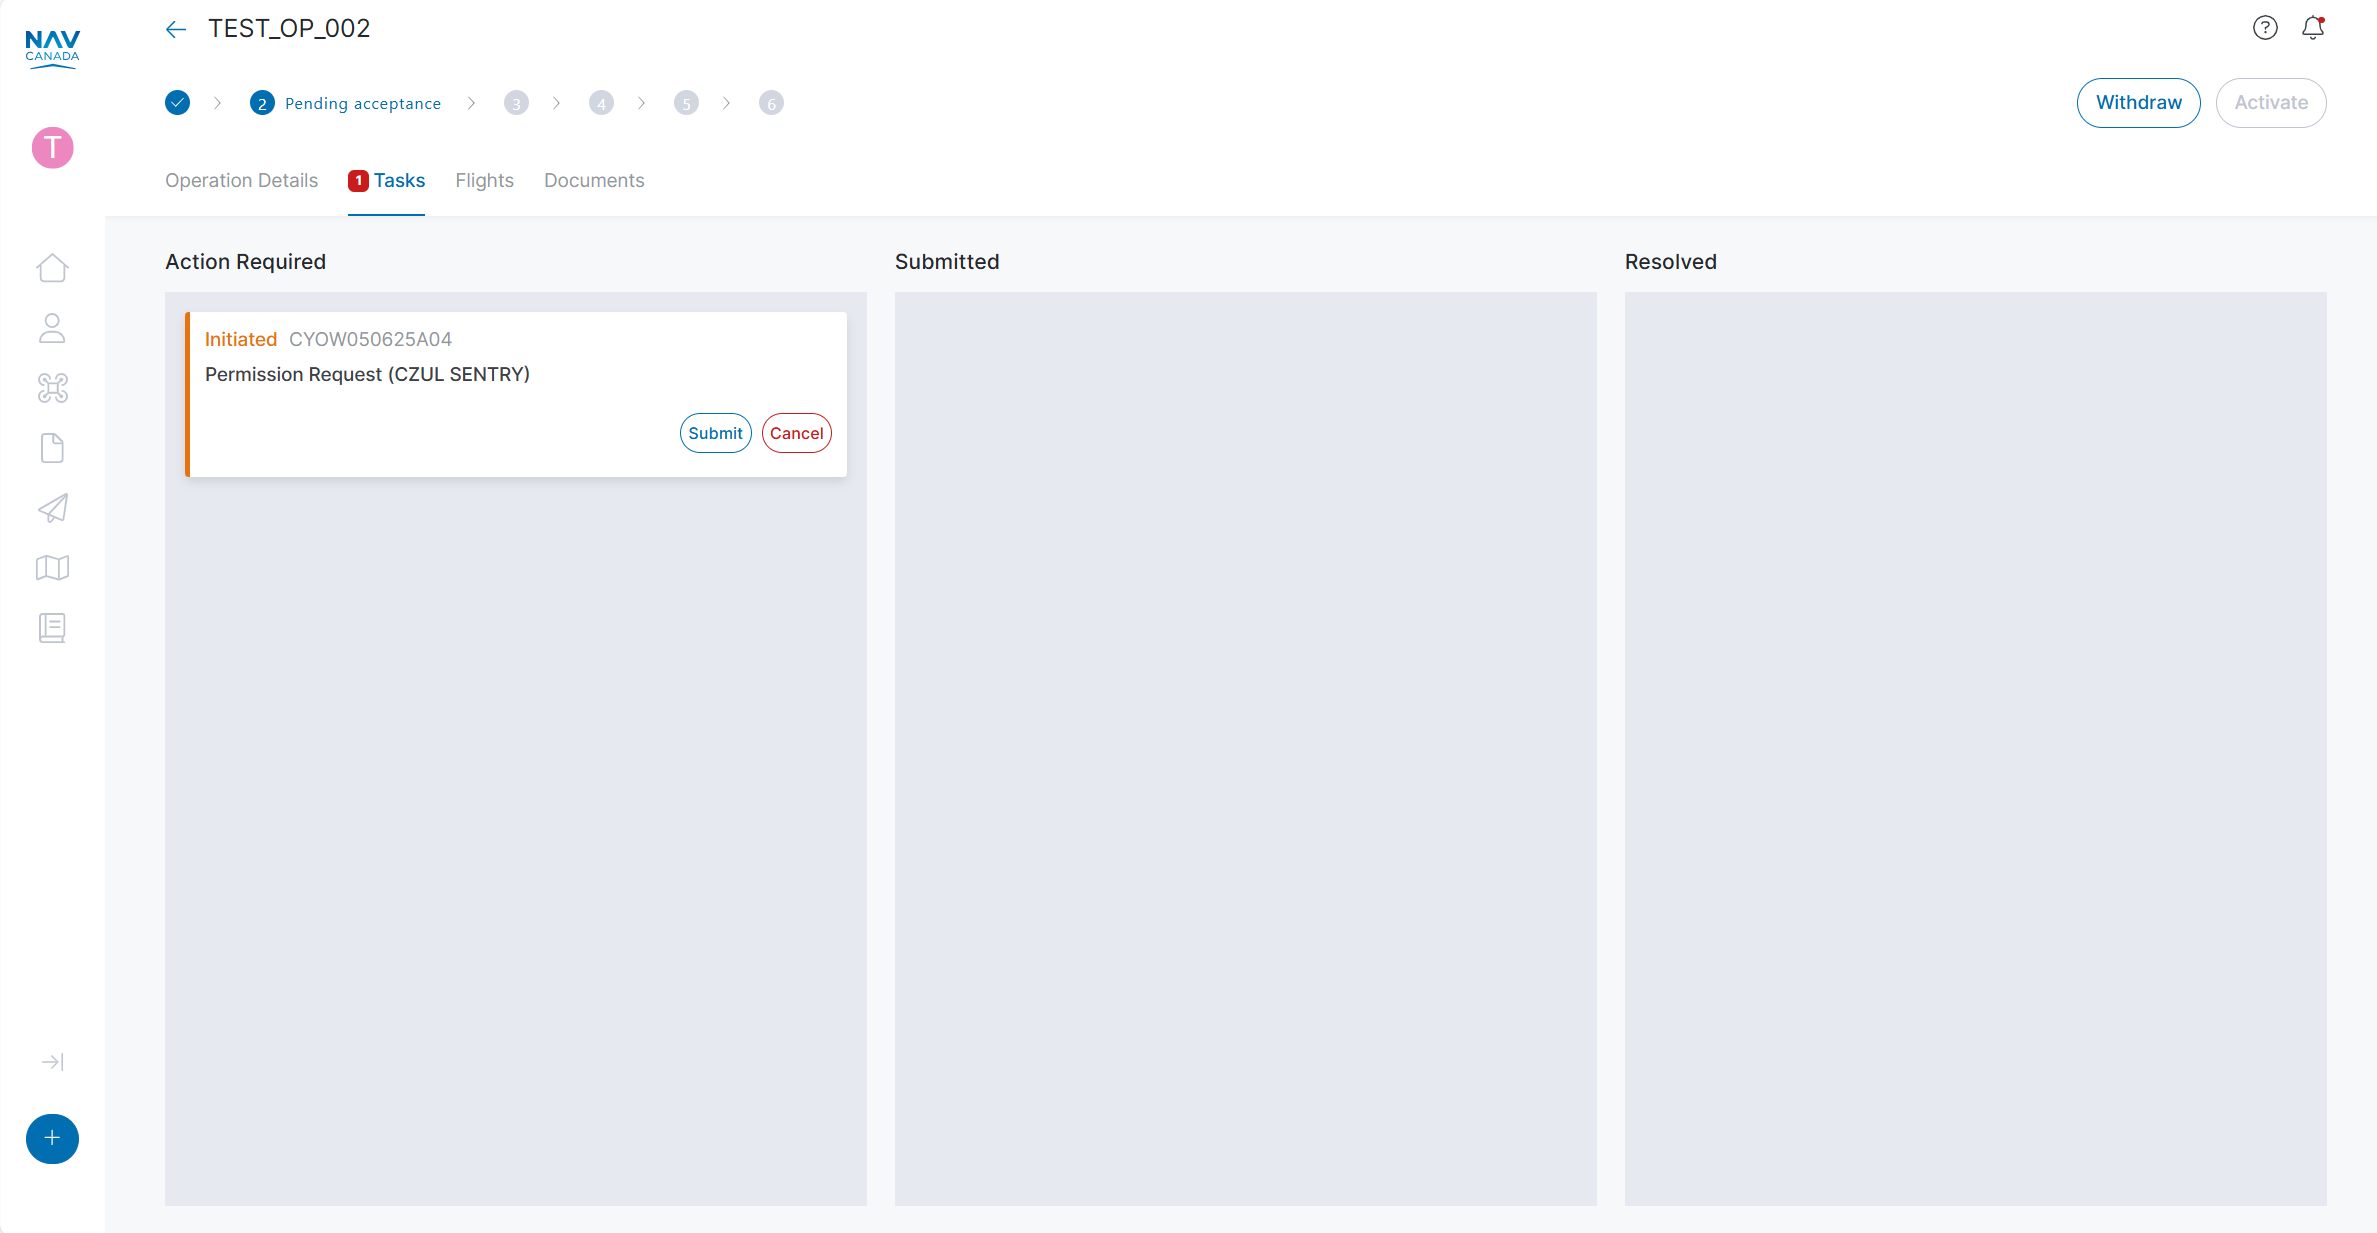
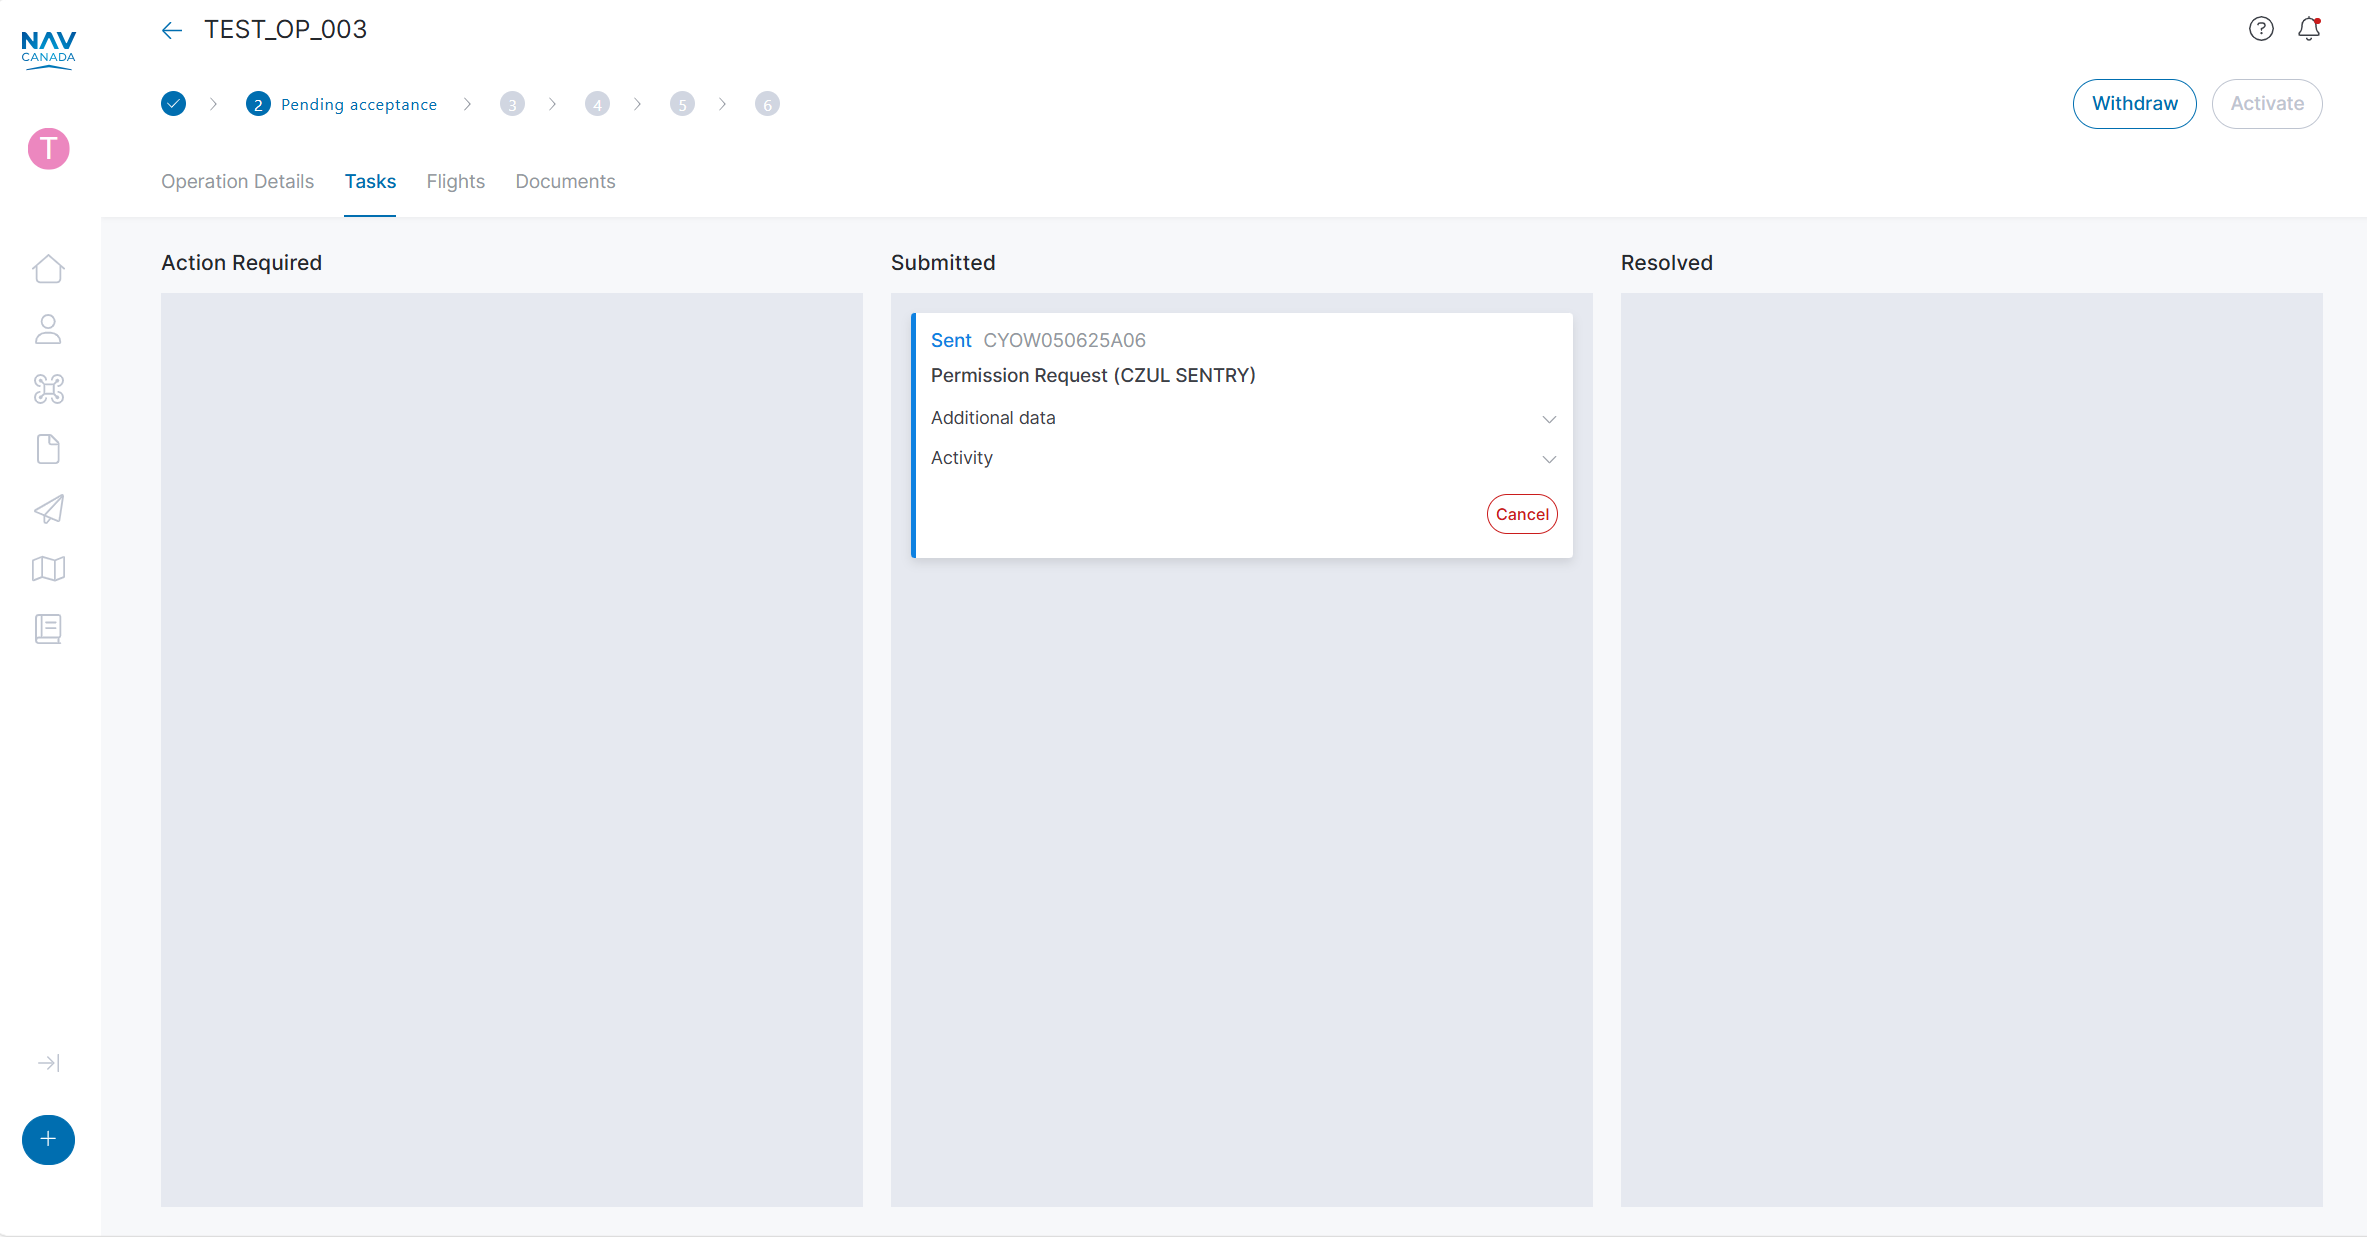
14 - Click Request Acceptance to finalize your operation. If your operation required authorization from NAV CANADA, a permission request task will be created in the Tasks tab.
The permission request process is used to obtain authorization from NAV CANADA to fly in controlled airspace. The NAV CANADA Grid geozones are used to facilitate the authorization process. If your operation validates to Authorization required then you must submit a Permission Request to obtain authorization from NAV CANADA.
Please note that if your operation requires authorization from another Authority (e.g. Department of National Defence, Airport Authority, Prison Authority, Parks Canada, etc.), you will need to coordinate with that Authority directly as this cannot be accomplished through NAV Drone.
The permission request process is initiated by clicking the Request Acceptance button:
Each grid cell (or polygon in certain control zones) is assigned an altitude threshold value.
This section applies to permission requests submitted for small drones:
For medium drones, under Advanced VLOS, all permission requests must be manually reviewed by NAV CANADA.
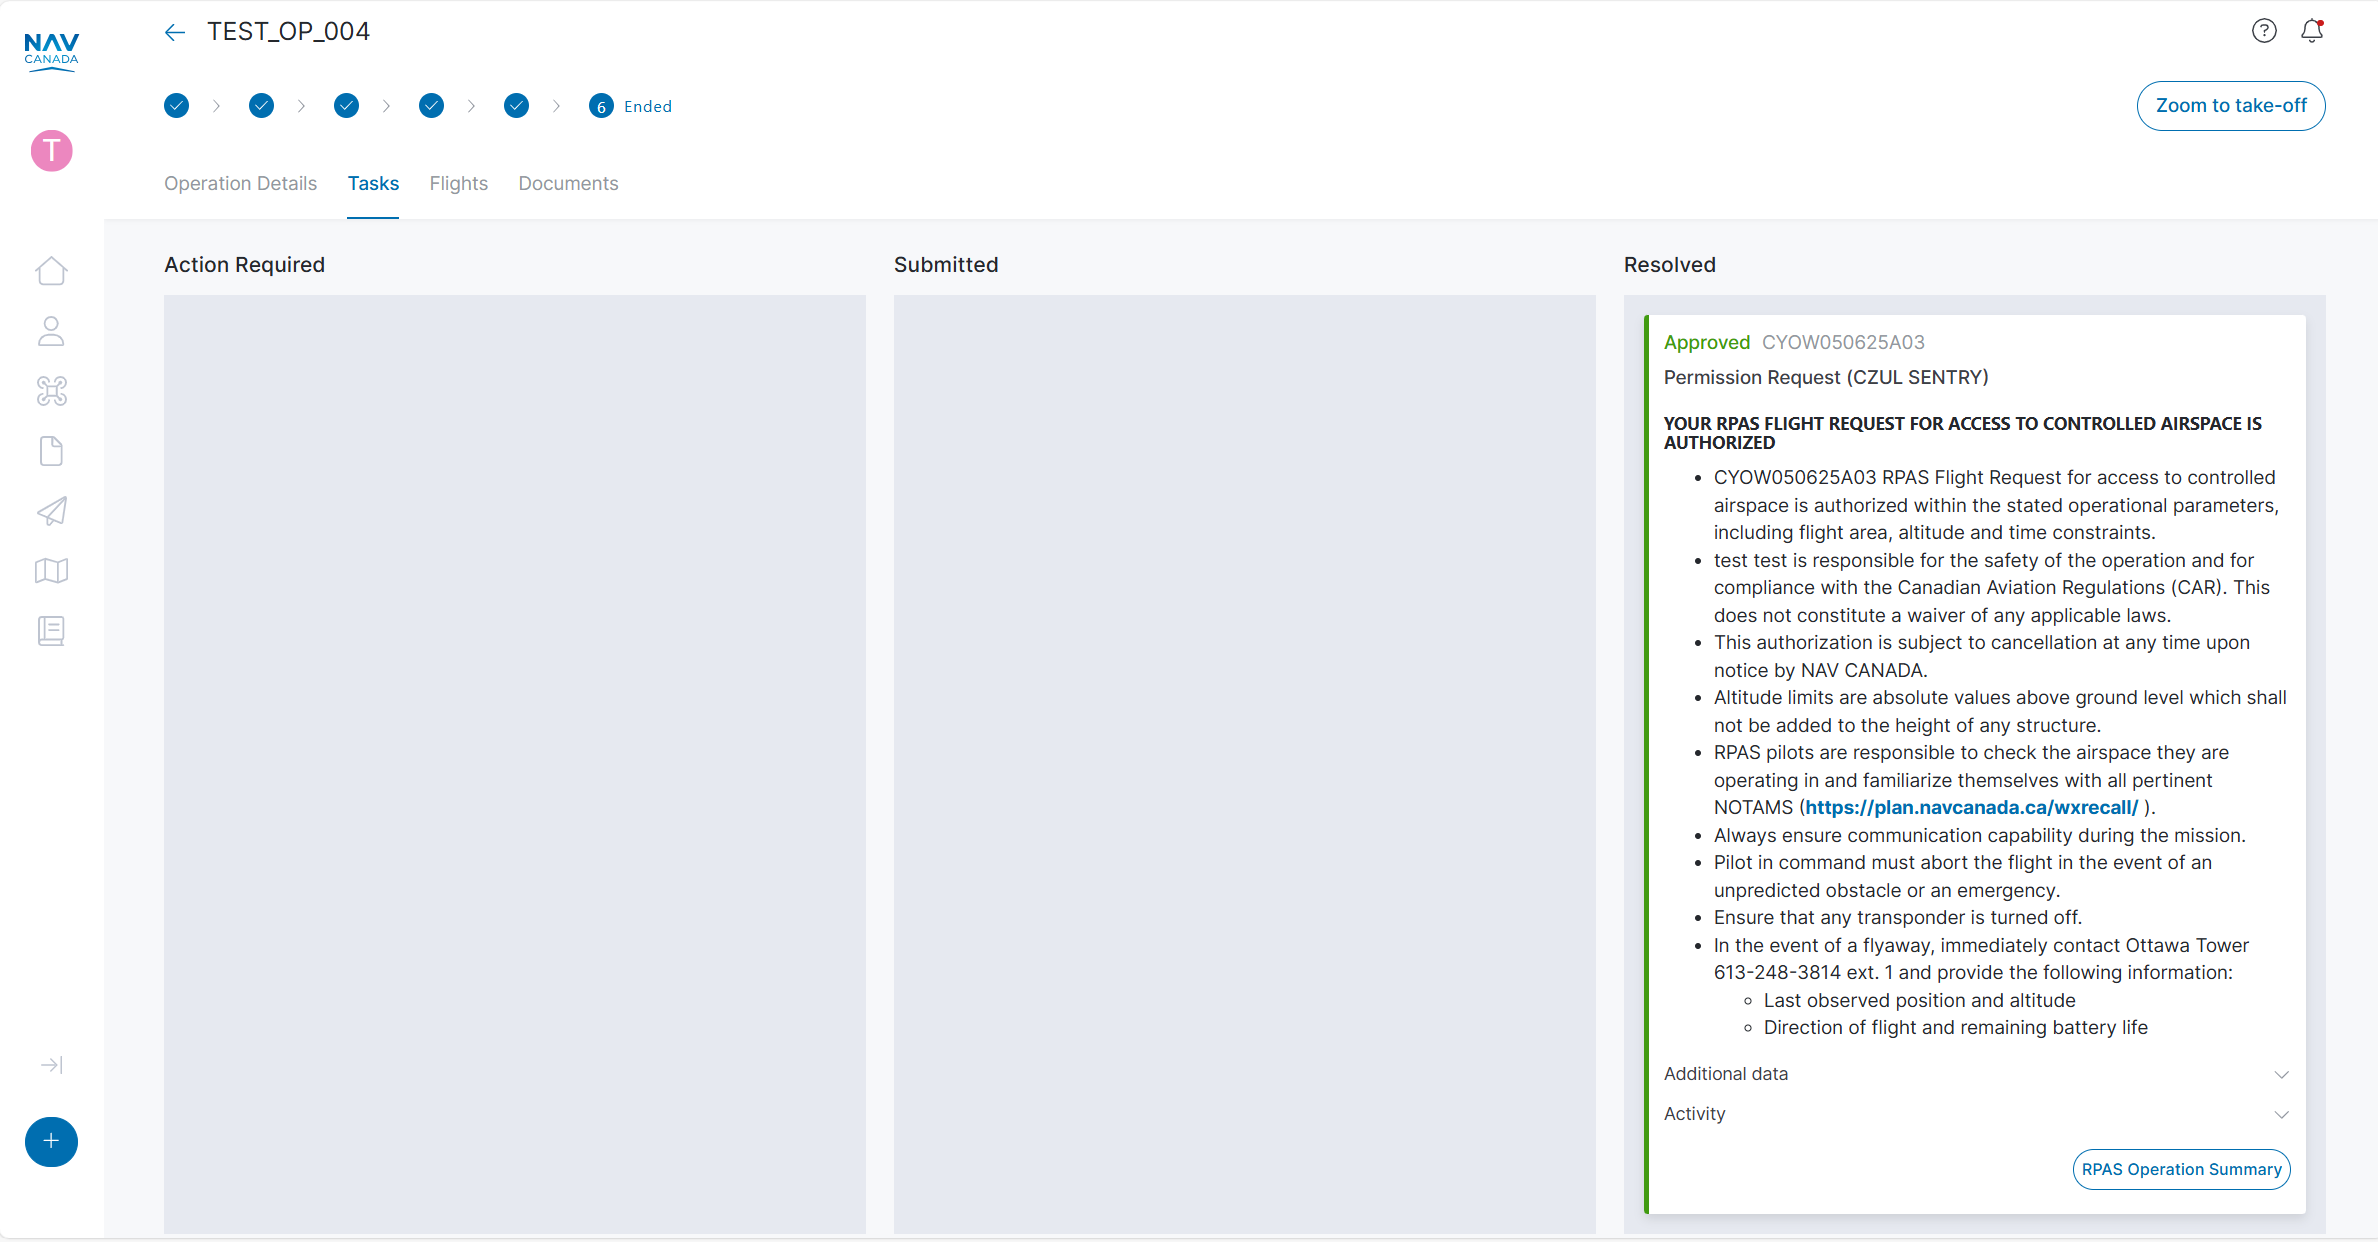
The RPAS Operation Summary is a HTML-based document that summarizes all aspects of your operation and can be used as proof of authorization to operate in NAV CANADA controlled airspace.
After you have requested acceptance for your operation, you can download the RPAS Operation Summary document containing all relevant operational information. If your operation was Accepted, the document provides proof that you are allowed to carry out flights within the context of that operation.
You can download the RPAS Operation Summary in the Operation details screen:
1 - Click on Operations in the left sidebar.
2 - Click on the operation you want to download the RPAS Operation Summary for
3 - Click on the More button and select RPAS Operation Summary.
4 - The RPAS Operation Summary is downloaded as an HTML file in your browser's download folder. Use the print feature of your browser to print the document or save it as a PDF. The report provides a QR code for saving as a PDF on your mobile device. Scan the QR code to store the summary for later reference.
Each operation has only one RPAS Operation Summary, regardless of the number of tasks/permission requests (if any).
In case permission requests are required, the RPAS Operation Summary will reflect the status of these permission requests at the time of download.
NAV Drone now supports the planning of operations conducted under a Special Flight Operations Certificate (SFOC). You can plan an SFOC operating by selecting the SFOC Category of Operation parameter.
An SFOC-RPAS gives you permission to operate your drone for a specific purpose under special conditions. Previously, these operations were planned and handled outside of NAV Drone.
If you want to get permission for specific drone flight operations, you will need to apply for an SFOC-RPAS with Transport Canada.
For more detailed information visit Transport CanadaOpen a new window.
In order to plan an operation using the SFOC Category of Operation, you must have a valid SFOC-RPAS issued by Transport Canada.