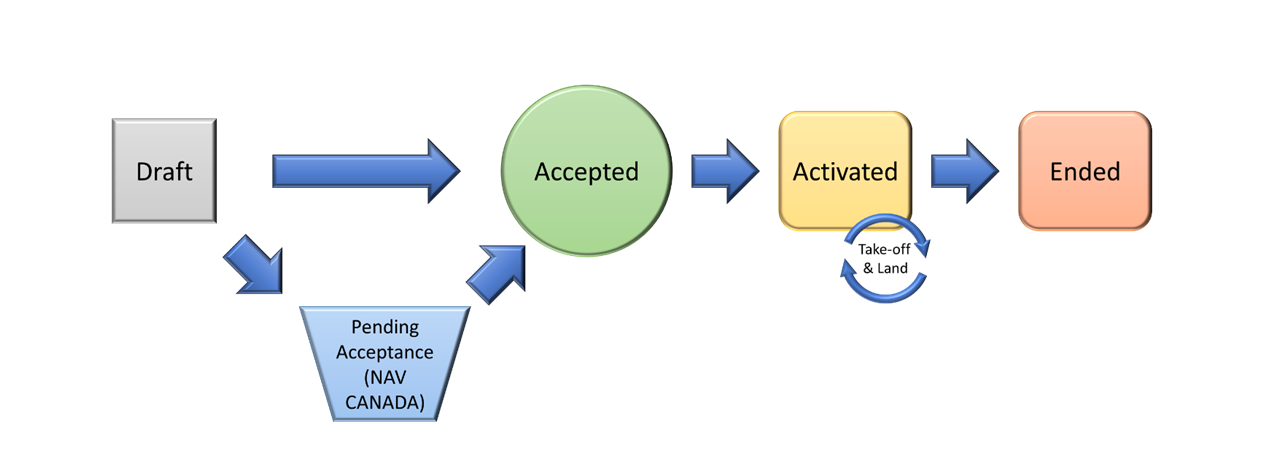
The different Operation Planning states are as follows:
The process of how operations are planned is shown in the workflow diagram below.
Prior to planning an operation, ensure that a valid user (with appropriate pilot certificate) and drone (with appropriate registration certificate) have been defined. The following steps demonstrate how to plan an operation:
1 - After logging into the App, enter the location of your operation in the location search bar or navigate to an area of interest using the map features.
2 - From the App’s main screen, select a drone from the list of available Gear.
3 - Select a Category of Operation: Micro Drone, Basic, Advanced or SFOC. For a Basic, Advanced or SFOC operations, the selected pilot requires the appropriate Pilot Certificate.
4 - Set the Maximum Height of the operation zone.
5 - Set the Start Time and End time (date and time) of the operation.
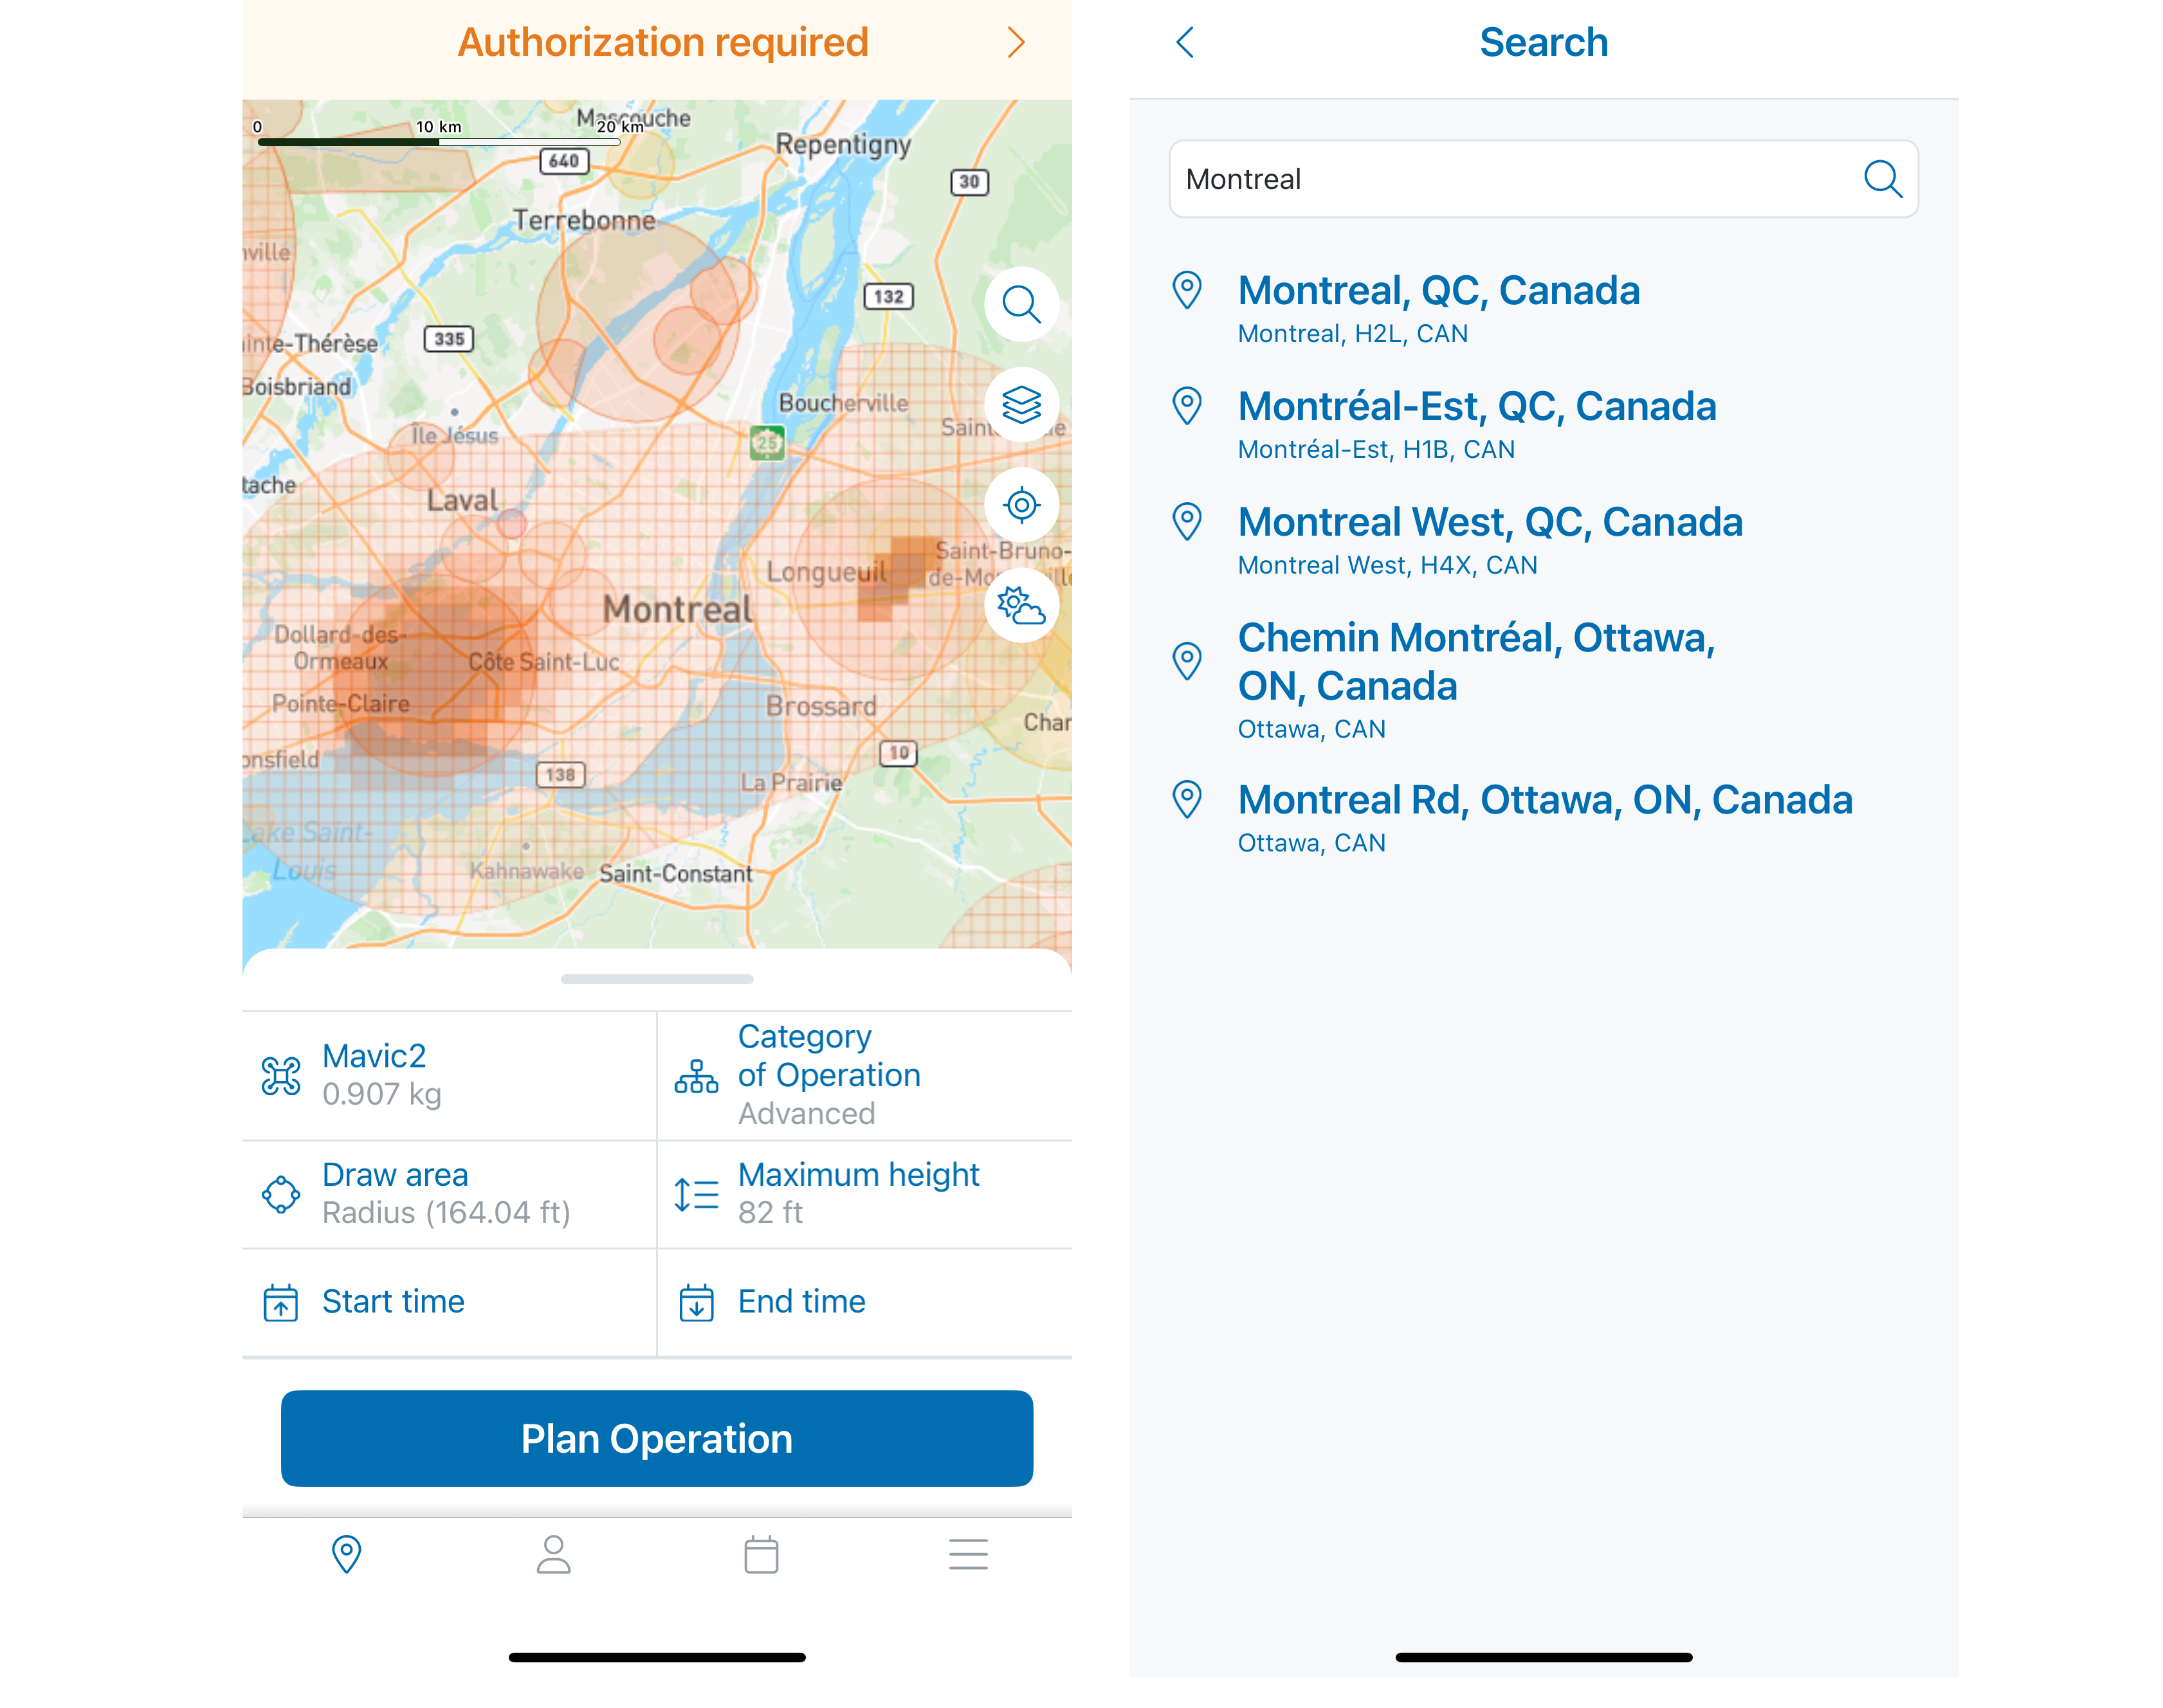
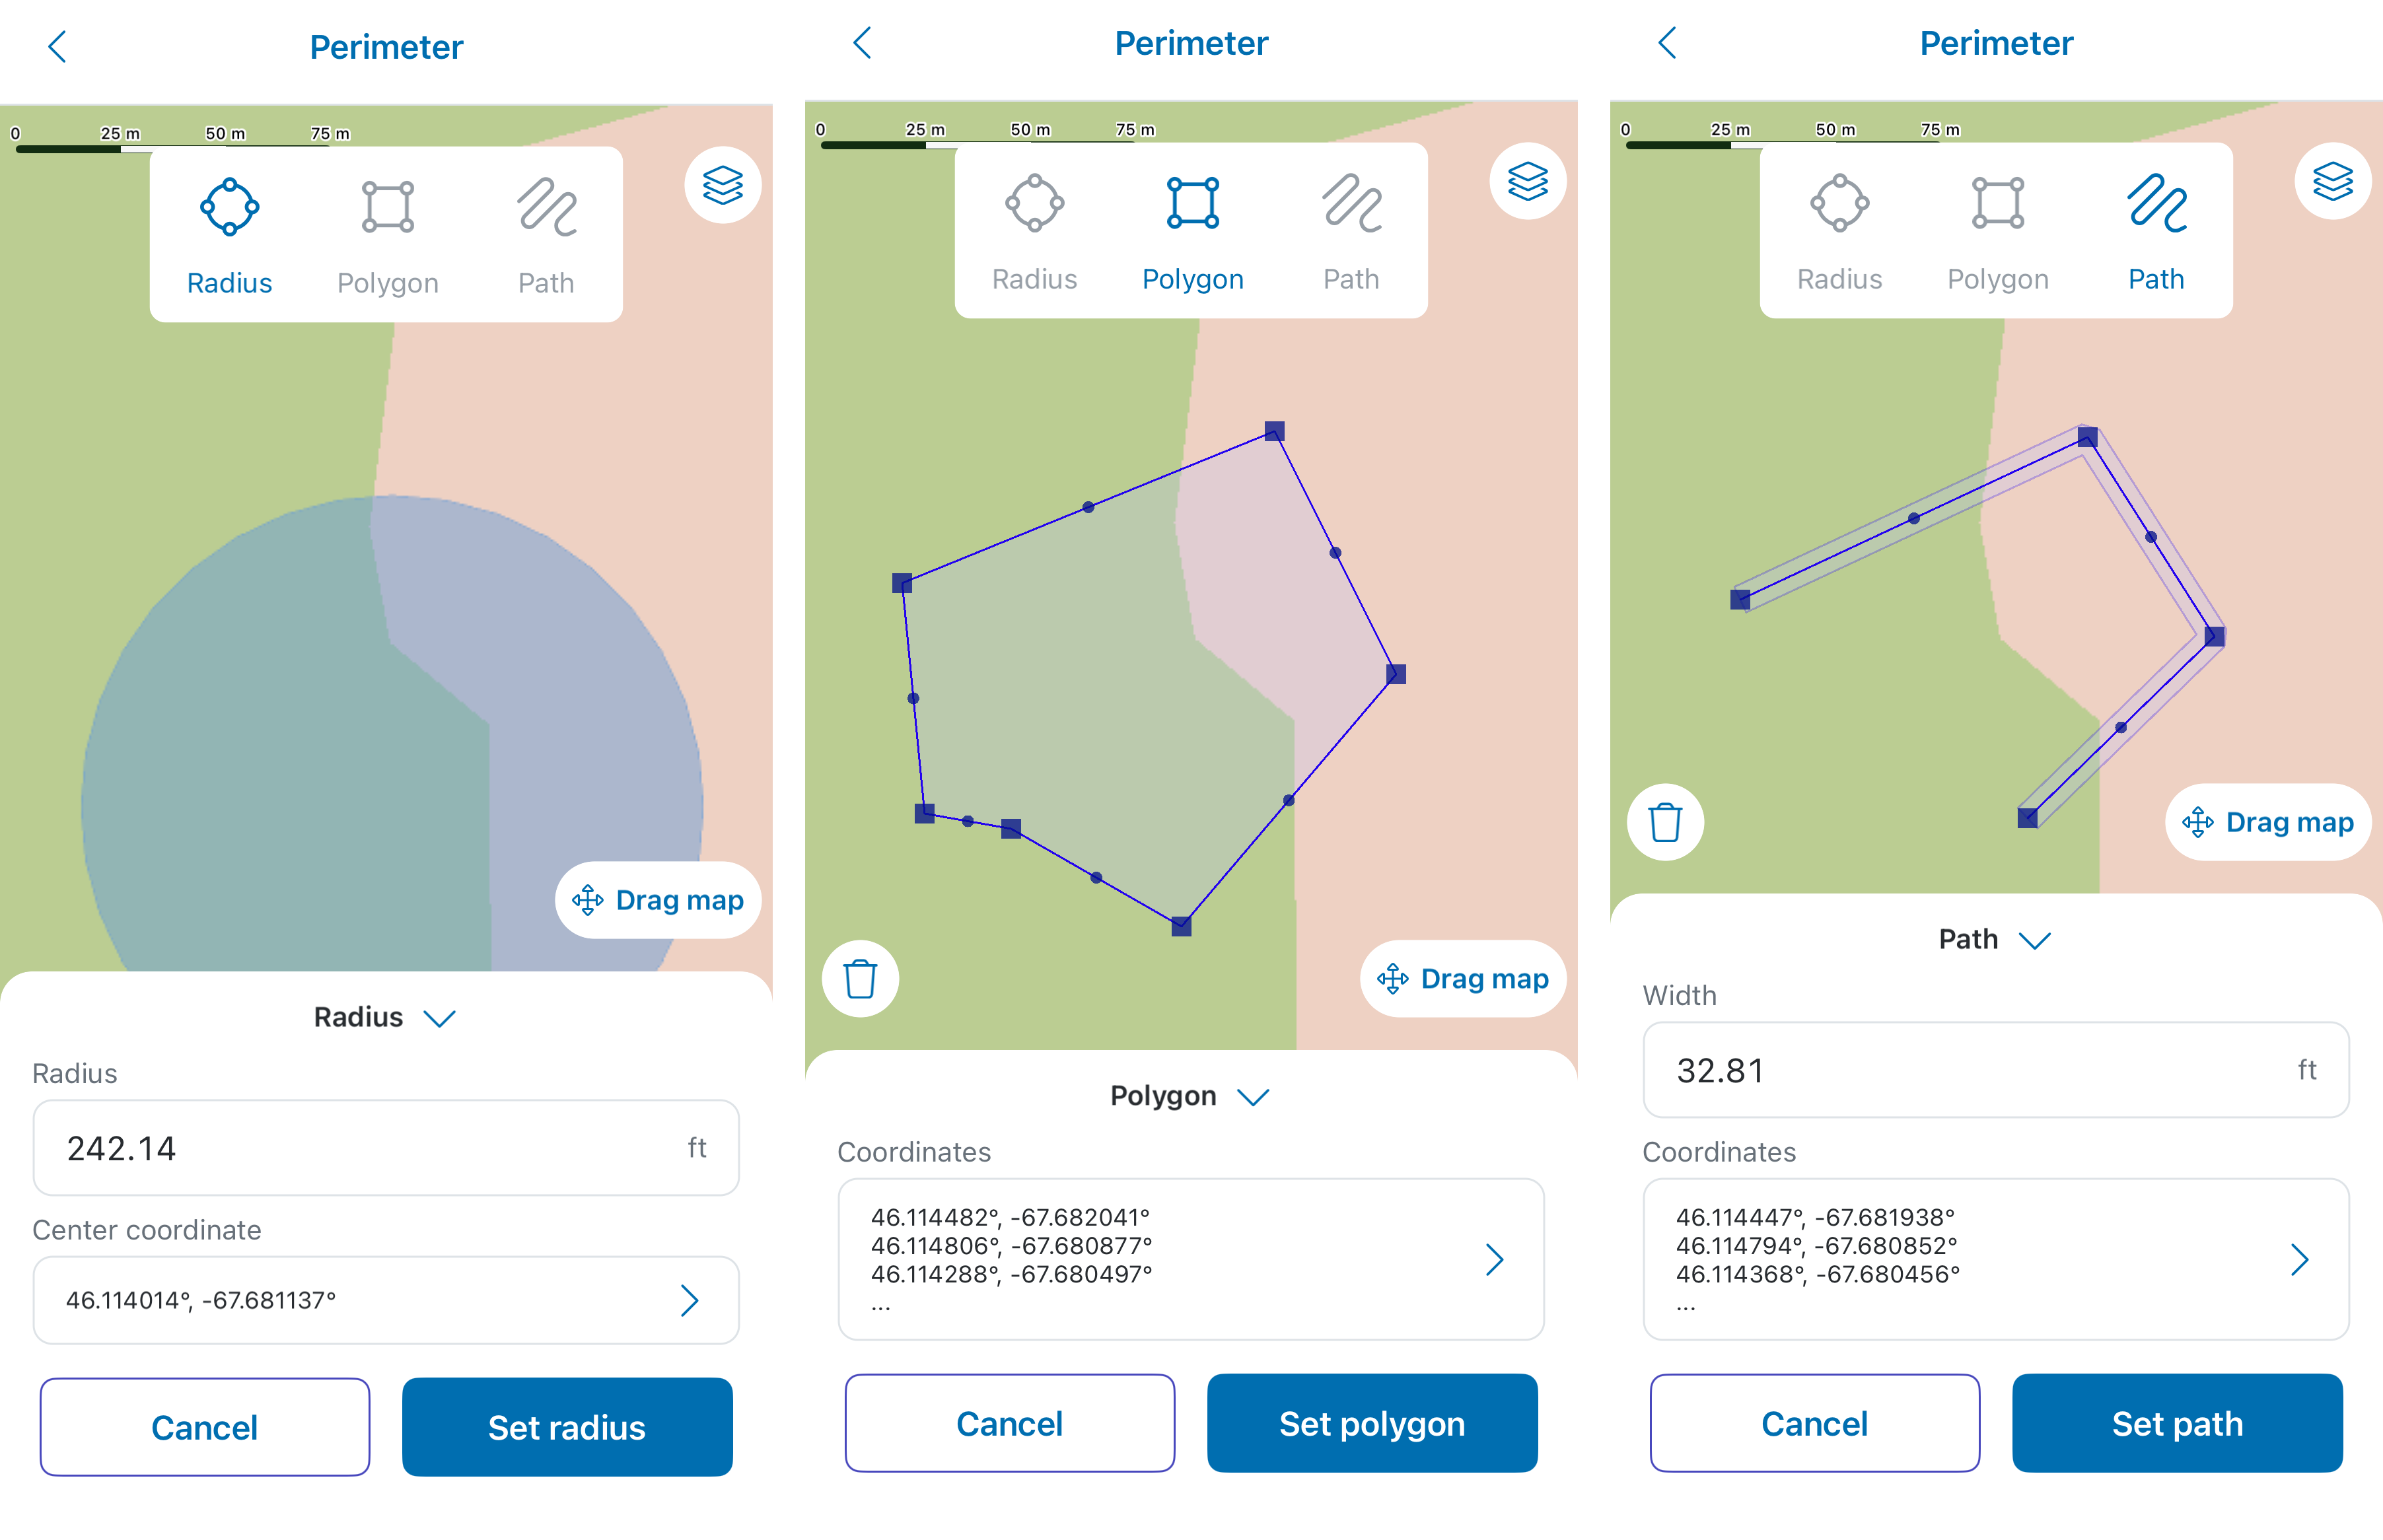
6 - Click the Draw Area, choose a shape type (Radius, Polygon, Path) that best defines your planned operation zone.
7 - From the App’s main screen, tap on the Plan Operation button at the bottom of the screen to continue.
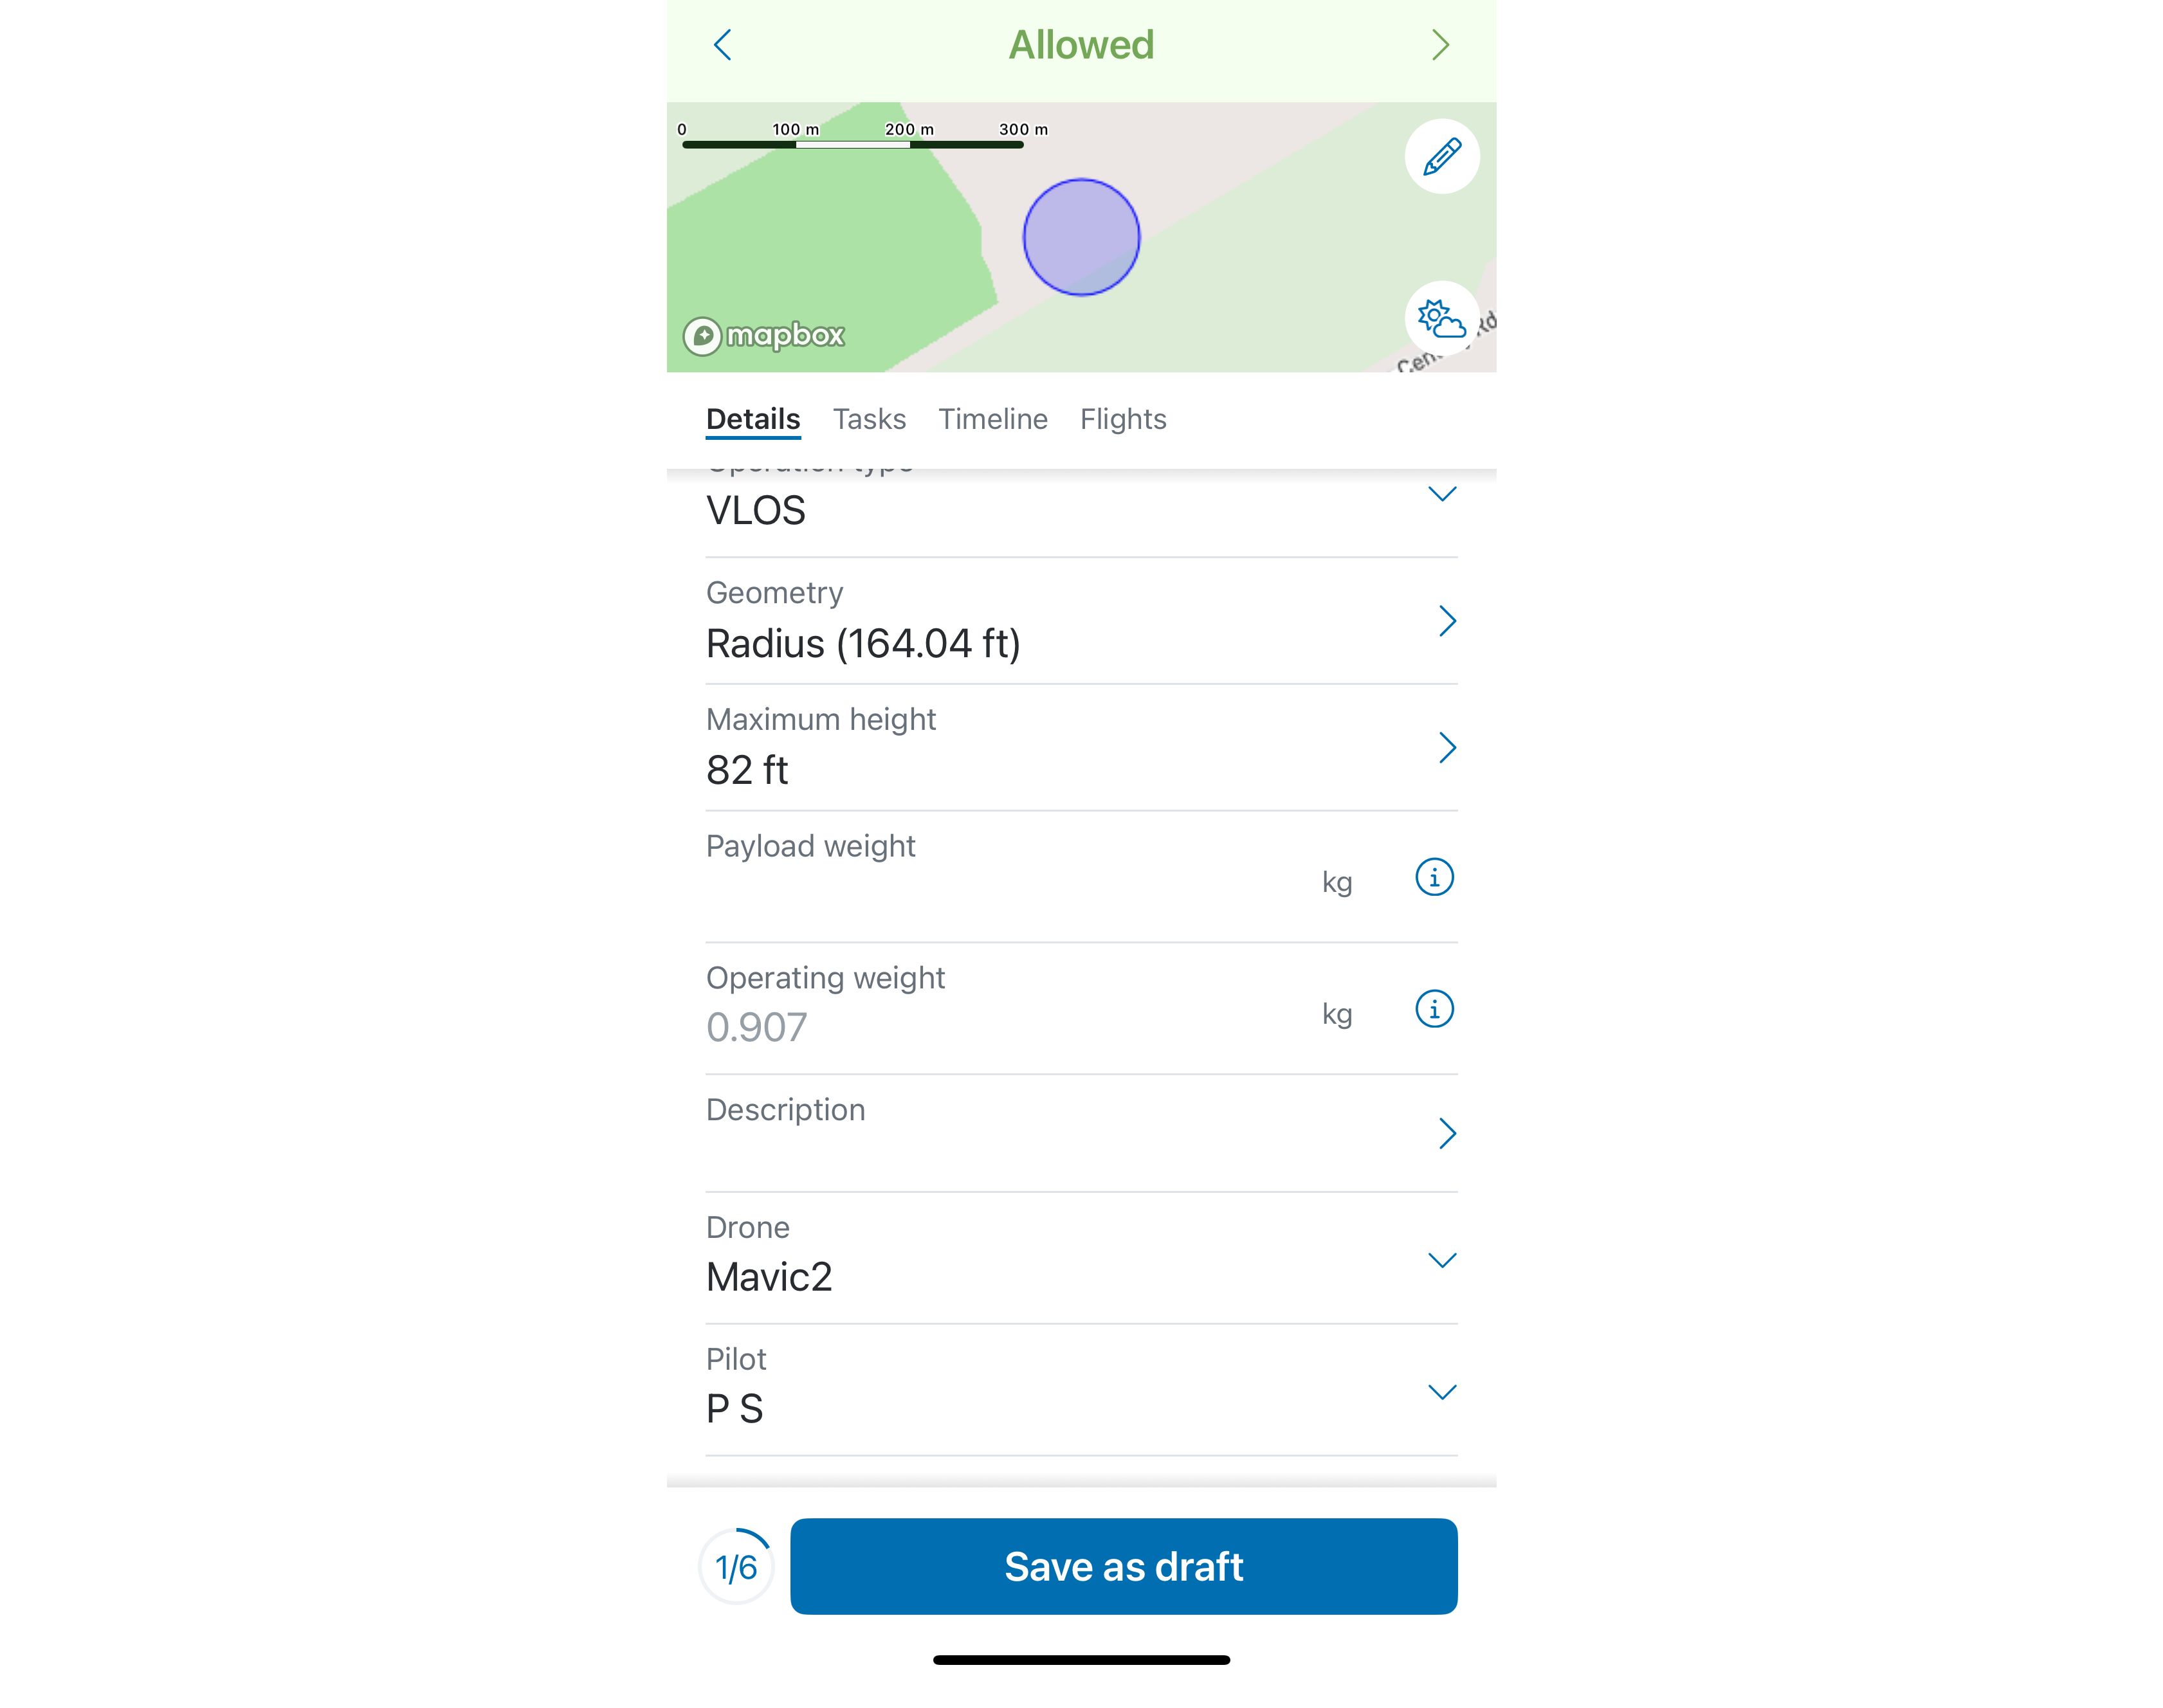
8 - The parameters specified on the App’s main screen are automatically transferred to the operation planning screen. Define the remainder of the operations parameters.
9 - If the drone is carrying payload not originally accounted under the Gear configuration menu, set the additional Payload Weight here.
Operating Weight is the sum of the weight of the drone (including batteries/fuel, systems required for its operation, etc.) and the weight of any payload attached to it. Operators must ensure that the Weight parameter for a drone is entered in their drone profile(s) via the Gear tab, otherwise the validation result will return a negative message when planning an operation. Operating Weight and Payload Weight are parameters of the operation.
Based on the operating weight, the drone is categorized as either a micro drone, small, medium or a large drone.
10 - Once complete, tap the Save as draft button at the bottom of the screen. A message will appear indicating that the operation was successfully saved and the Save as draft button will be replaced with a Request Acceptance button. The App will provide you with a validation result that can be seen at the top of the screen.
While planning an operation the following Validation results are possible:
Once your operation has been planned, you must request acceptance from the system. Requesting acceptance is especially important when an operation is planned in NAV CANADA controlled airspace since it allows you to get authorization from NAV CANADA to fly your drone.
The permission request process is used to obtain authorization from NAV CANADA to fly in controlled airspace. The NAV CANADA Grid geozones are used to facilitate the authorization process. If your operation validates to Authorization required then you must submit a Permission Request to obtain authorization from NAV CANADA.
Please note that if your operation requires authorization from another Authority (e.g. Department of National Defence, Airport Authority, Prison Authority, Parks Canada, etc.), you will need to coordinate with that Authority directly as this cannot be accomplished through NAV Drone.
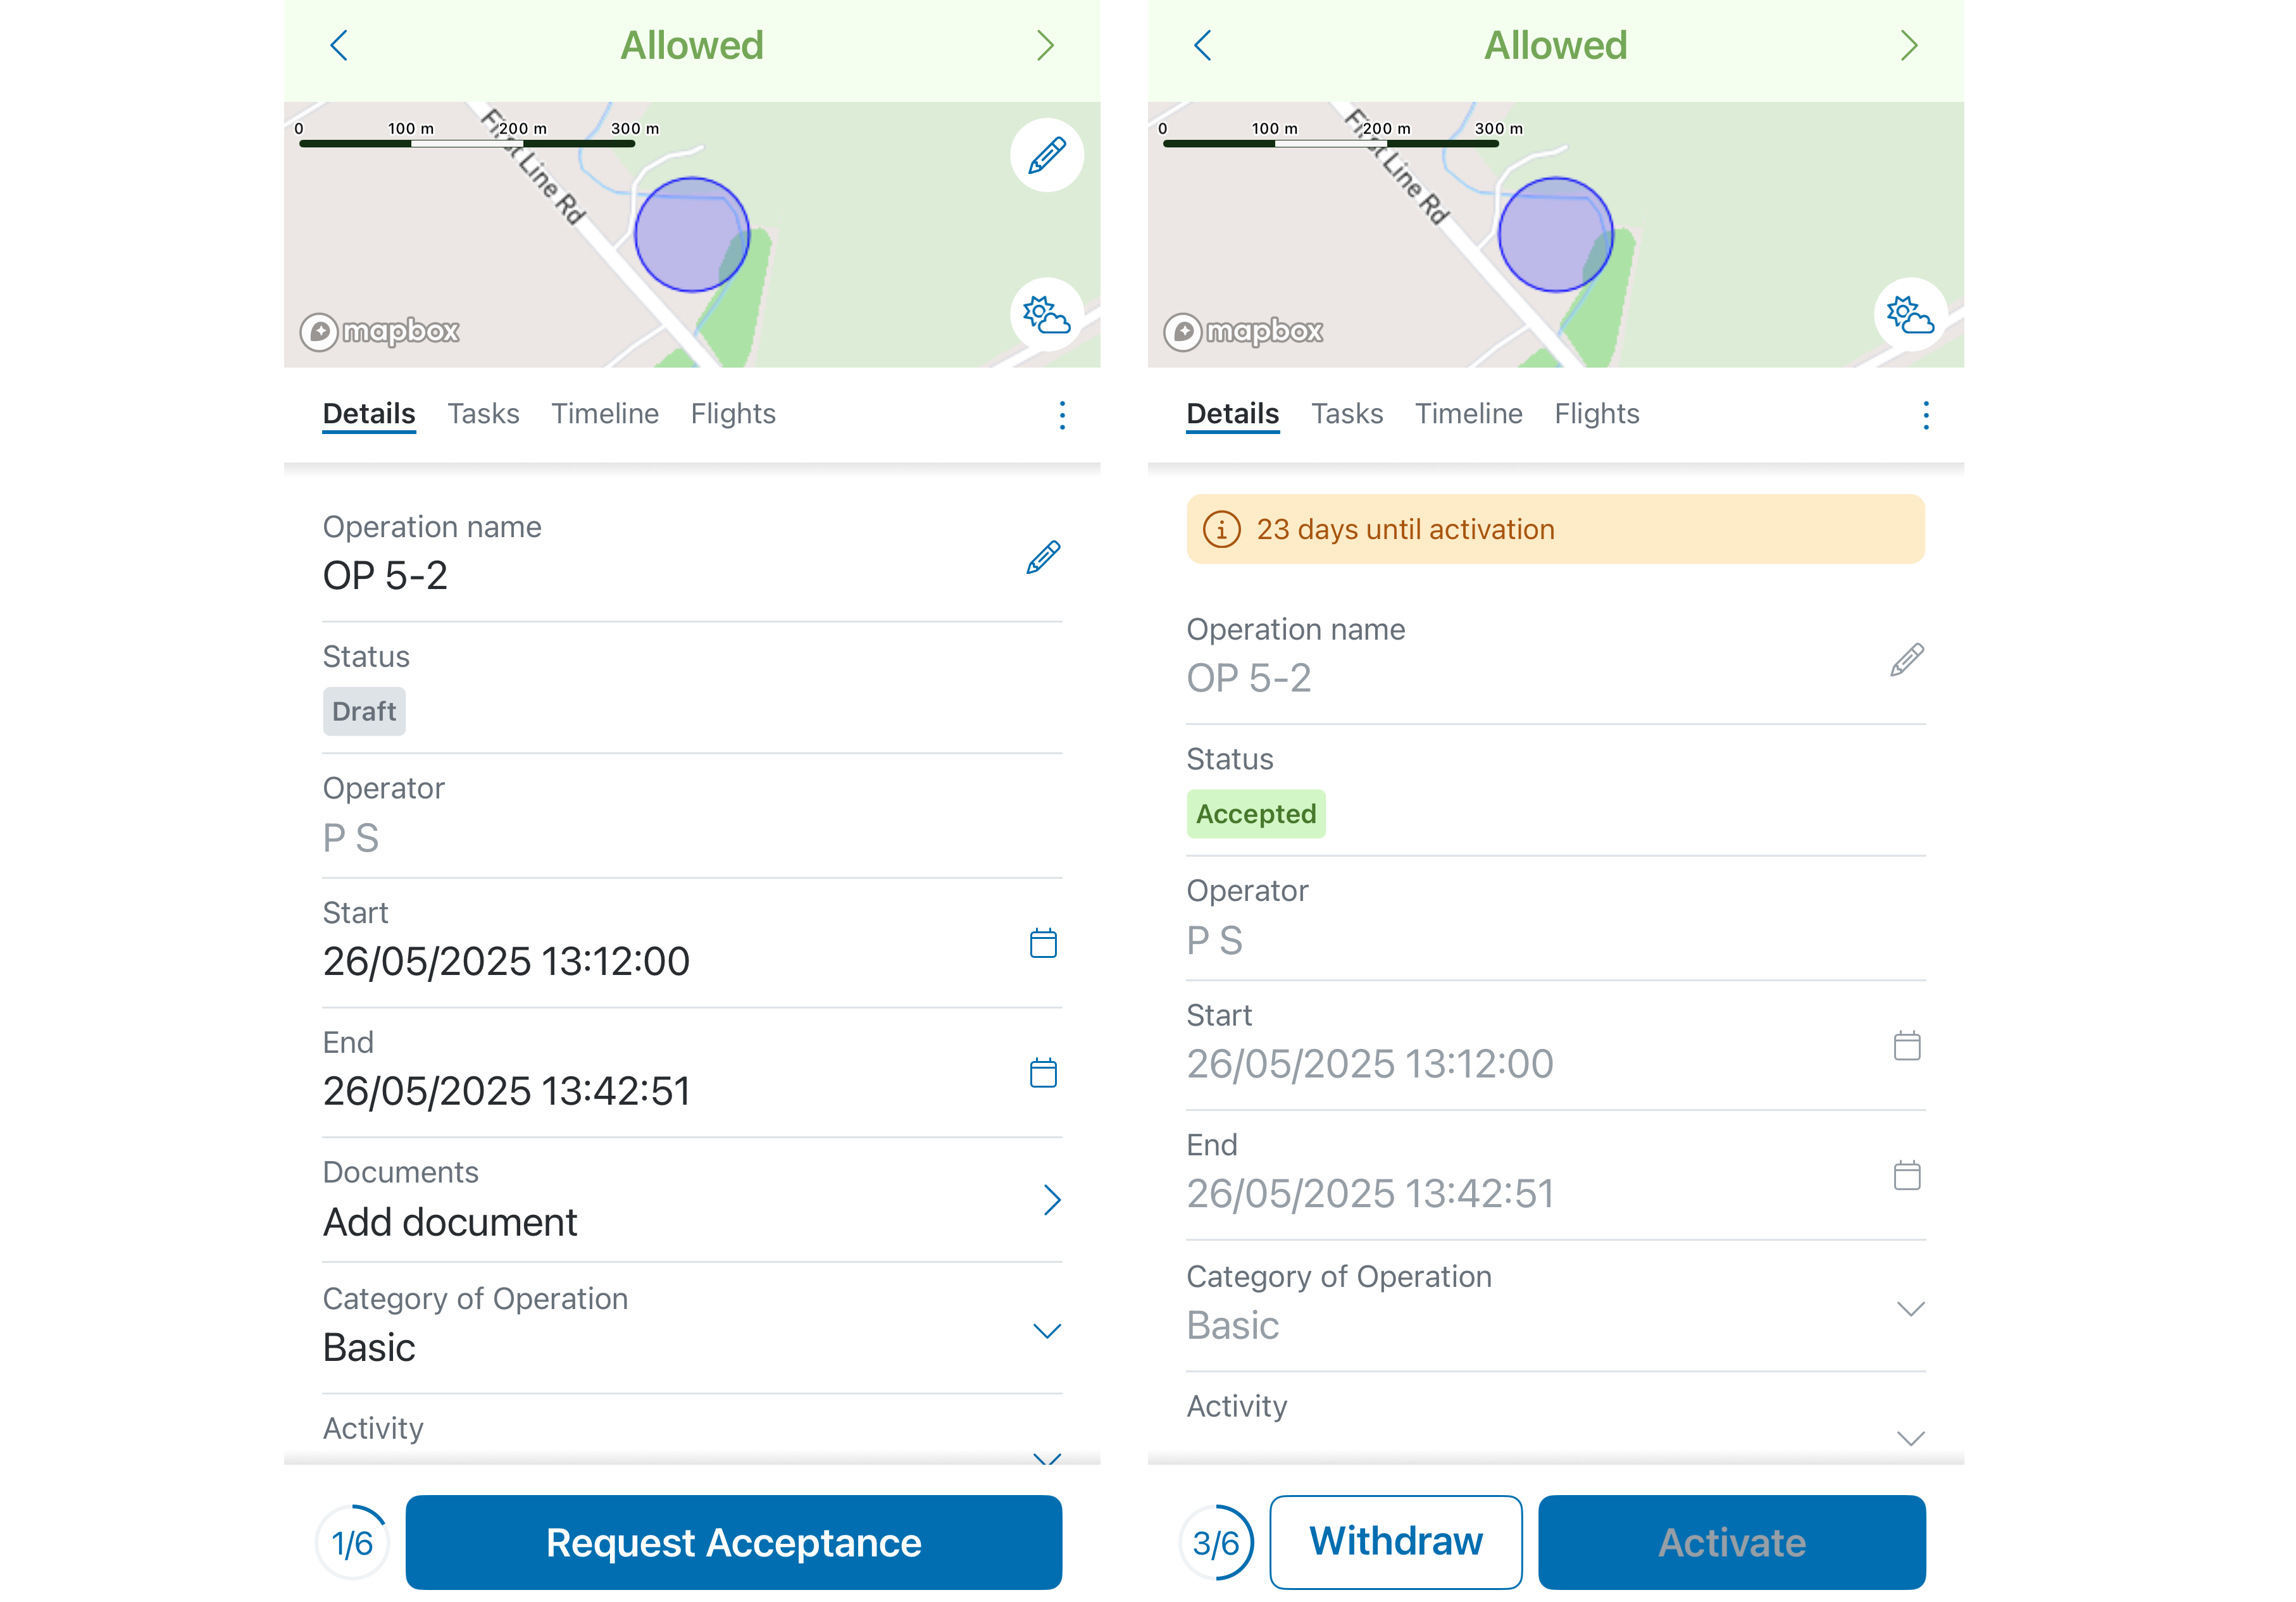
1 - The Details tab illustrates the status of the operation as Draft. Tap the Request Acceptance button at the top to initiate the permission request for your operation.
2 - If your operation does not require authorization from NAV CANADA to operate in a controlled airspace, the system will automatically accept the operation and the App will display an Allowed green label at the top of the window, a Status of Accepted and an indicator of the number of days left before the start of the operation.
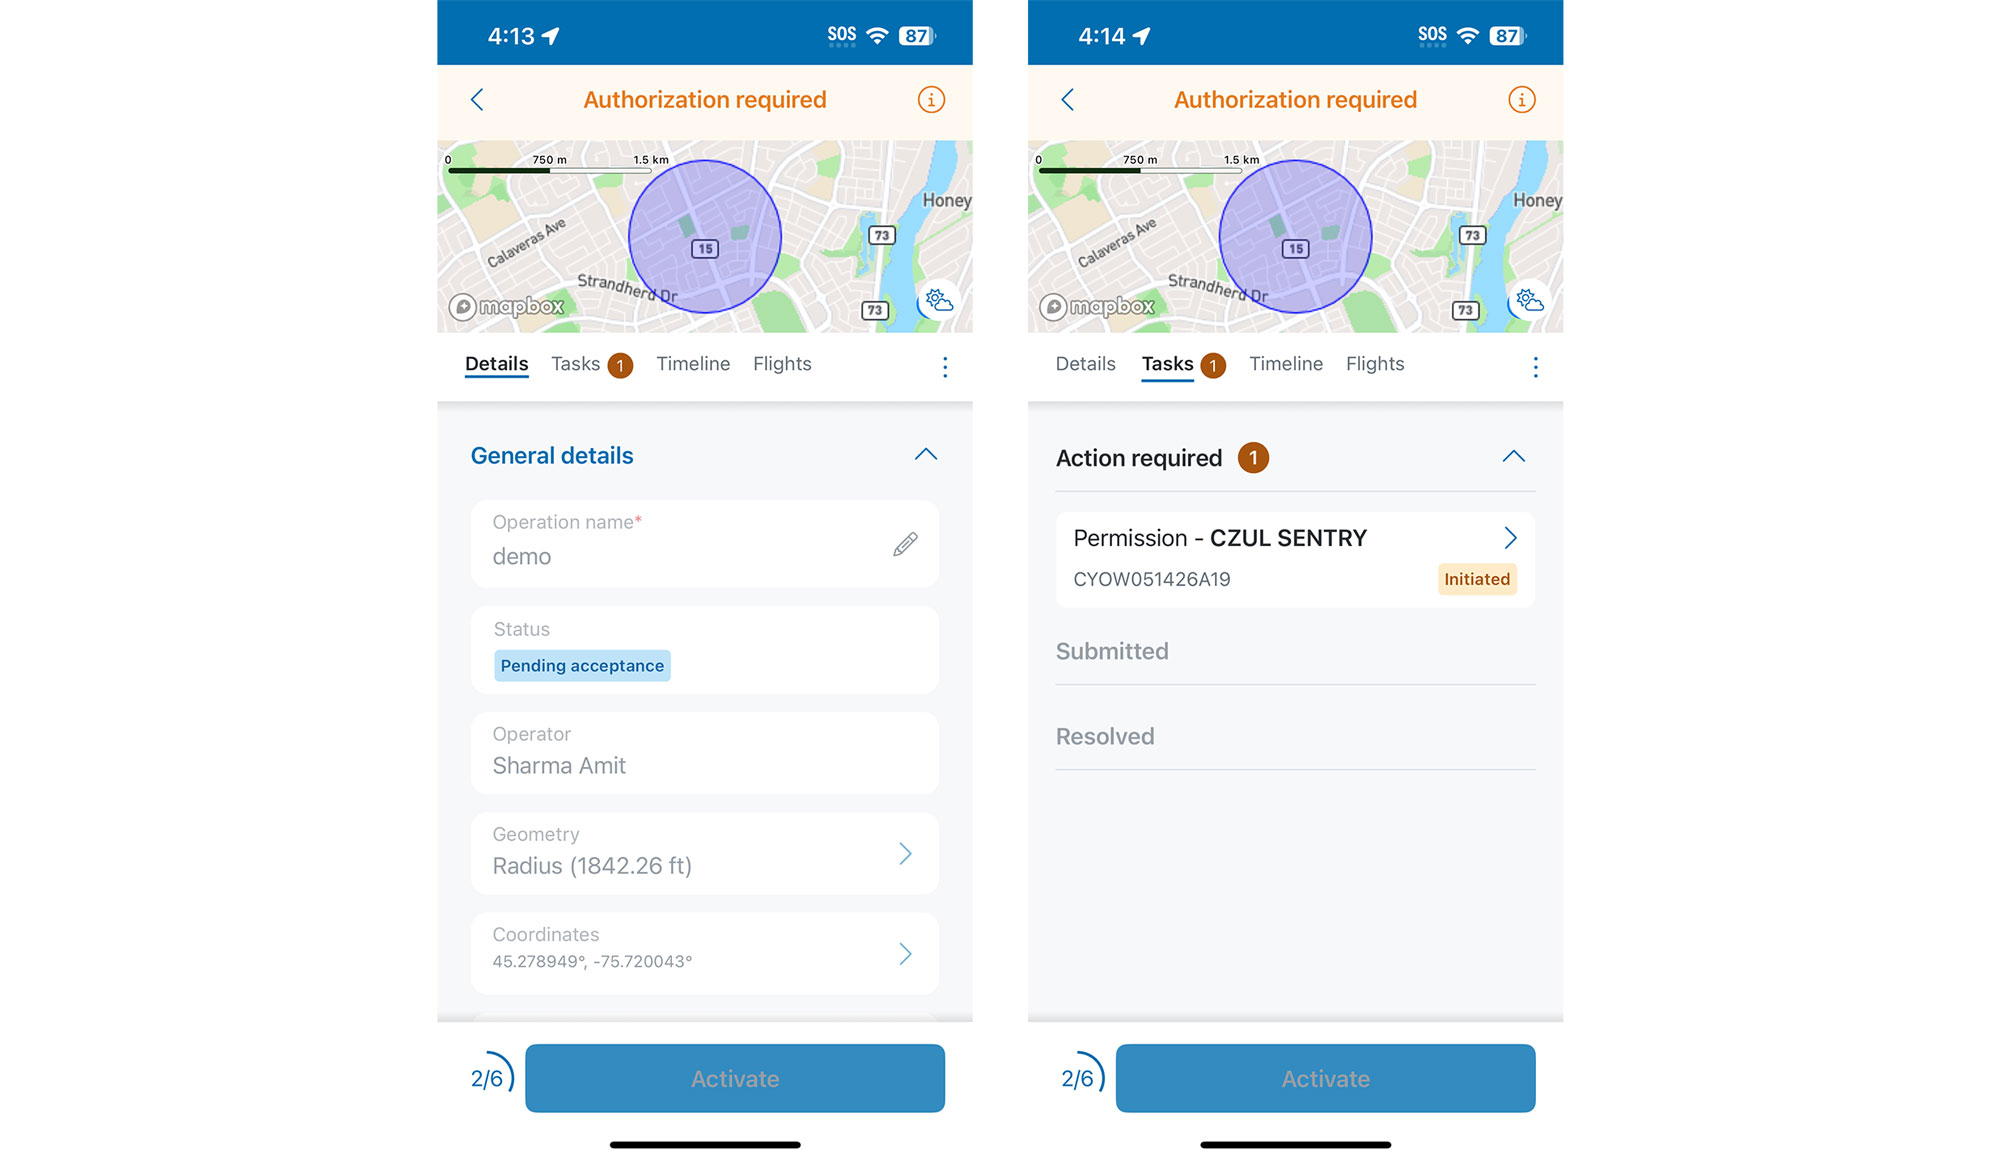
3 - If your operation has a status of Authorization required (orange label), you will have to submit your permission request via the Tasks tab for authorization. Tap the Request Acceptance button to proceed.
4 - After you tapped on the Request Acceptance button, the permission request status will be changed to Pending acceptance and a new action required will appear under the Tasks tab.
5 - Tap the Tasks tab to access the Action required menu. The permission request status will be set to Initiate. Tap the right arrow (>) to proceed with the submission of the permission request.
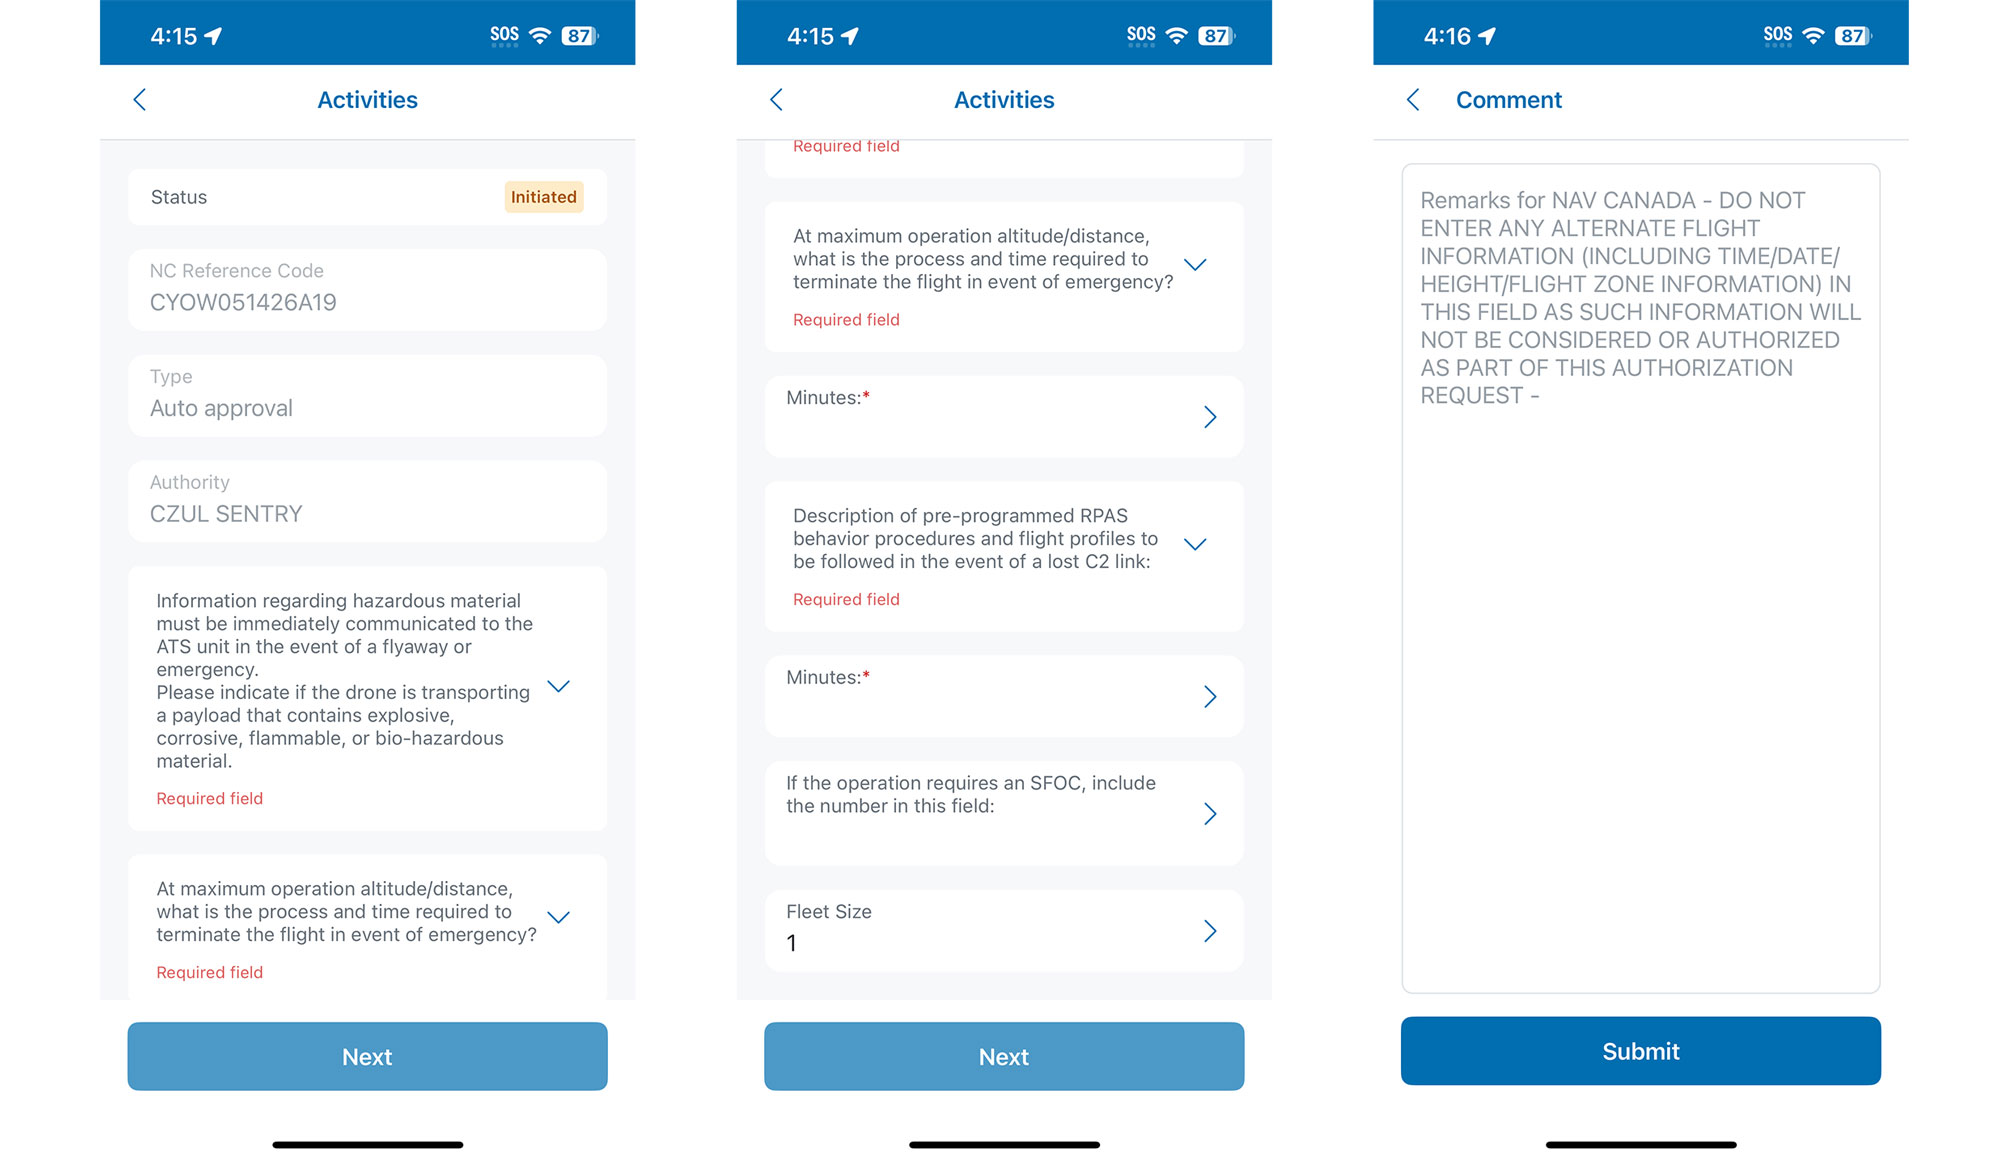
6 - The App will display the Activities form with questions about the operation payload and emergency response. Complete all required fields and tap the Next button at the top right.
7 - A Remarks field will be presented next where user can enter any additional comments about the operation. As indicated in the default text, do not enter any additional flight information as it will not be considered or authorized as part of the permission request review process.
8 - Tap the Submit button to send your permission request to NAV CANADA for review.
9 - Depending on the parameters of the operation, the permission request may be automatically approved and moved to the Resolved workflow state after submission.
10 - If the permission request requires a manual review by NAV CANADA prior to approval, the permission request will be moved to the Submitted state of the approval workflow with a status of In review. During a manual review, additional information may be requested by NAV CANADA ATS. In such cases, the permission request will be returned, and its status will be changed to Needs action. The user will be required to resubmit and provide the missing or additional information requested.
Each grid cell (or polygon in certain control zones) is assigned an altitude threshold value.
This section applies to permission requests submitted for small drones:
For medium drones, under Advanced VLOS, all permission requests must be manually reviewed by NAV CANADA.
The RPAS Operation Summary is a HTML-based document that summarizes all aspects of your operation and can be used as proof of authorization to operate in NAV CANADA controlled airspace.
After you have requested acceptance for your operation, you can download the RPAS Operation Summary document containing all relevant operational information. If your operation was Accepted, the document provides proof that you are allowed to carry out flights within the context of that operation.
Each operation has only one RPAS Operation Summary, regardless of the number of tasks/permission requests (if any).
In case permission requests are required, the RPAS Operation Summary will reflect the status of these permission requests at the time of download.
In the NAV Drone App, you can access the RPAS Operation Summary by following these steps:
1 - From the main App screen, tap the Calendar icon at bottom of the App and select the operation for which you would like a summary
2 - Tap the More button (three vertical dots icon) on the right side and select RPAS Operation Summary.

3 - An HTML version of the RPAS Operation Summary will be saved to your mobile device. You may use the print feature of your browser to print the document
NAV Drone now supports the planning of operations conducted under a Special Flight Operations Certificate (SFOC). You can plan an SFOC operating by selecting the SFOC Category of Operation parameter.
An SFOC-RPAS gives you permission to operate your drone for a specific purpose under special conditions. Previously, these operations were planned and handled outside of NAV Drone.
If you want to get permission for specific drone flight operations, you will need to apply for an SFOC-RPAS with Transport Canada.
For more detailed information visit Transport CanadaOpen a new window.
In order to plan an operation using the SFOC Category of Operation, you must have a valid SFOC-RPAS issued by Transport Canada.