Mobile Menu - Fr Mobile Search

NAV Drone Mobile: Gear and Document Management

Gear Management

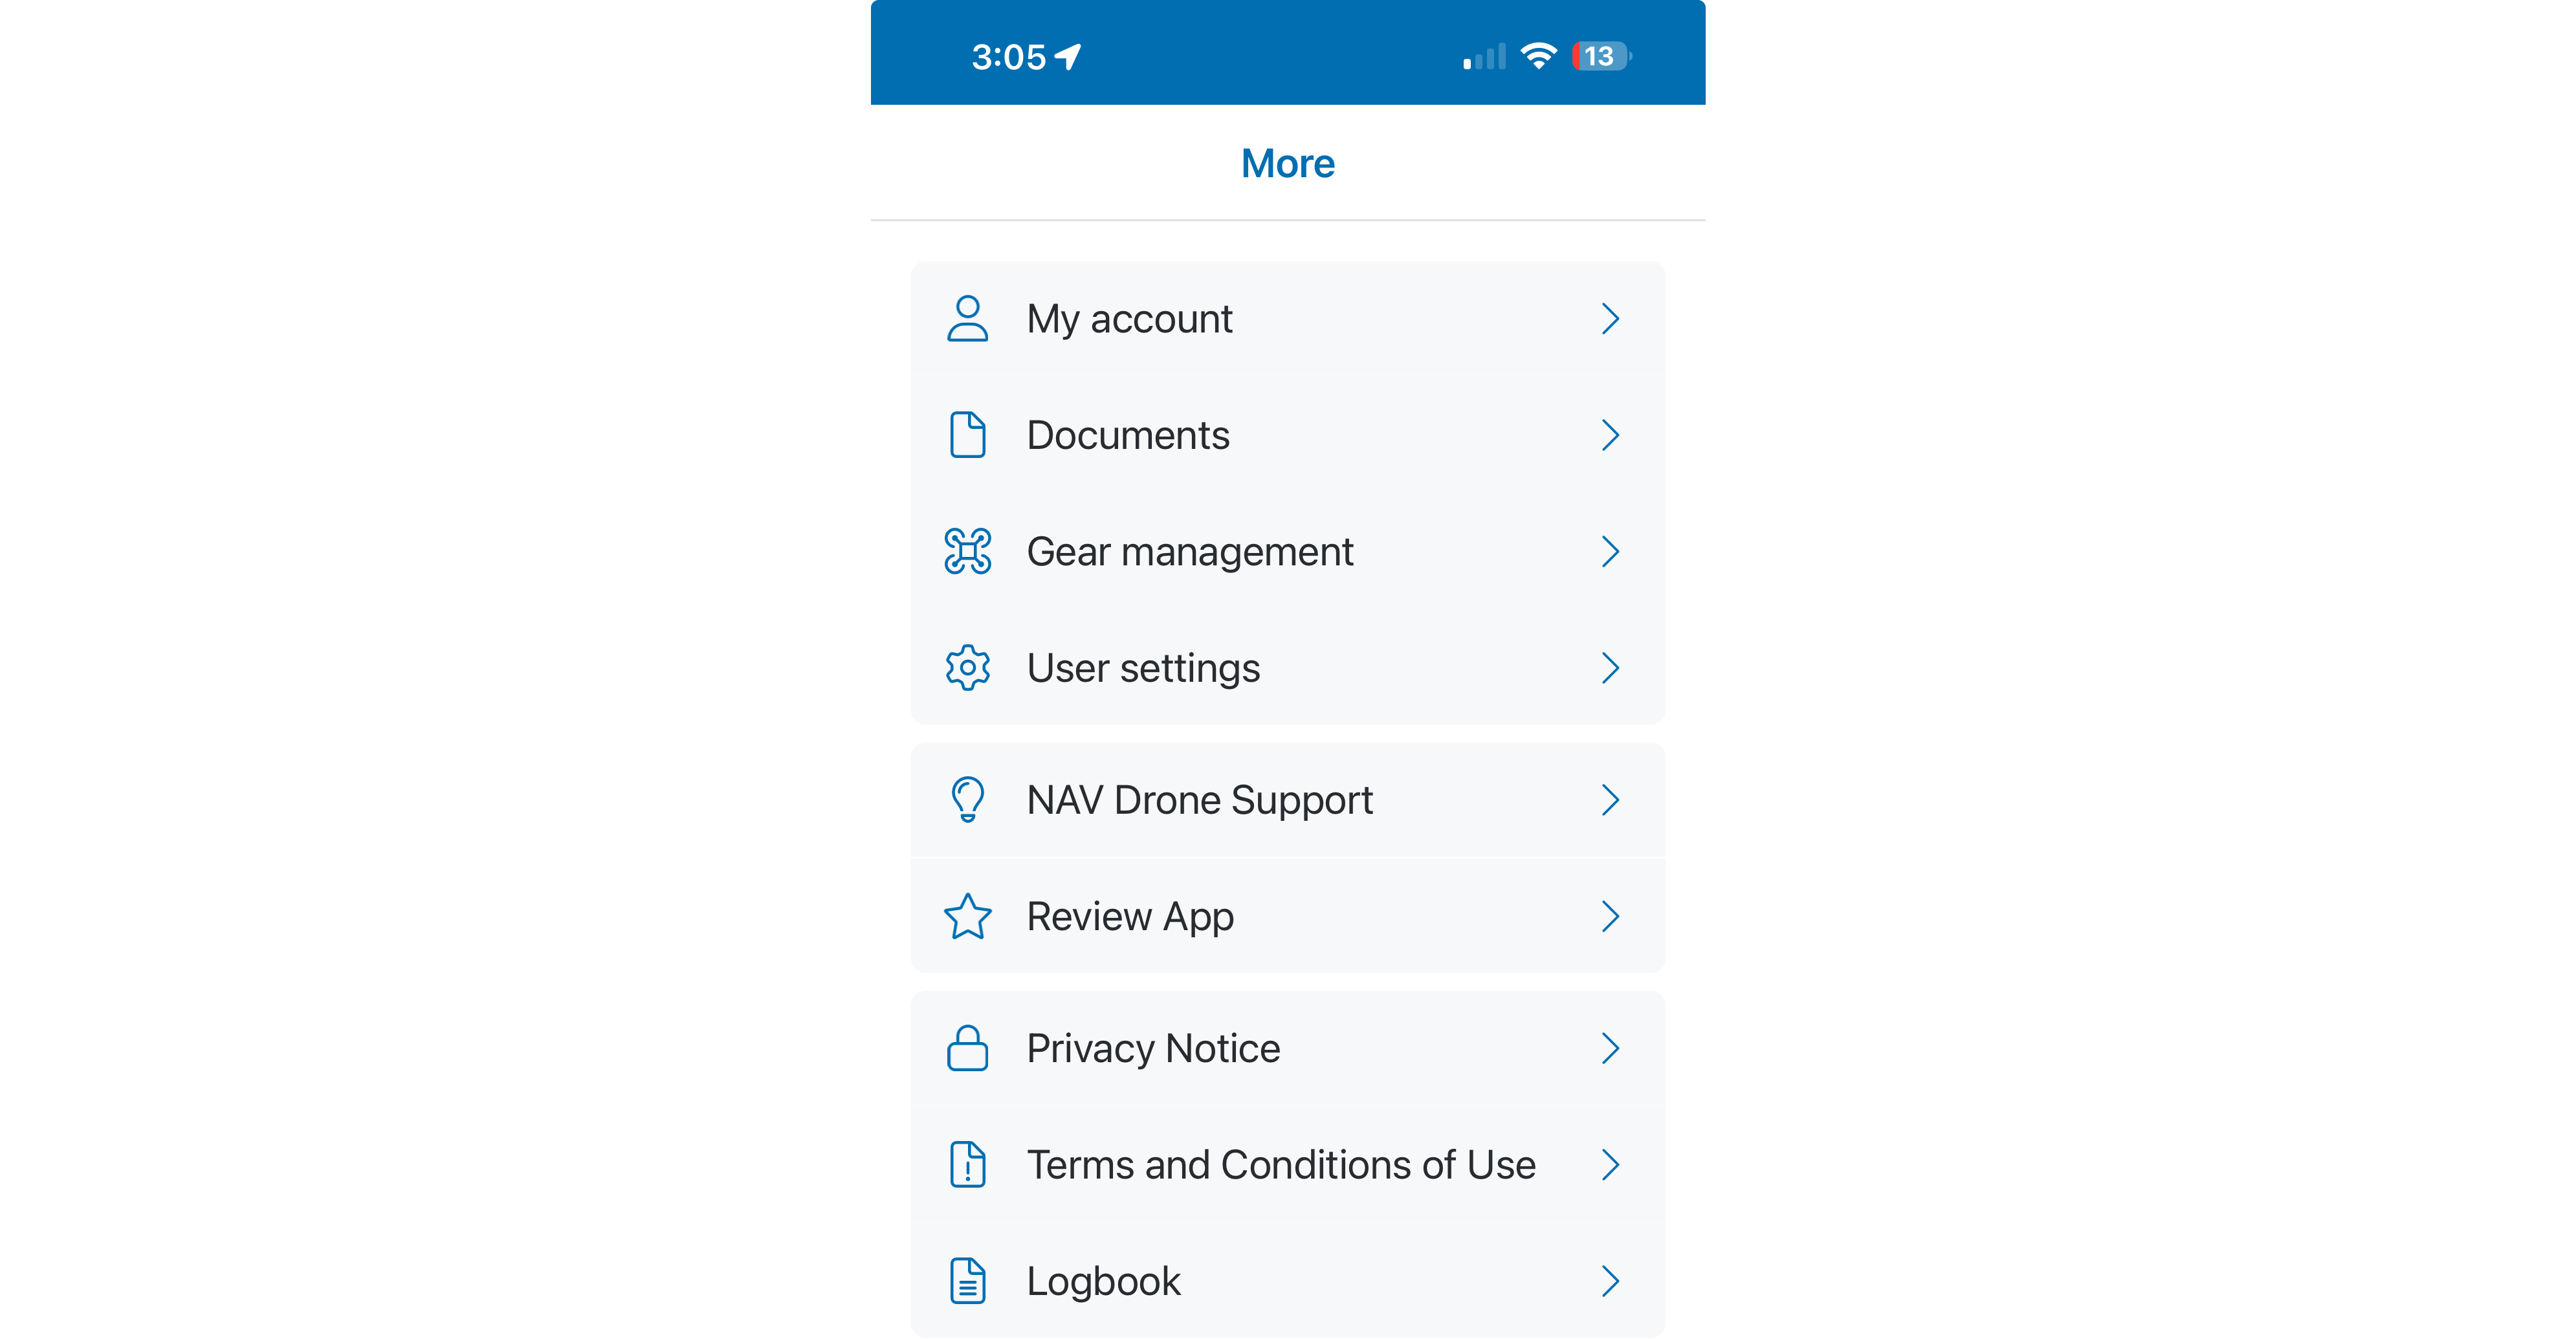
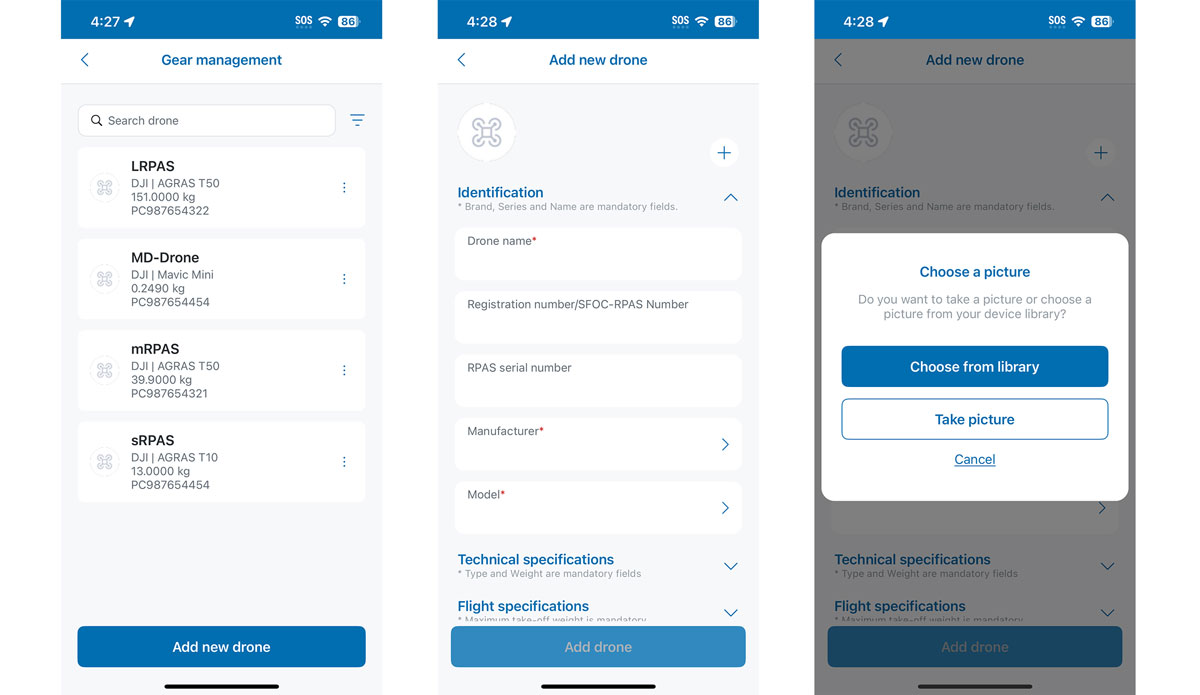
You can view the list of all the drones associated with your profile by tapping the More button at the bottom right of the App and then selecting Gear management.

Adding a New Drone  

  1. In the Gear management window, tap the Add new drone button at the bottom of the app.
  2. Enter a unique name for the new drone, a Registration number/SFOC-RPAS Number and RPAS serial number if available.
  3. Tap the Add manufacturer button to select an existing drone manufacturer or to add a new manufacturer to the list.
  4. If you select an existing manufacturer, the App will automatically take you to the next screen where you can select an existing model or add a new model associated with the selected manufacturer.
  5. Once the manufacturer and model are selected, the App will you back to the Add new drone window and will automatically populate several fields with preset for the selected drone. If you are adding a new drone that was not in the existing list, all the fields will be blank.
  6. You can add or update the drone picture by tapping the + button next to the image at the top the App. You can either select to Take picture with your camera or Choose picture from your library.
  7. Tap the Add drone button at the bottom of the App to complete the action. The new drone will now be visible in the list of existing drones associated with your profile.

Edit a Drone Profile

  1. In the Gear management window, tap the name of the drone you wish to modify.
  2. The App will take you to drone form where you can modify any of the available parameters.
  3. Click the back arrow to save the changes and return to the Gear management window.

Deleting a Drone Profile

  1. In the Gear management window, select the drone you wish to delete and tap the More button to the right. In the More menu, tap the Delete option.
  2. A confirmation message will appear. Tap the Yes, delete drone to proceed with the removal of the drone or No, keep drone to cancel the deletion.

Adding a Drone Document

  1. In the Gear management window, select the drone you wish to add an associated document.
  2. Tap the Documents menu. A list of associated documents to this specific drone will appear. 
  3. Tap the Add document button at the bottom of the App.
  4. Select the type of document you wish to add from the list of existing document types
  5. Enter the name of the document and a brief description.
  6. Tap the Upload file link to attach the document.

Edit a Drone Document

  1. In the Gear management window, select the drone you wish to edit an associated document.
  2. Tap the Documents menu. A list of associated documents to this specific drone will appear. 
  3. Tap the document you wish to edit.
  4. In the Documents menu, make the necessary changes.  You can delete an attached document by clicking the next to the document or click the Upload file to add another document.

Deleting a Drone Document

  1. In the Gear management window, select the drone you wish to delete an associated document.
  2. Tap the Documents menu. A list of associated documents to this specific drone will appear. 
  3. Tap the More button to the right of the document you wish to delete and select Delete.
  4. A confirmation message will appear. Tap the Yes, delete document to proceed with the removal of the document or No, keep this document to cancel the deletion.

Document Management

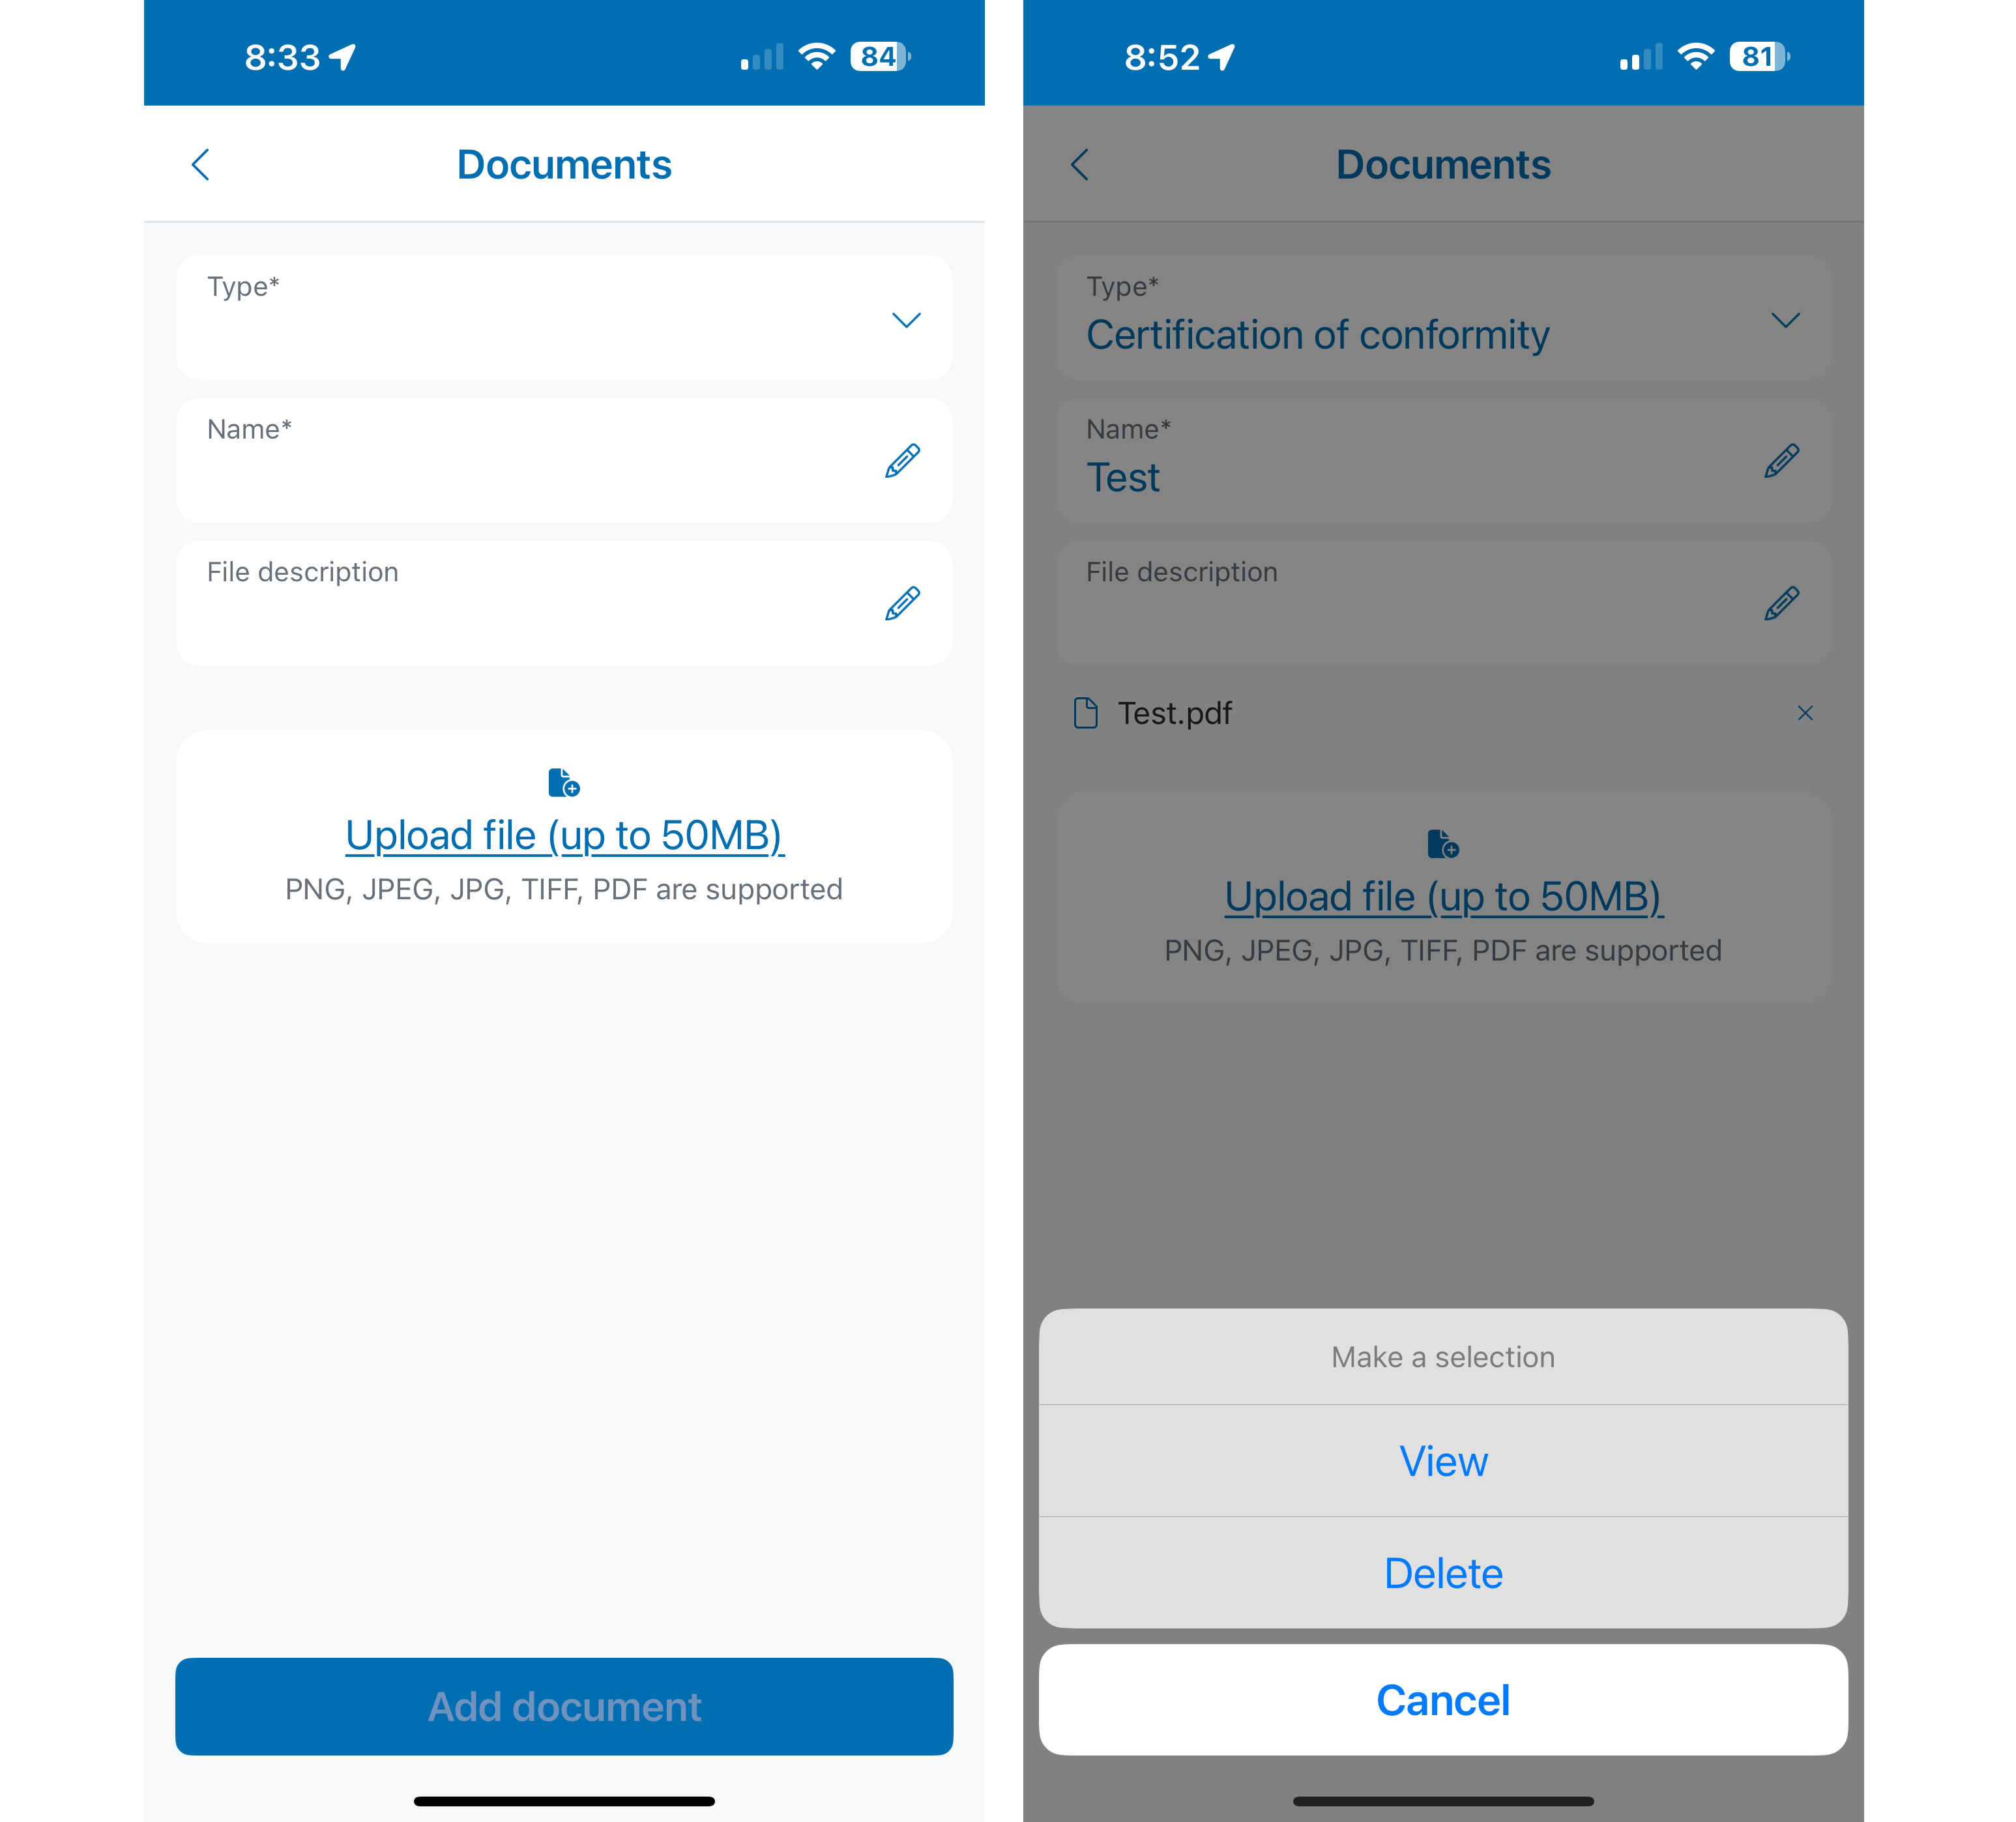
The Documents window lists all the documents that have been added to the related profile.

Users may add/modify:

  • Pilot Certificates
  • Radio Operator Certificates
  • Other documents

Adding New Documents

  1. Tap the More button at the bottom right of the App.
  2. Tap the Documents menu to open the Documents window.
  3. Tap the Add new document button at the bottom of the App.
  4. Attach copies of the document to the App by tapping the Upload file link at the bottom of the window.
  5. Tap the Save document button to save the changes and return to the previous window.

Modifying Documents

  1. Tap the More button at the bottom right of the App.
  2. Tap the Documents menu to open the Edit document window.
  3. Tap the 3 dots on the name of the document you wish to modify to open the Edit document window.
  4. Make the necessary changes to the selected document and click the Update document button at the bottom of the page to save the changes and return to the previous window.

Adding and Modifying a Pilot Certificate:

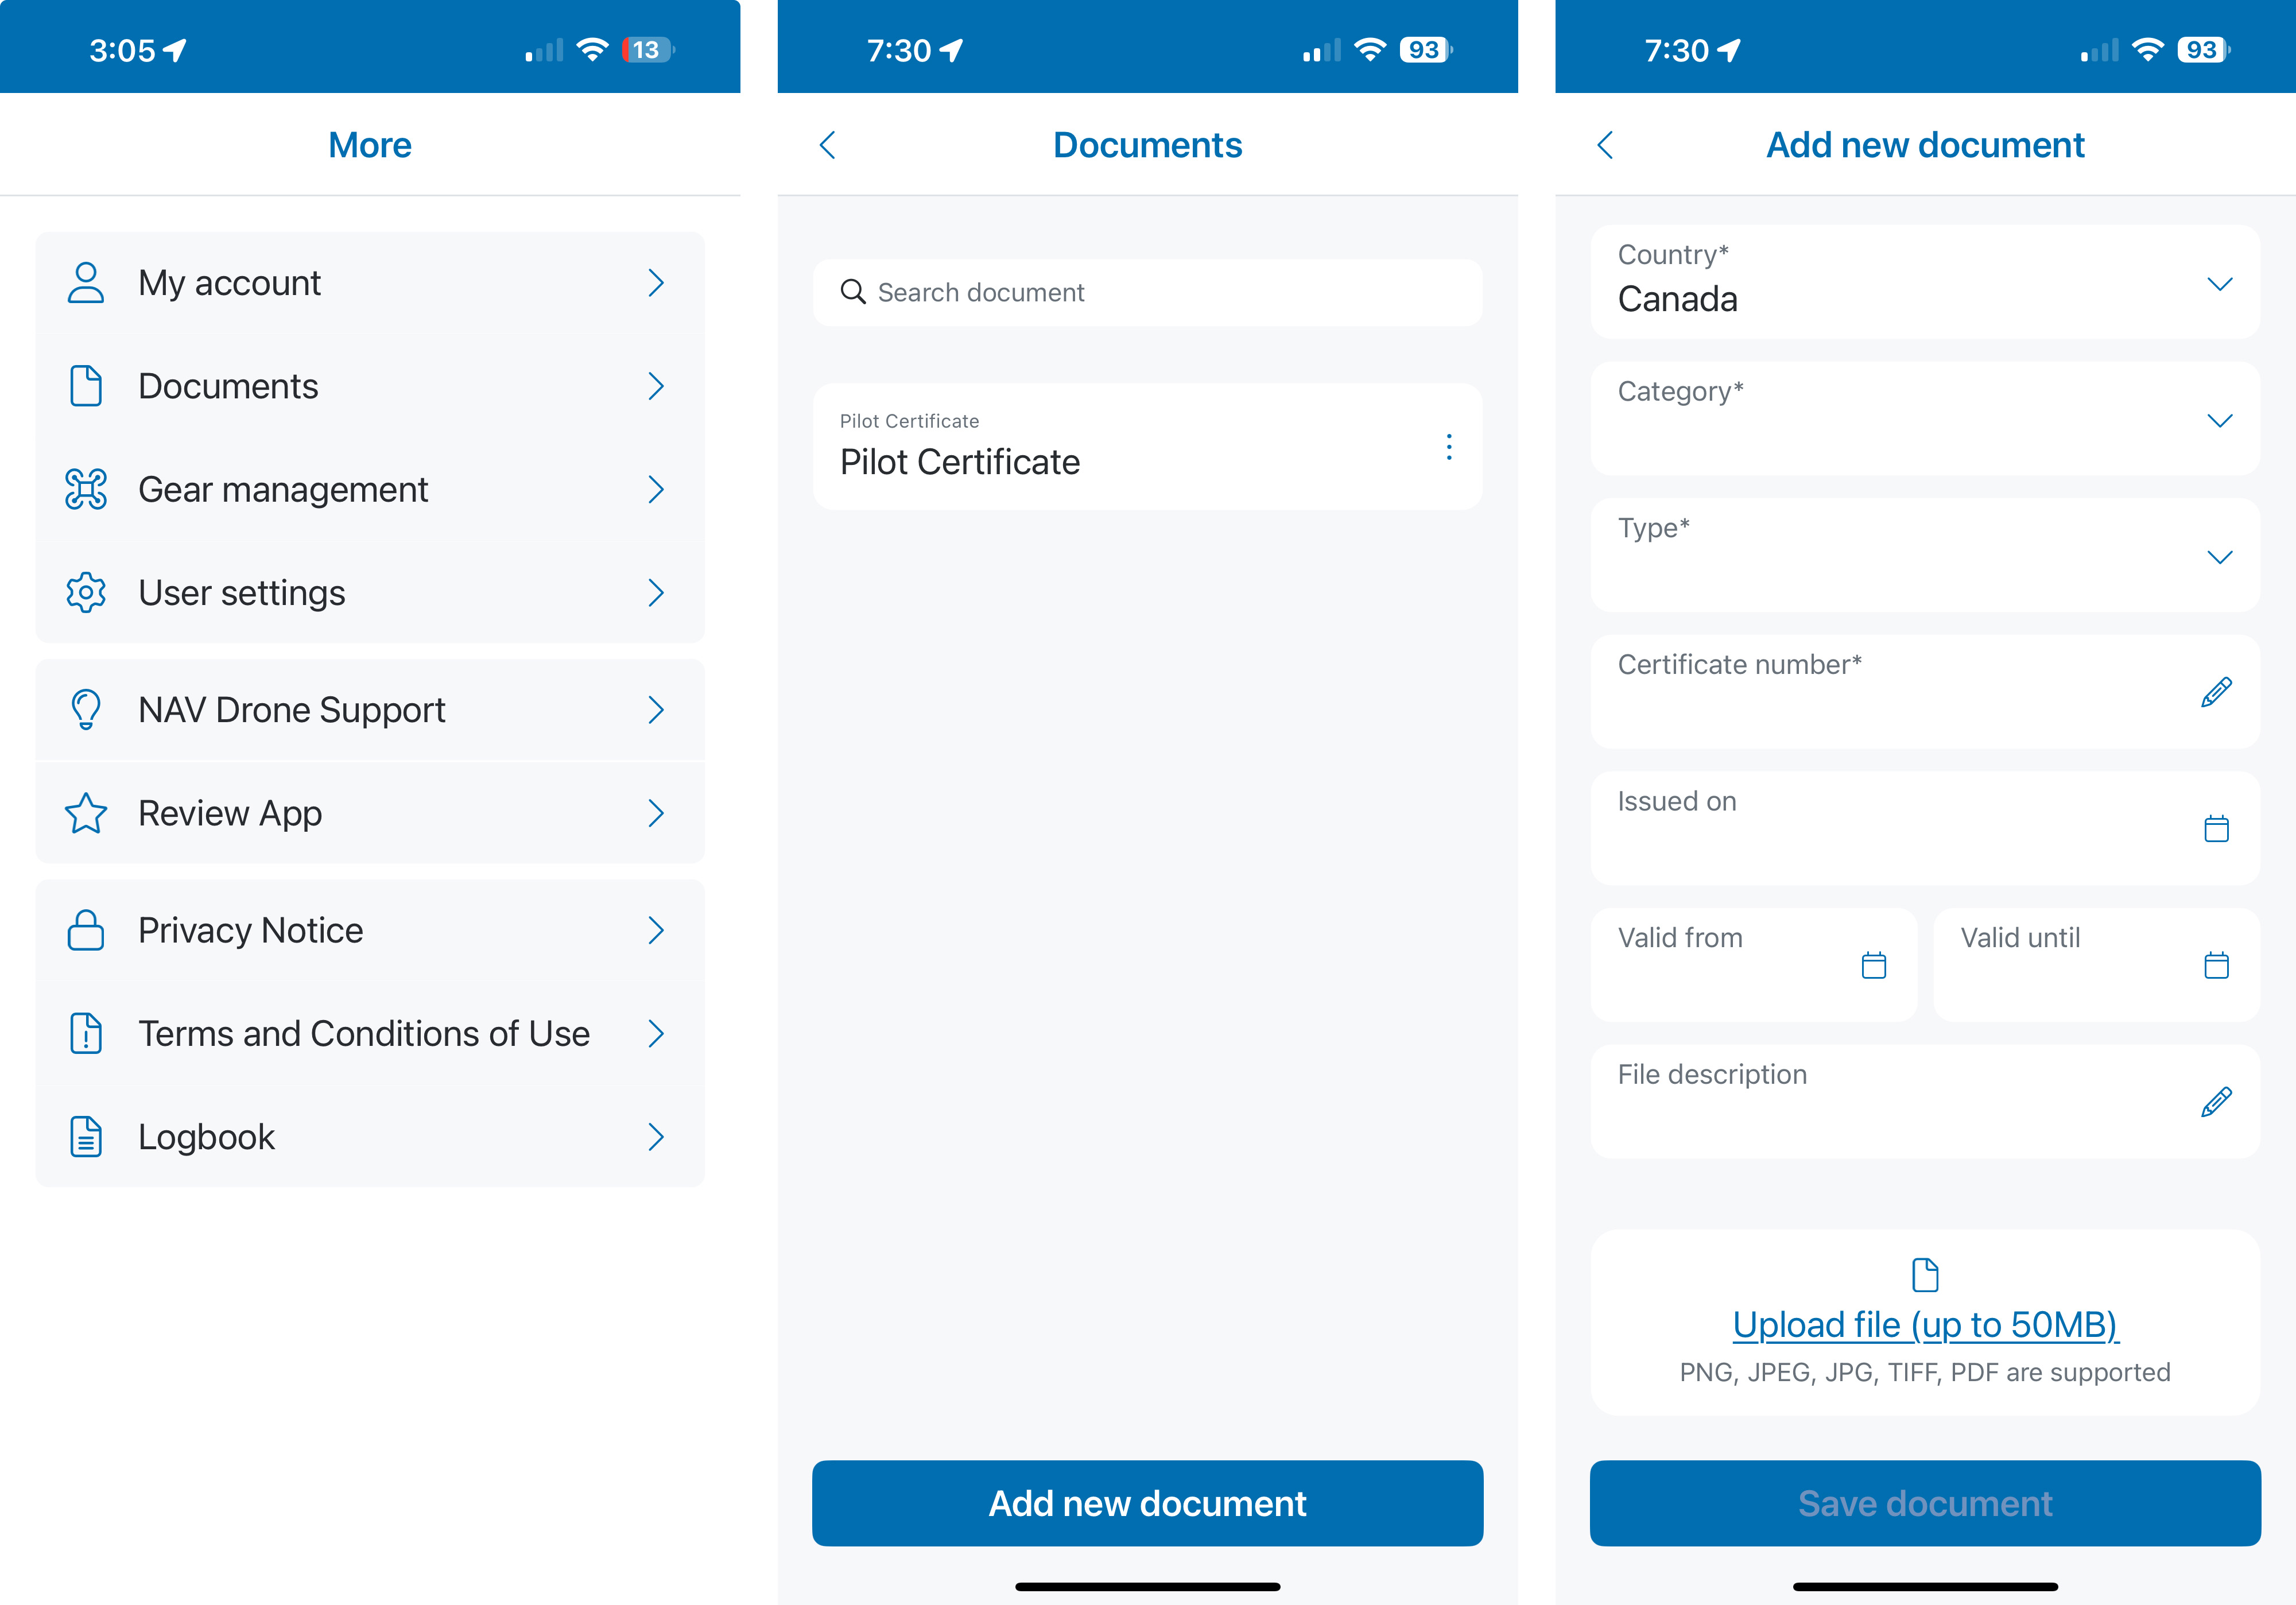
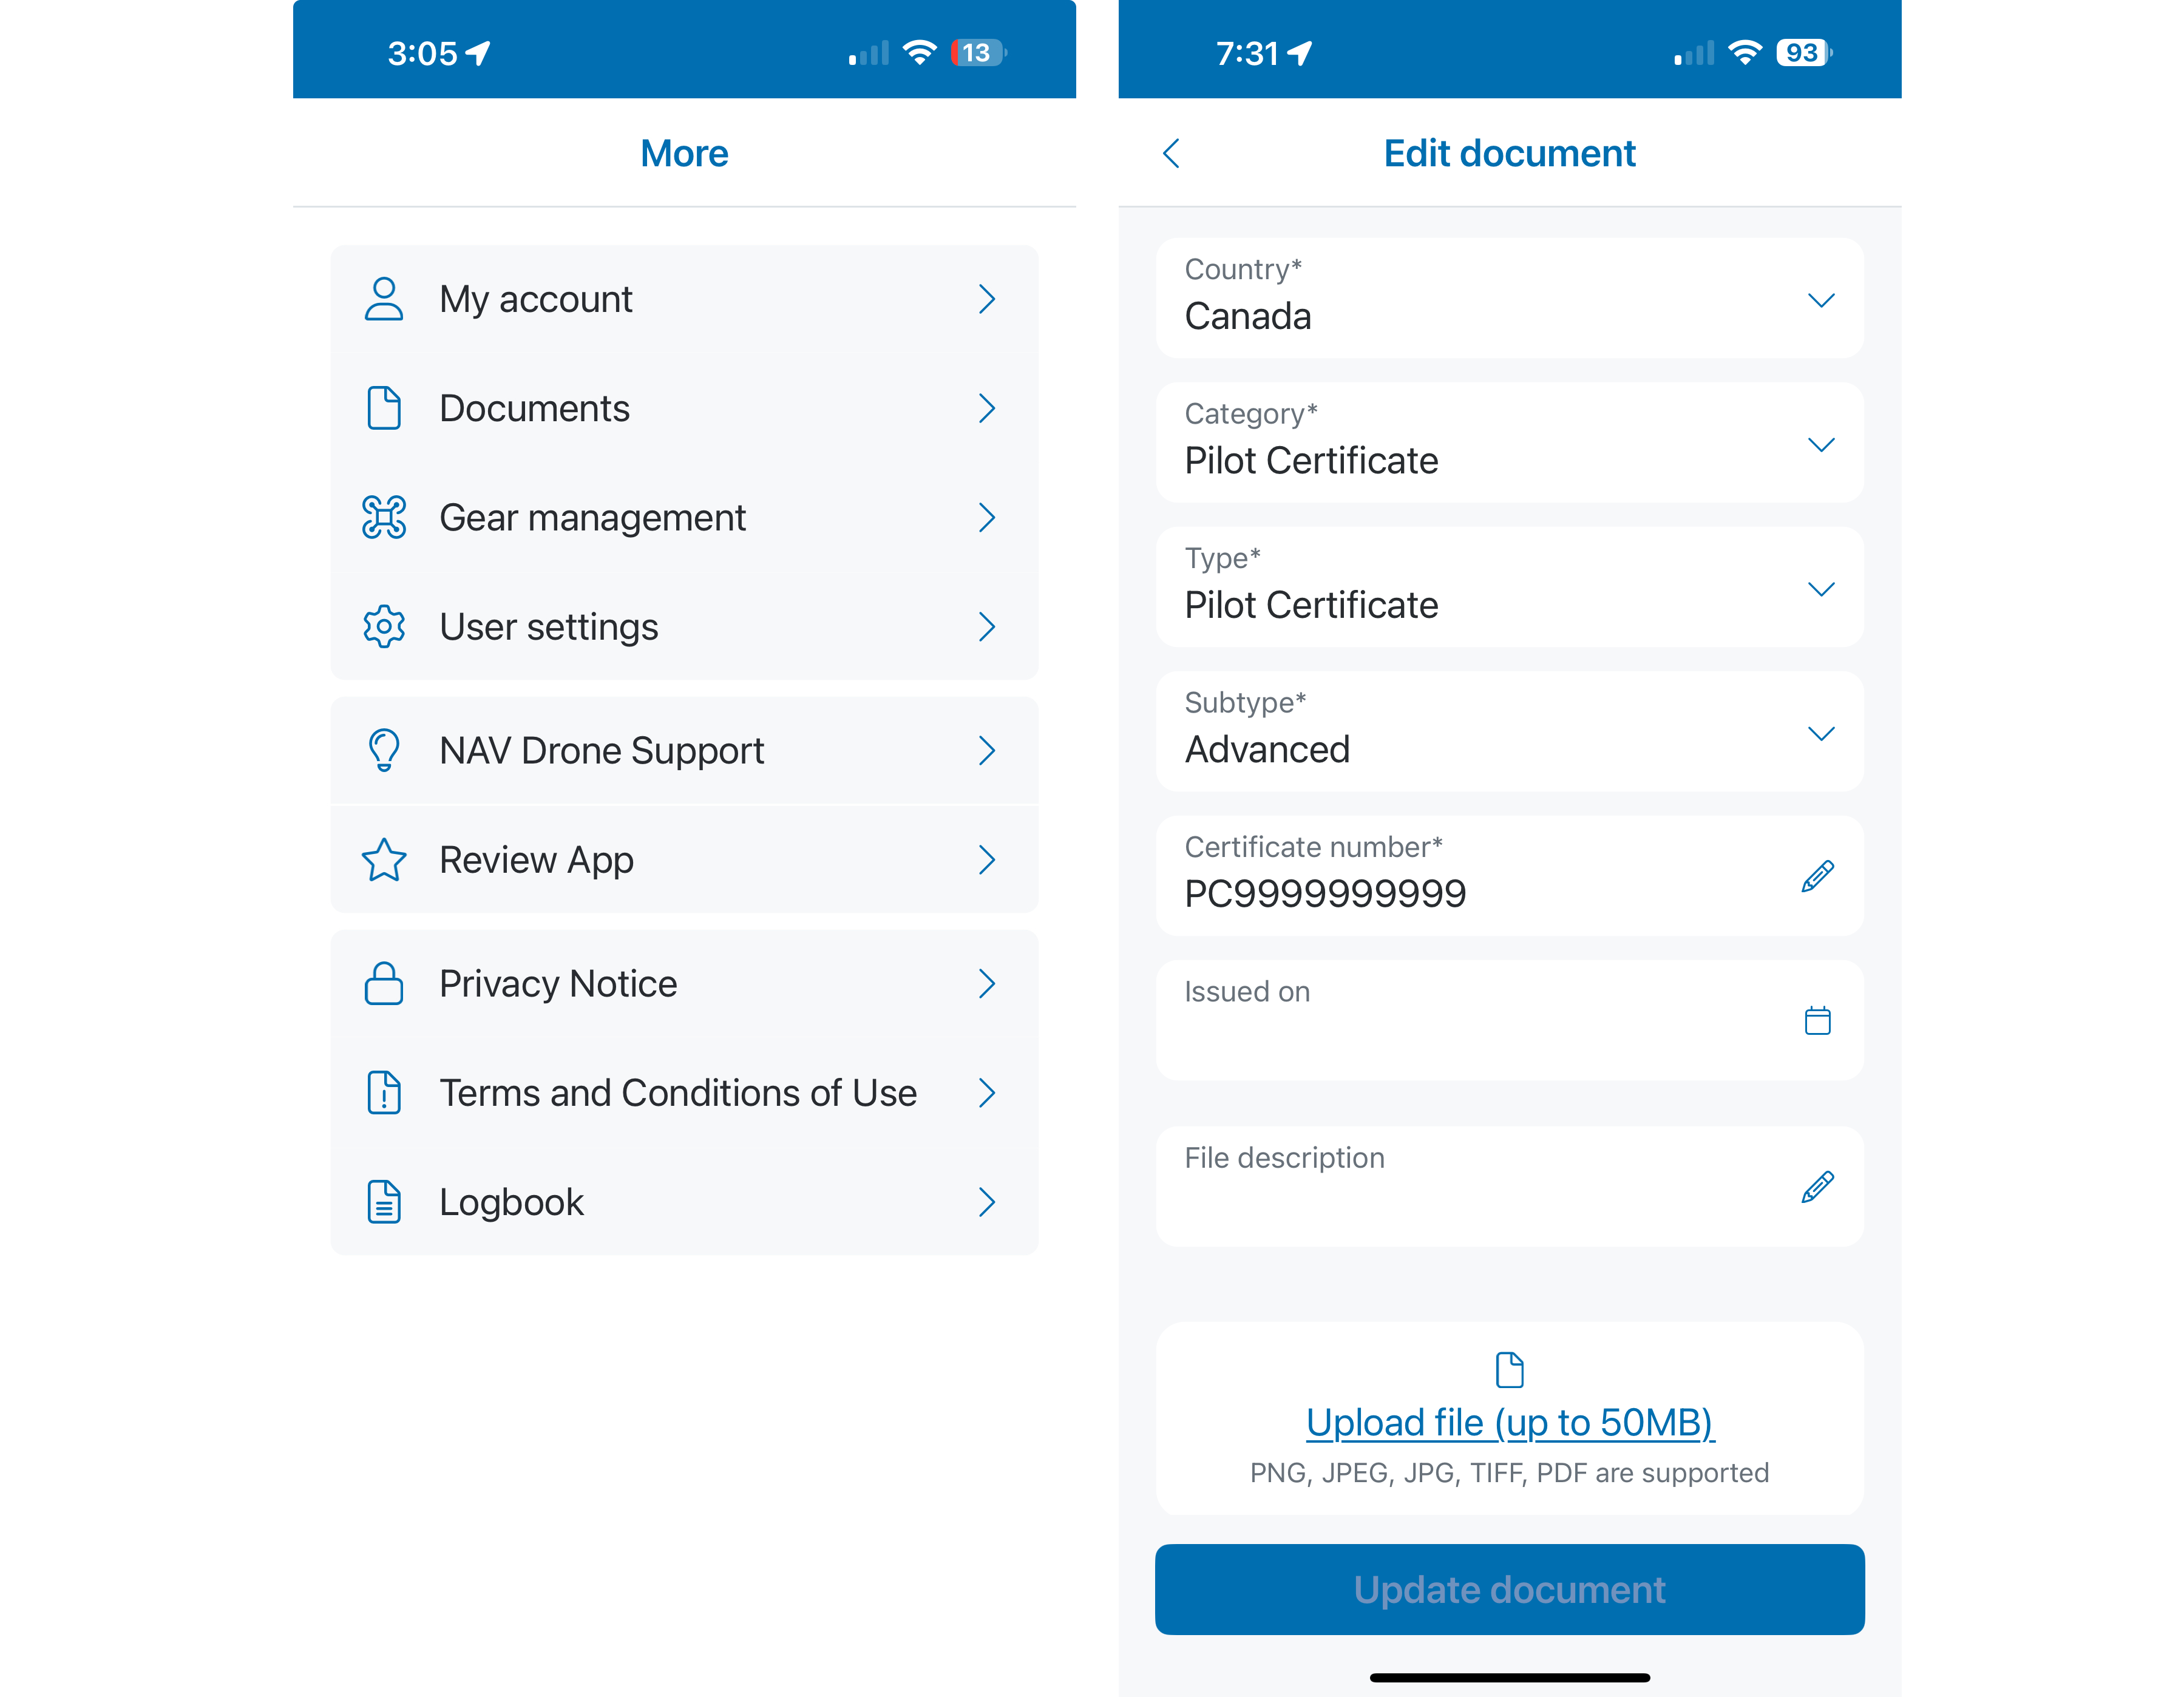
When adding/modifying a Pilot Certificate, ensure you select the correct sub type (Basic, Advanced, or Level 1 Complex). Ensure you also enter your certificate (Reference) number with the prefix “PC” followed by the 10-digit number.

Deleting a document

  1. Tap the More button at the bottom right of the App.
  2. Tap the 3 dots on the name of the document you wish to delete.
  3. A confirmation message will appear asking to confirm the action by tapping Yes, delete document or No, keep this document.

Deleting a Pilot Certificate:

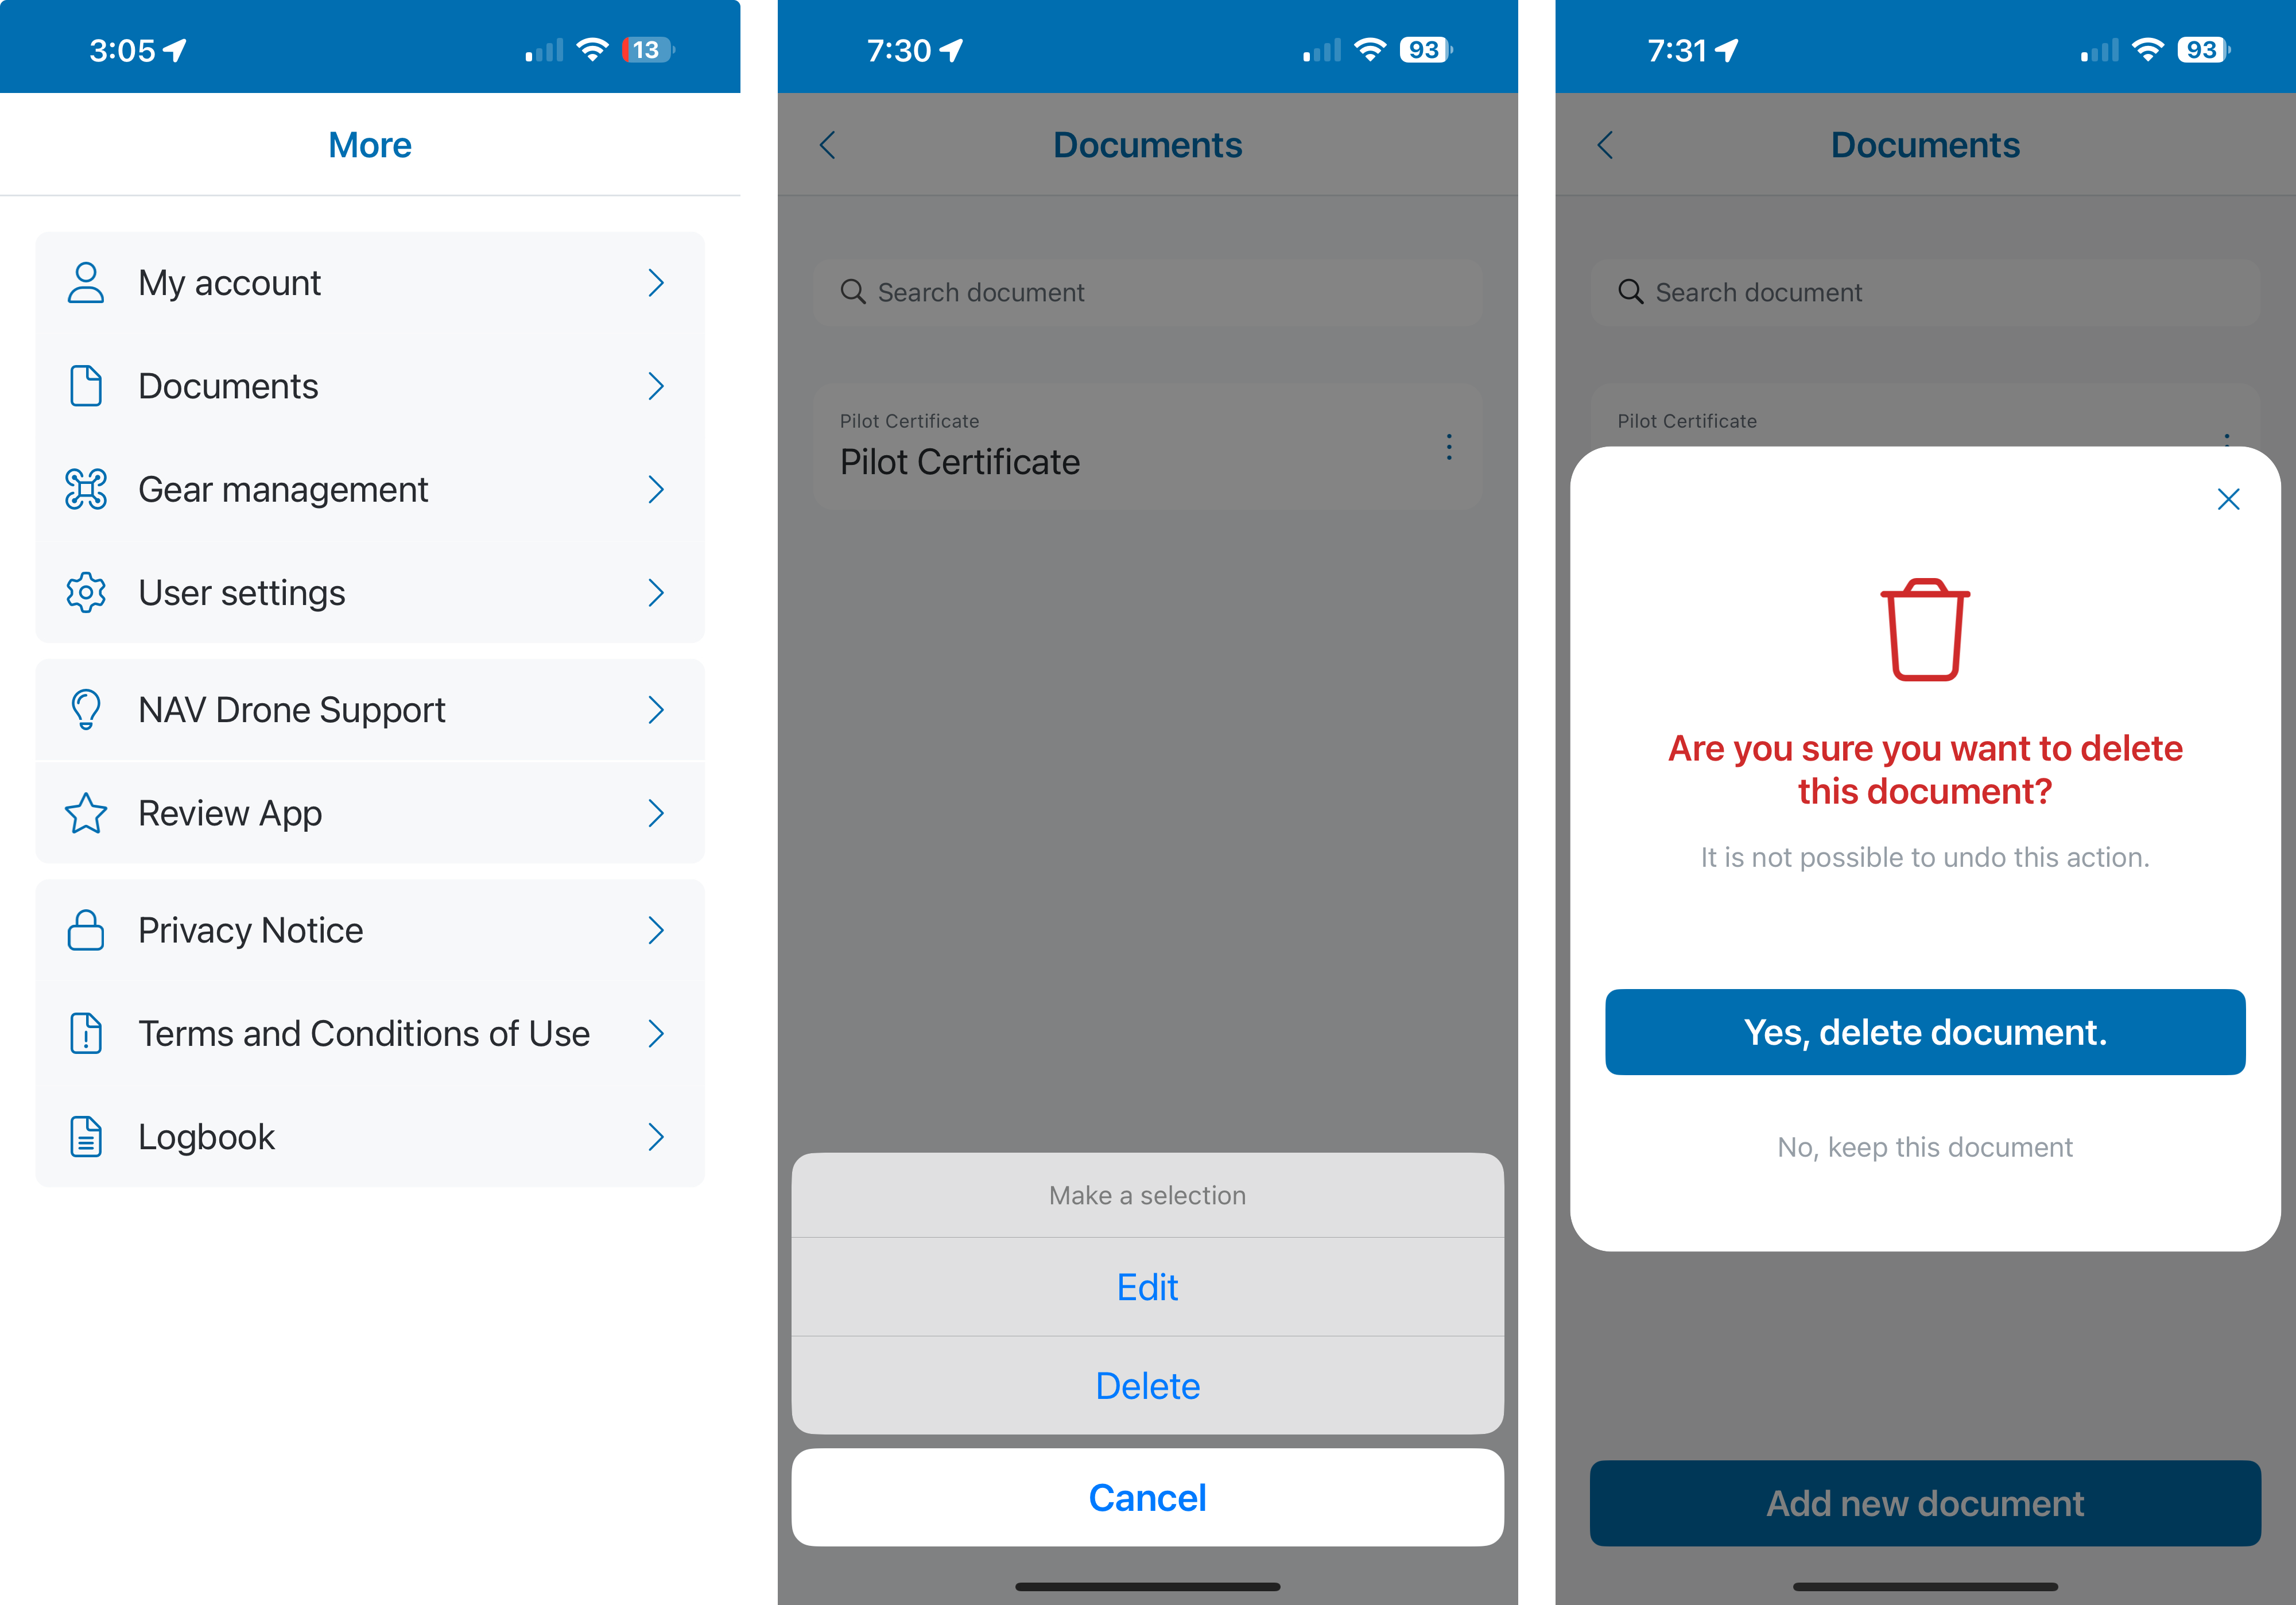
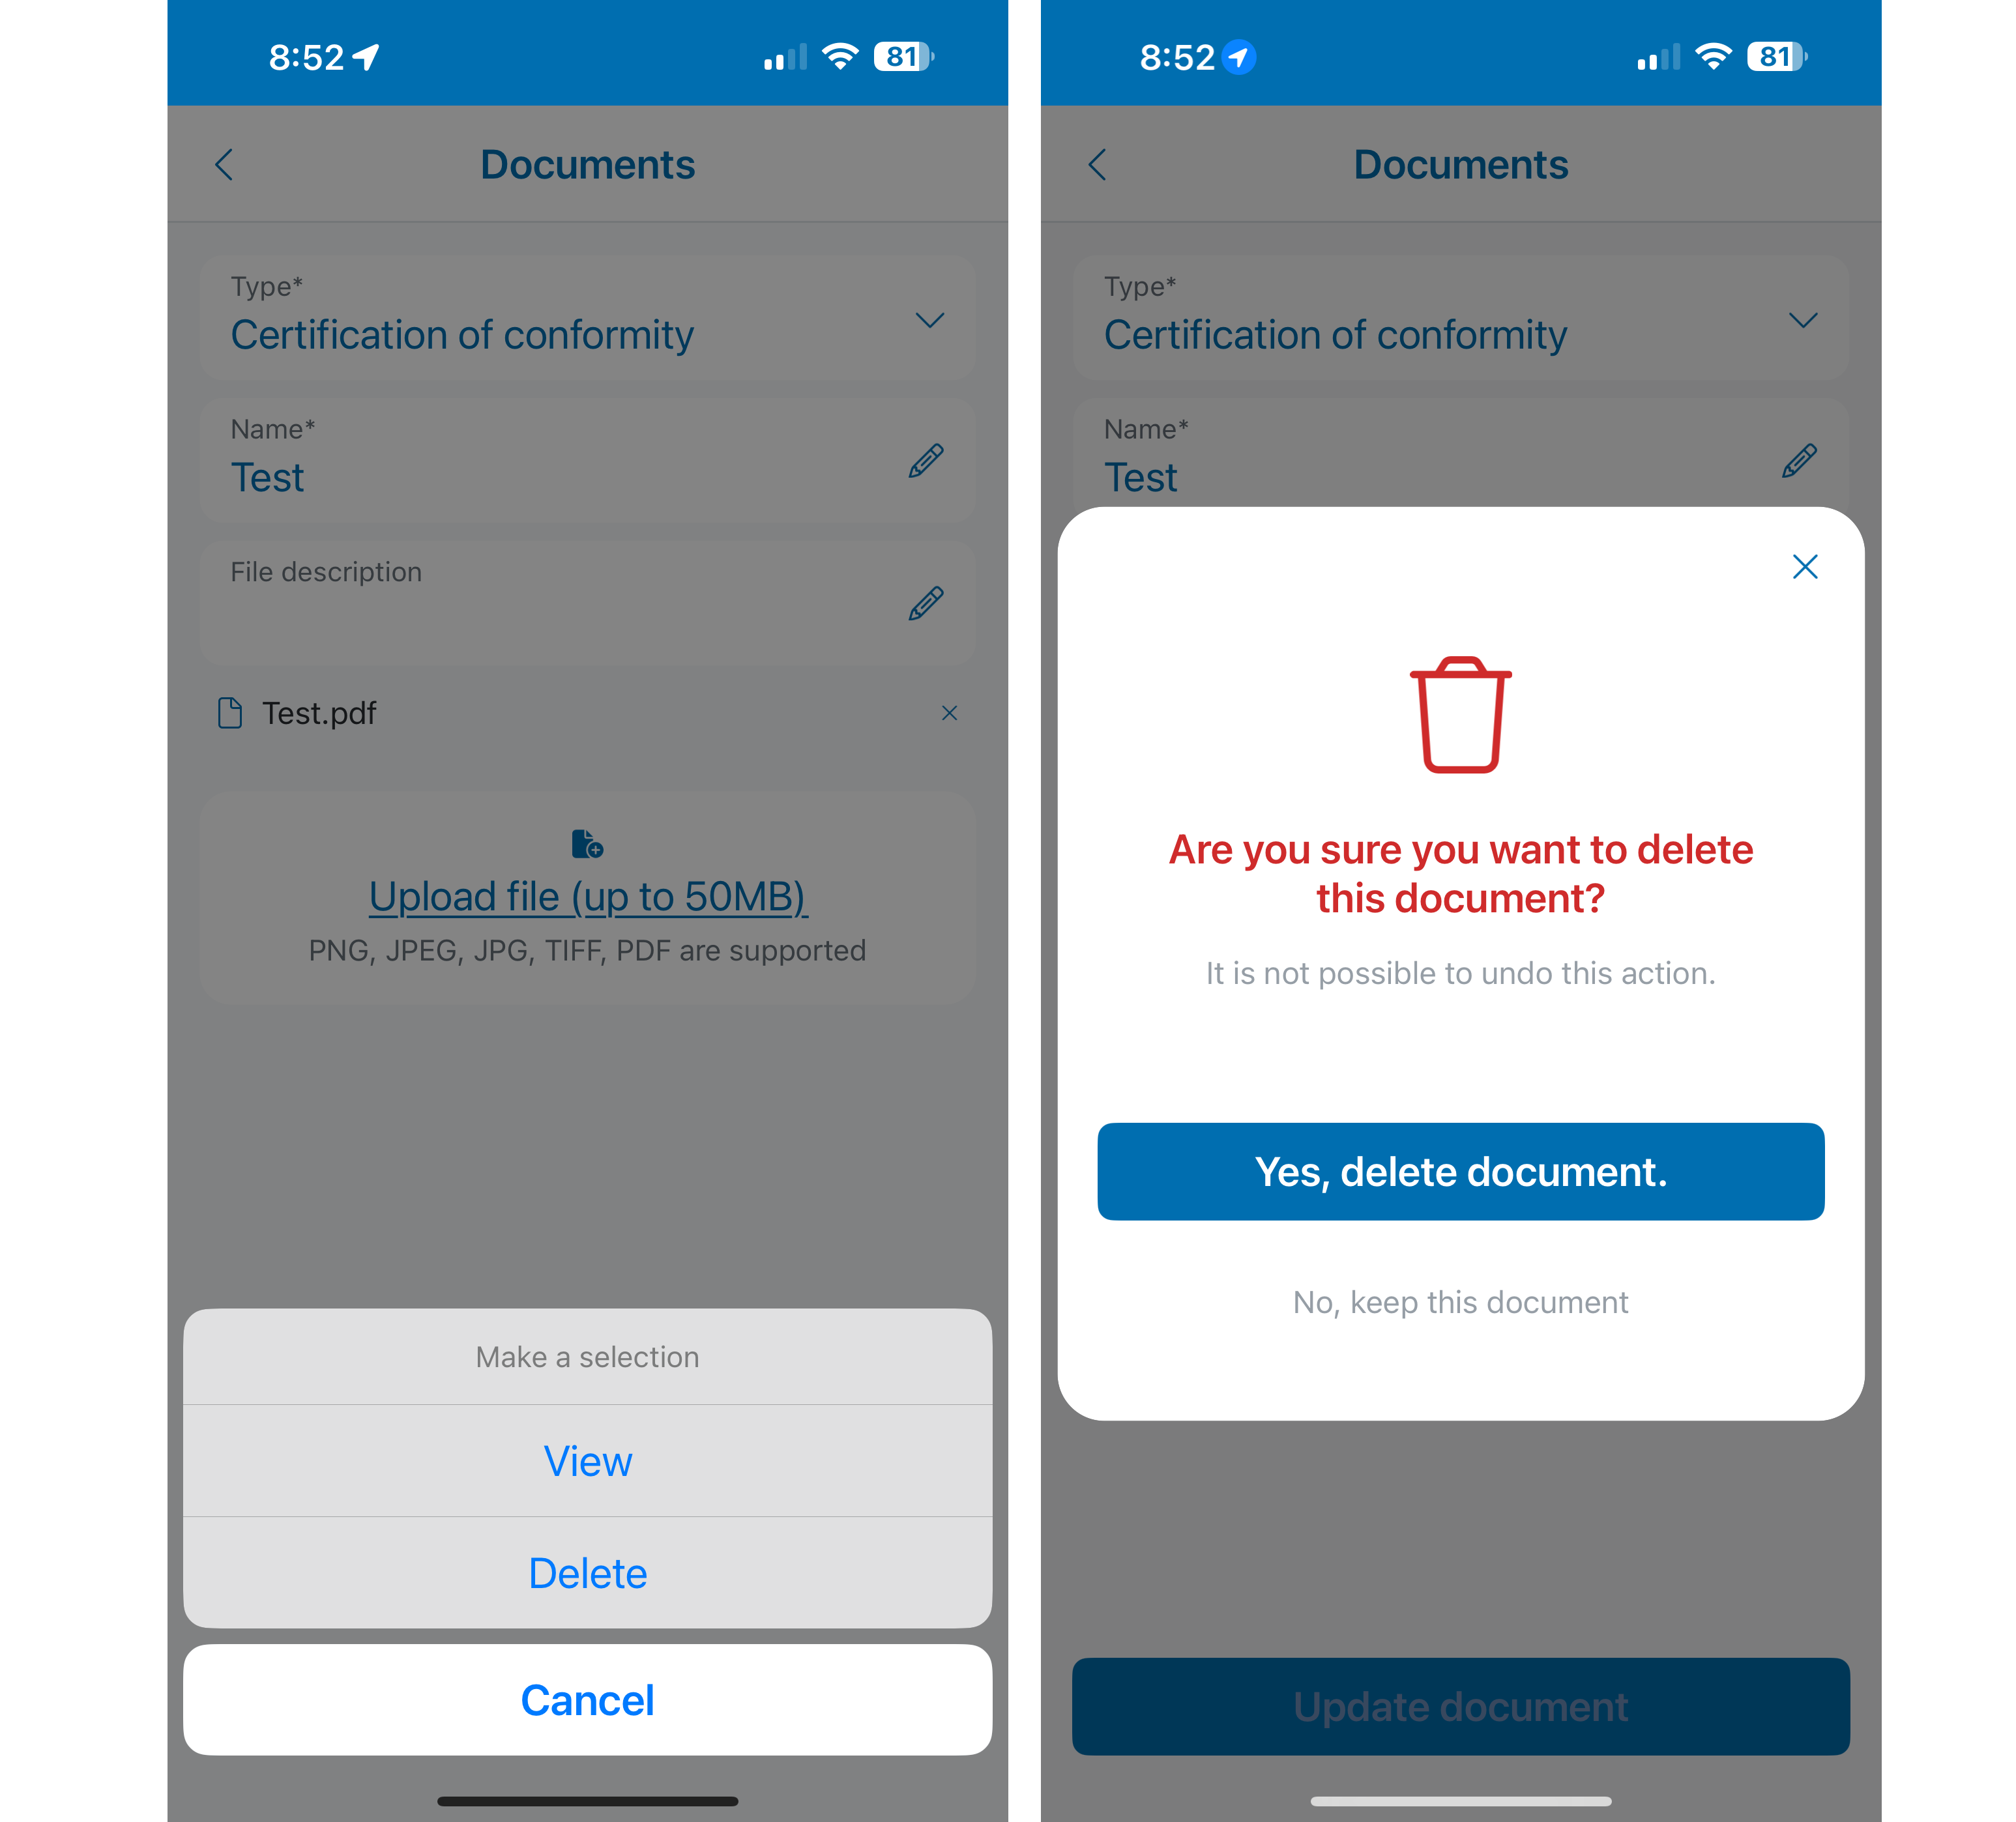
If you delete a pilot certificate that has been used in an operation, it may inadvertently change the validation result of your operation.